Not every promotion or message is meant for every customer. You may want to offer exclusive deals to your top buyers, reach out to repeat customers, or engage a specific group of shoppers. With Bumpa’s Customer Groups feature, you can organise your customers and send targeted messages to the right audience.
In this guide, we'll show you how to use the default customer groups and create your own custom groups.
View your customer groups
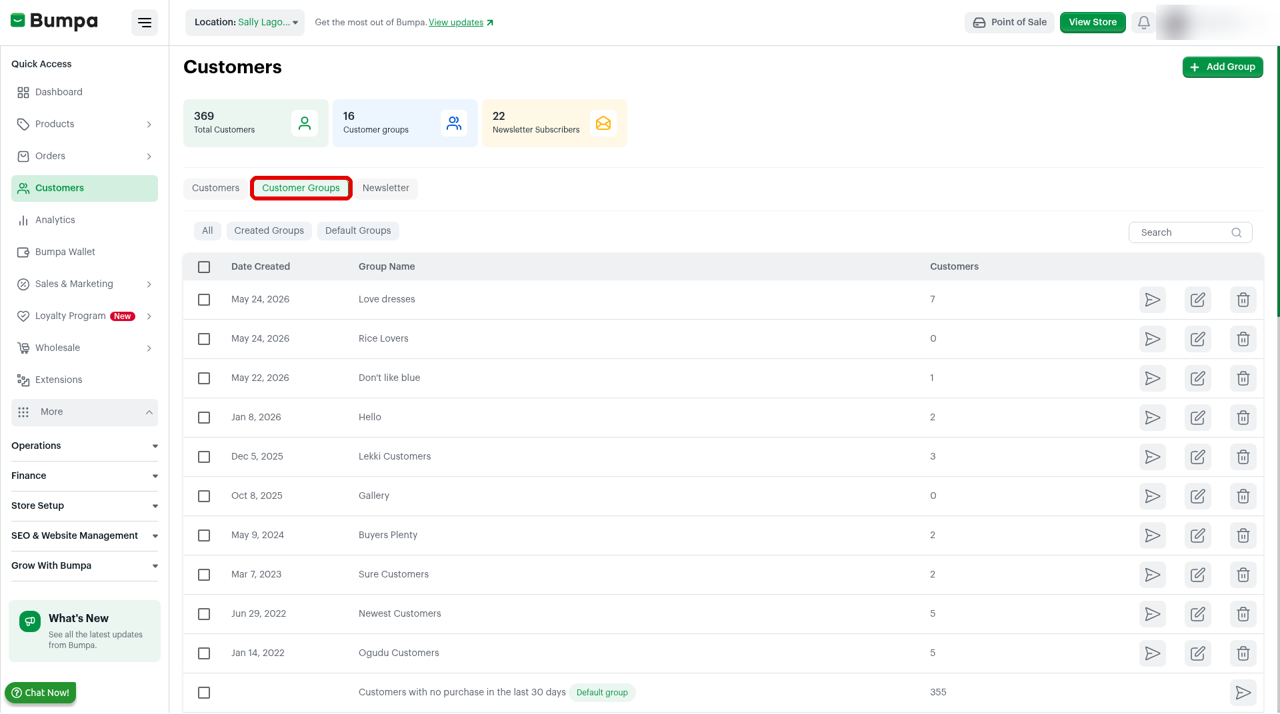
The Customer Groups tab lists every group in your store and the number of customers in each one. You can show All, Created Groups, or Default Groups.
To view your customer groups, follow these steps:
Log in to your Bumpa dashboard via app.getbumpa.com
Click Customers.
Click the Customer Groups tab.
Click Created Groups to see the groups you made, or Default Groups to see the groups Bumpa makes for you.
Use default groups
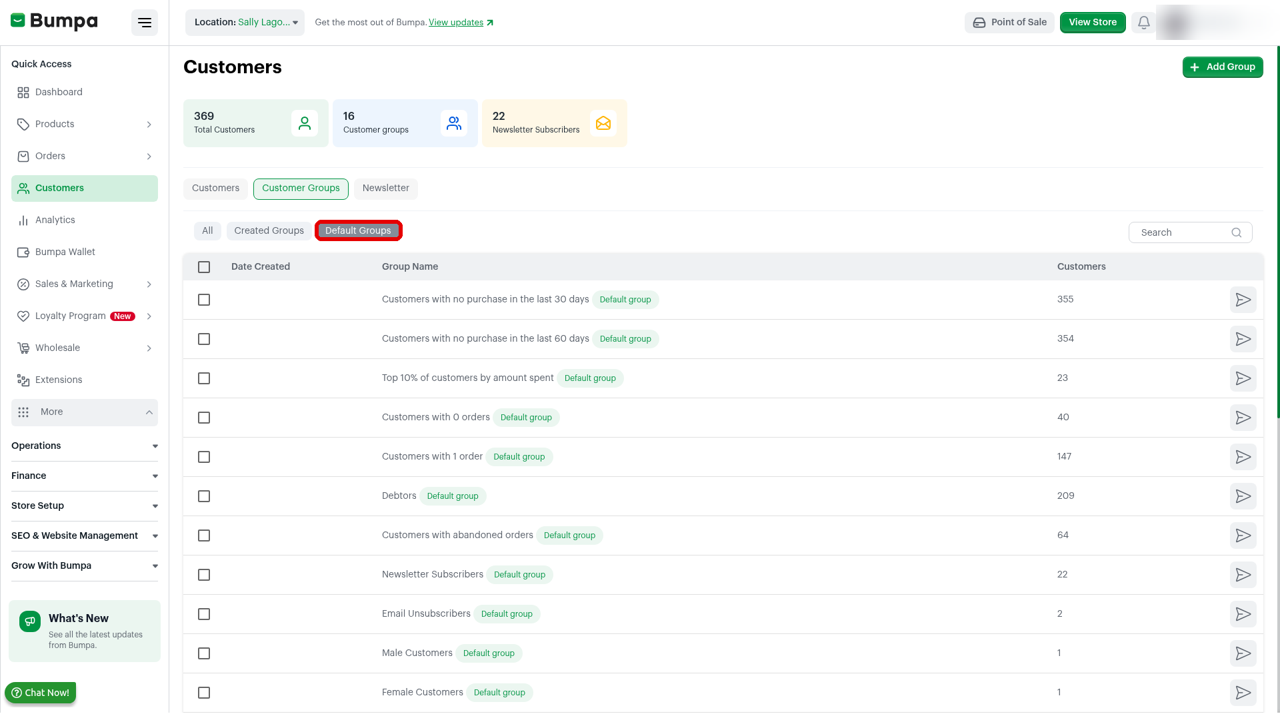
Bumpa fills default groups for you, based on what customers buy and the details they give. Each one has a Default group label. Default groups include:
Customers with no purchase in the last 30 days
Top 10% of customers by amount spent
Customers with abandoned orders
Male Customers, Female Customers, Other Customers and Unspecified Gender Customers
Customers with no birthday
Network groups, such as MTN Customers, Airtel Customers, Glo Customers and 9Mobile Customers
To open a default group, follow these steps:
Click the Customer Groups tab.
Click Default Groups.
Click a group, such as Customers with no birthday, to see the customers in it.
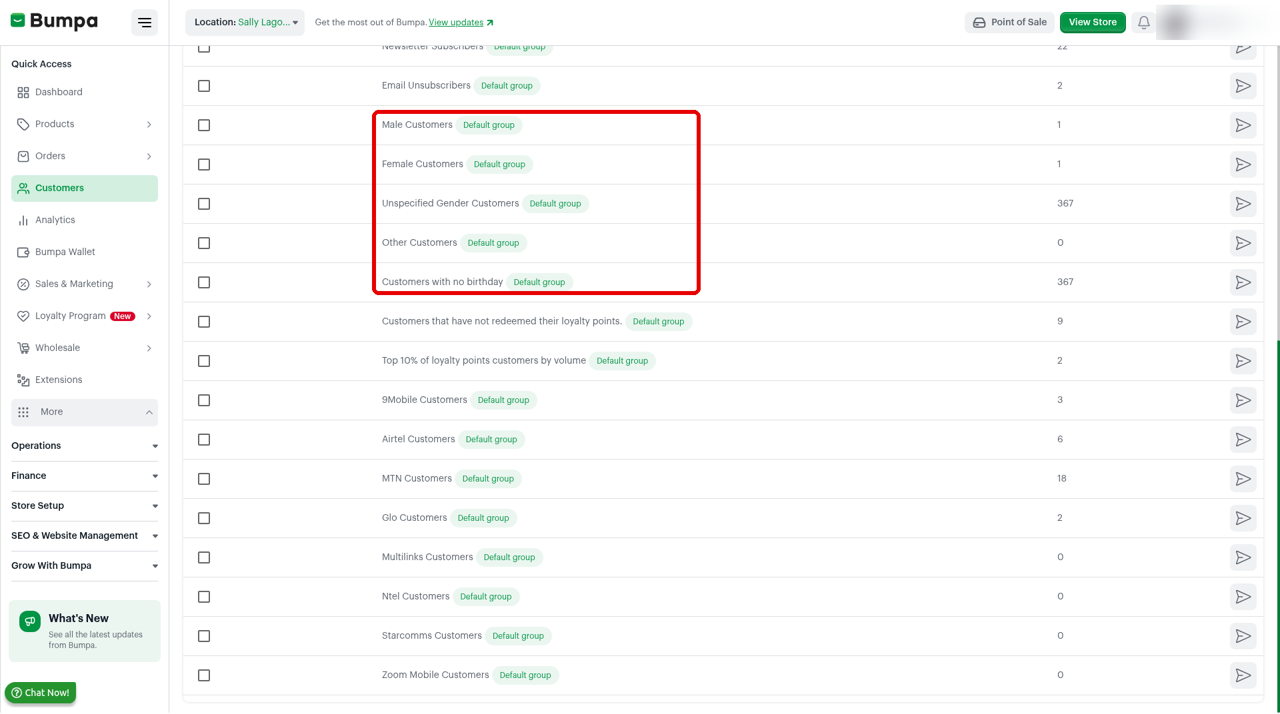
Note: Customers with no birthday and Unspecified Gender Customers show customers who have not added these details. You can ask them to log in to your website and add them.Create a group from selected customers
You can pick customers from your customer list and put them in a new group. You can also click Add Group on the Customer Groups tab to start a new group.
To create a customer group, follow these steps:
Click the Customers tab.
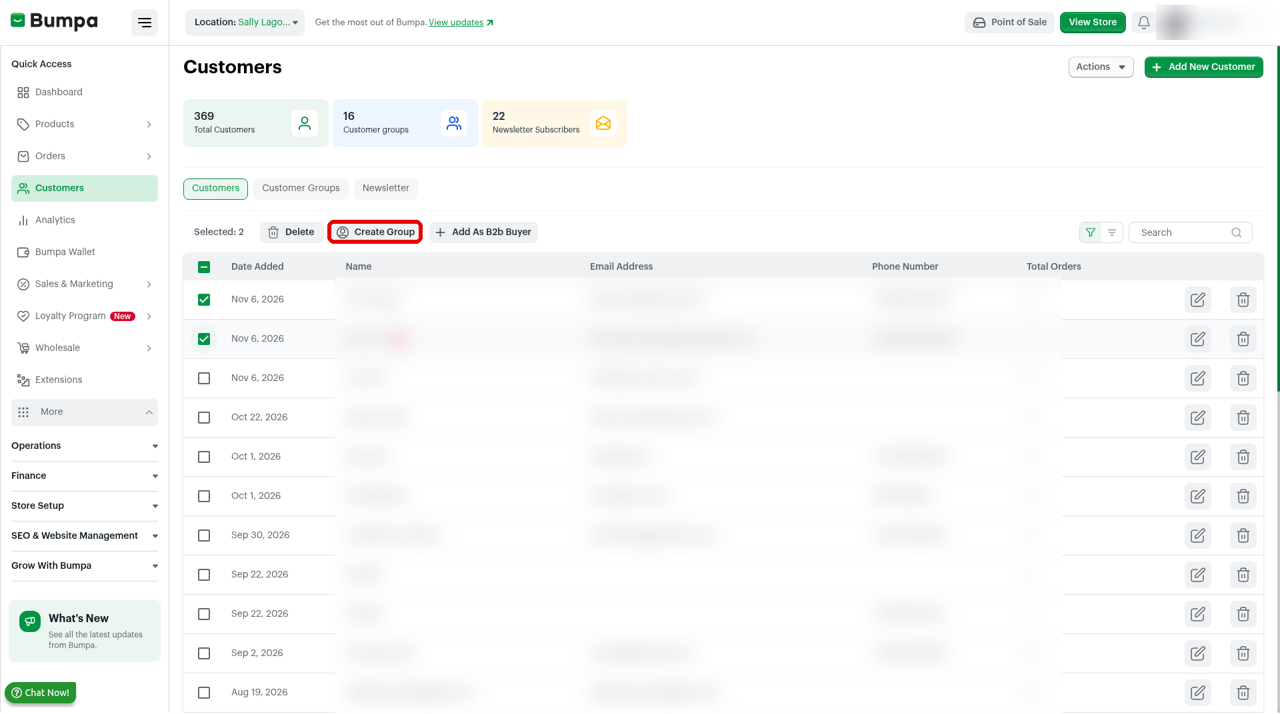
Tick the box next to each customer you want in the group.
Click Create Group in the bar above the list.
Enter a name under Group name.
Check the customers under Select Customers.
Click Create Group.
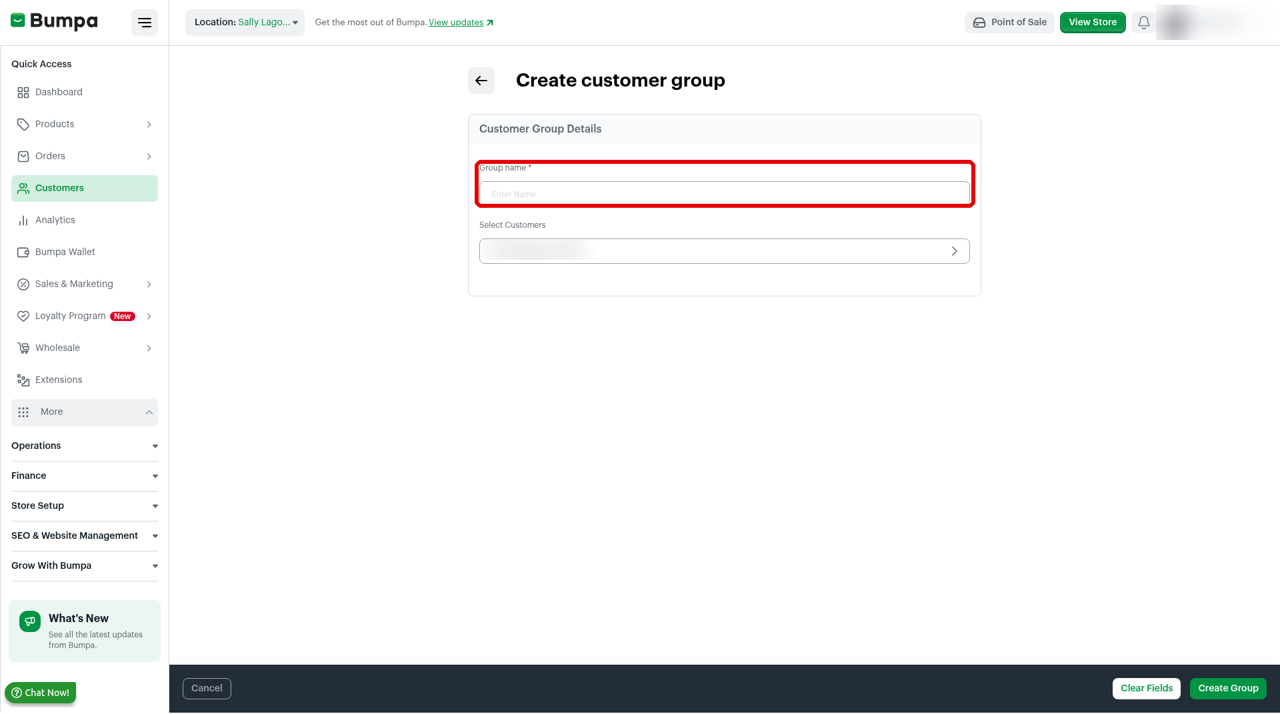
By following these steps, you can create customized customer groups on the Bumpa web App, making it easier to reach out to them in bulk.
Note:Customer groups are available on the Pro, Growth, Scale, and Premium plans.Was this article helpful?
That’s Great!
Thank you for your feedback
Sorry! We couldn't be helpful
Thank you for your feedback
Feedback sent
We appreciate your effort and will try to fix the article