As a business owner, you need an easy way to tell customers about new products, sales, and updates. Email campaigns on Bumpa let you design and send branded emails to your customers from your dashboard. In this article, learn how to create, customise, send, and schedule an email campaign.
Example: Wanjiru sells handmade bags in Nairobi. She sends an email to her "Repeat buyers" group about her new December collection, with a Shop Now button that opens her website.
1. Open Campaigns
Campaigns is where you create and manage your email and SMS campaigns.
To open Campaigns, follow these steps:
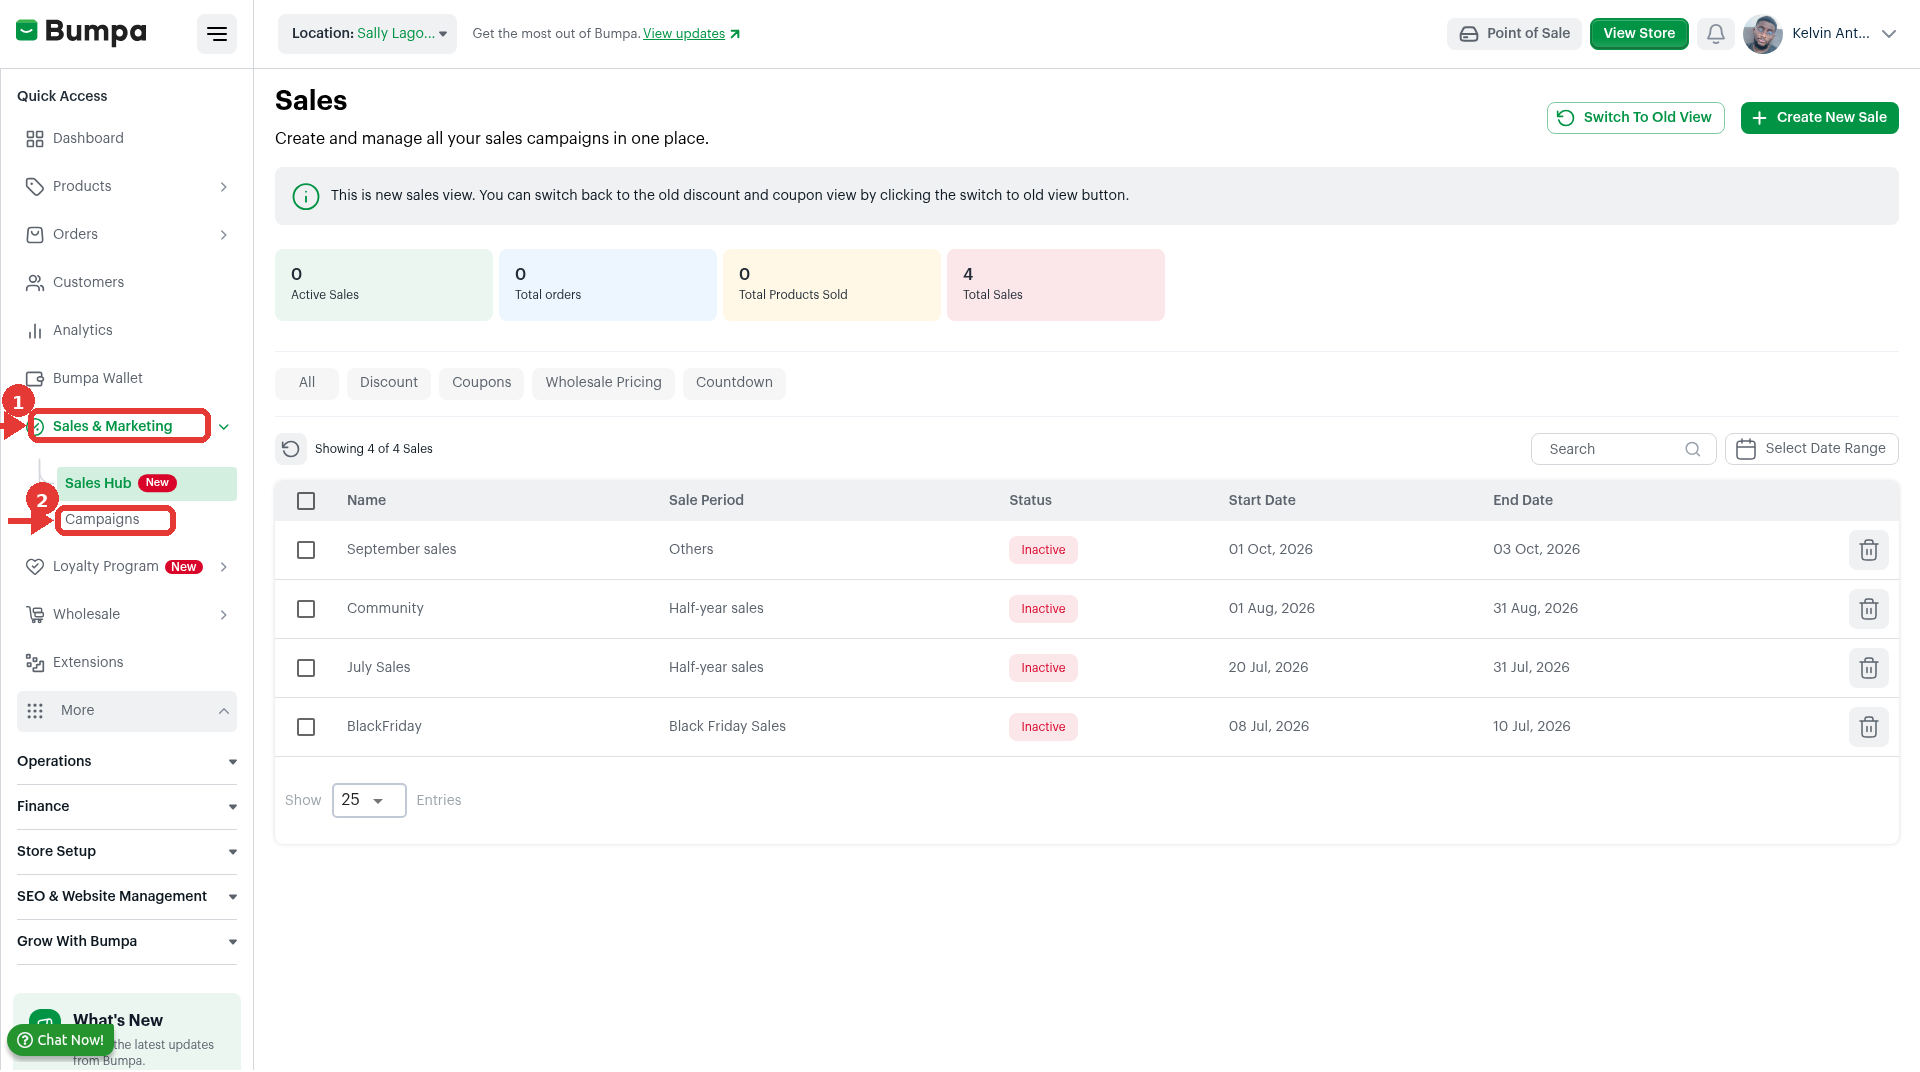
Log in to your Bumpa dashboard at app.getbumpa.com.
Click Sales & Marketing on the left sidebar.
Click Campaigns.
Click + New Campaign at the top right corner.
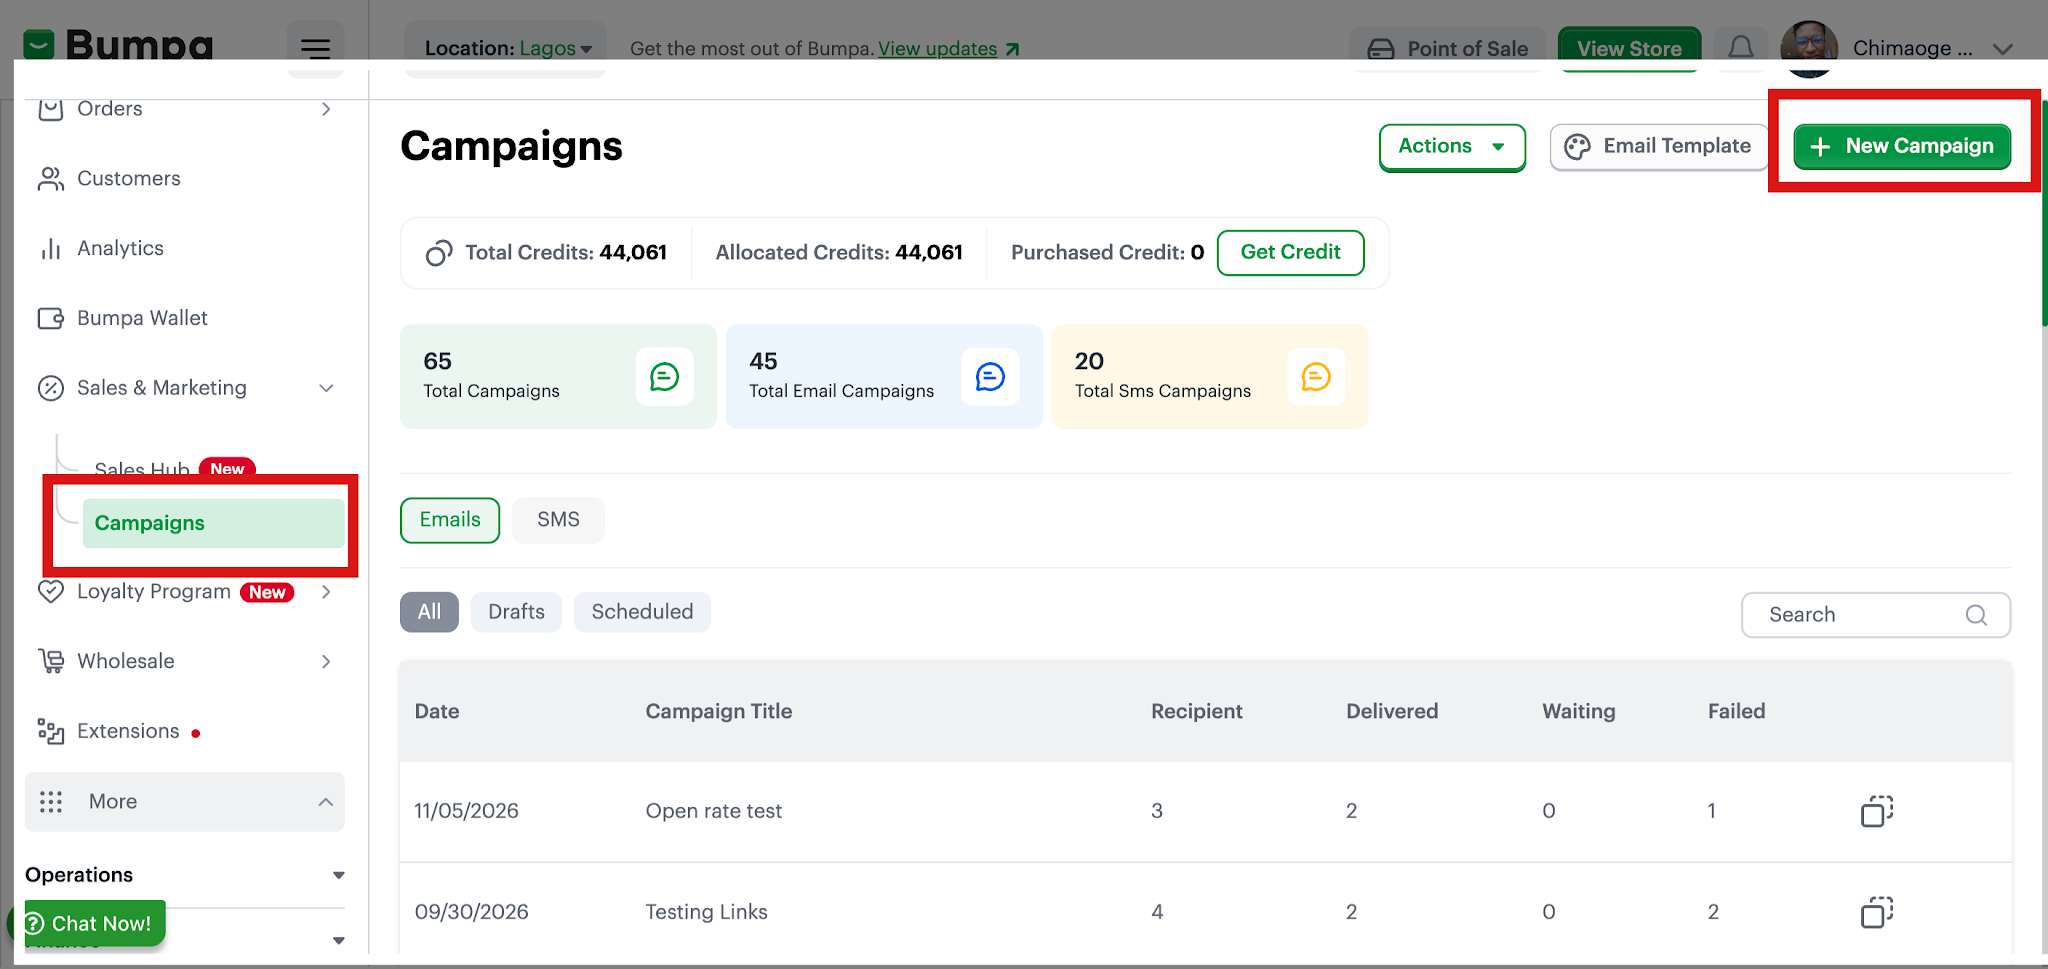
Email campaigns cost 4 credits per email. Each customer who gets the email uses 4 credits. Your credit balance shows at the top of the page.
Example: If you send a campaign to 50 customers, it uses 200 credits (50 customers x 4 credits).
2. Choose Your Template
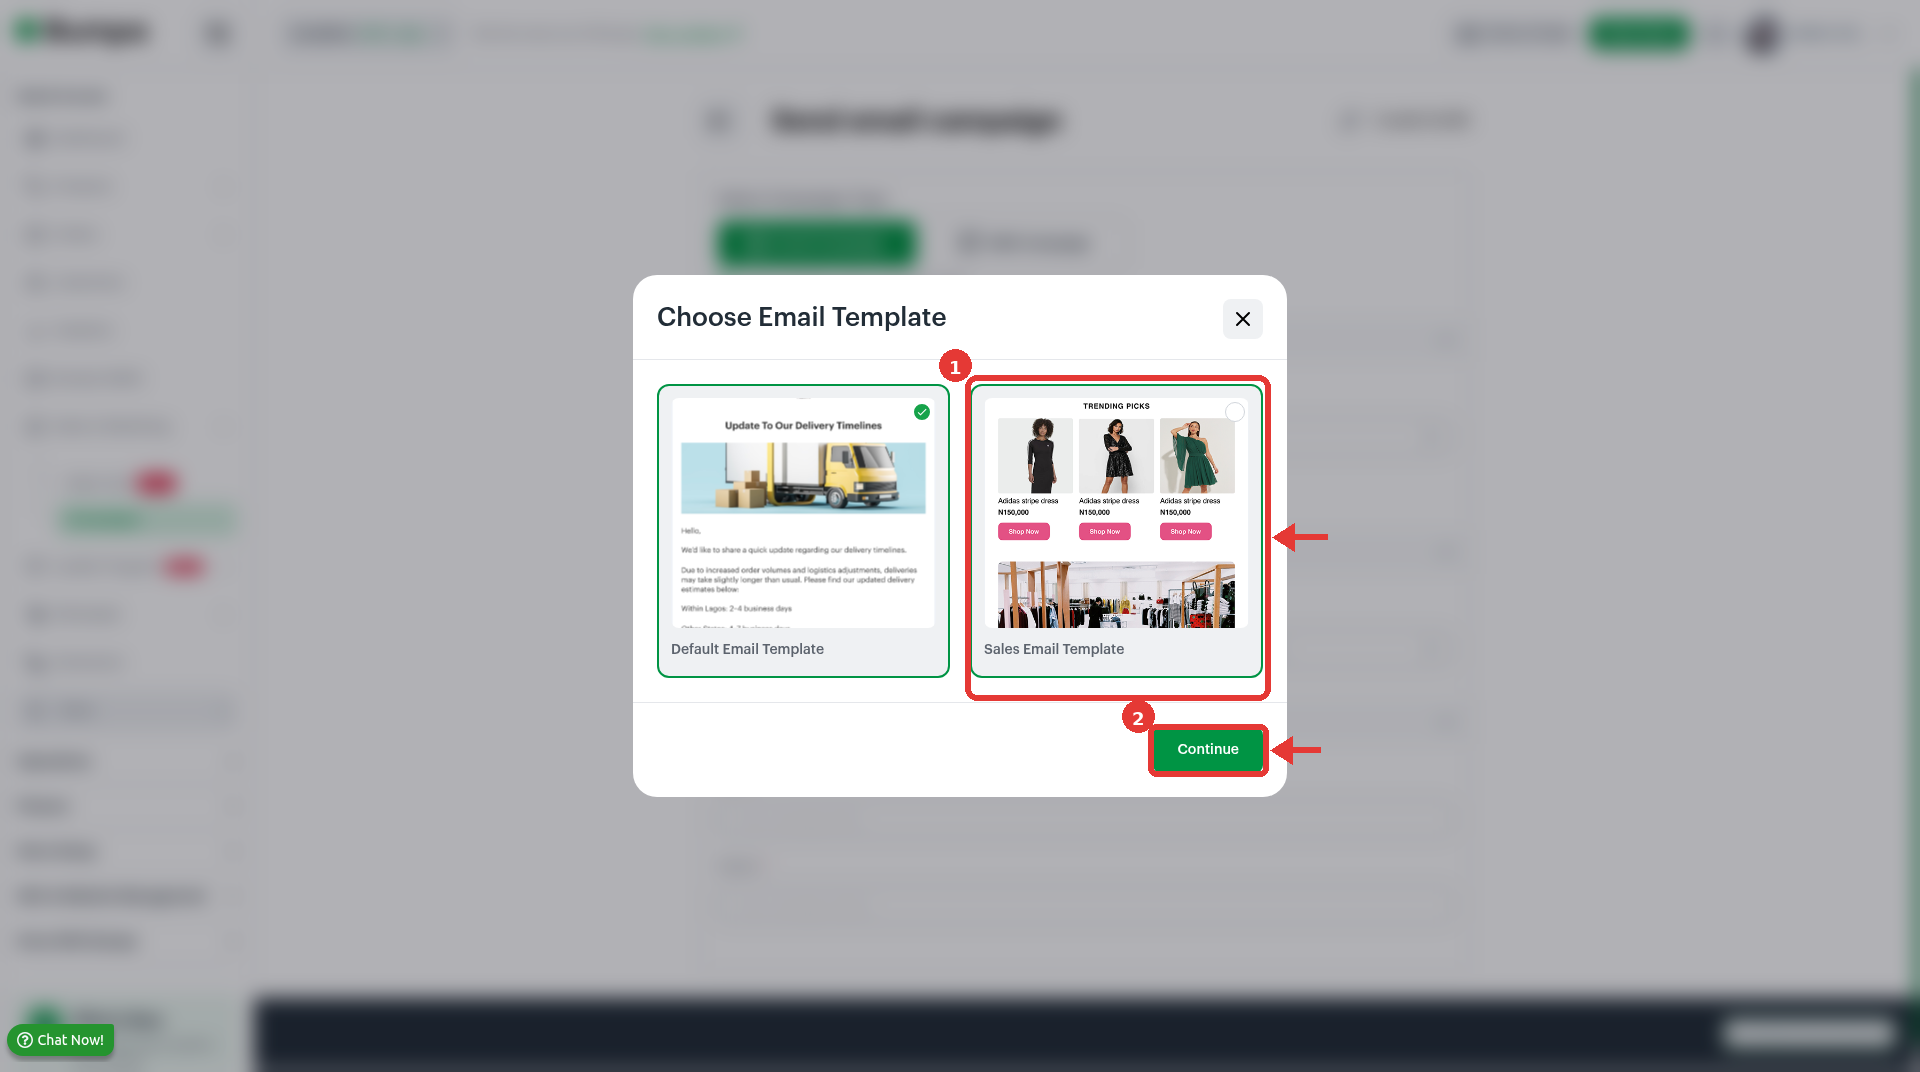
Bumpa has two email templates. The Default Email Template suits simple announcements. The Sales Email Template shows your products in the email, so it suits sales and new arrivals.
To choose a template, follow these steps:
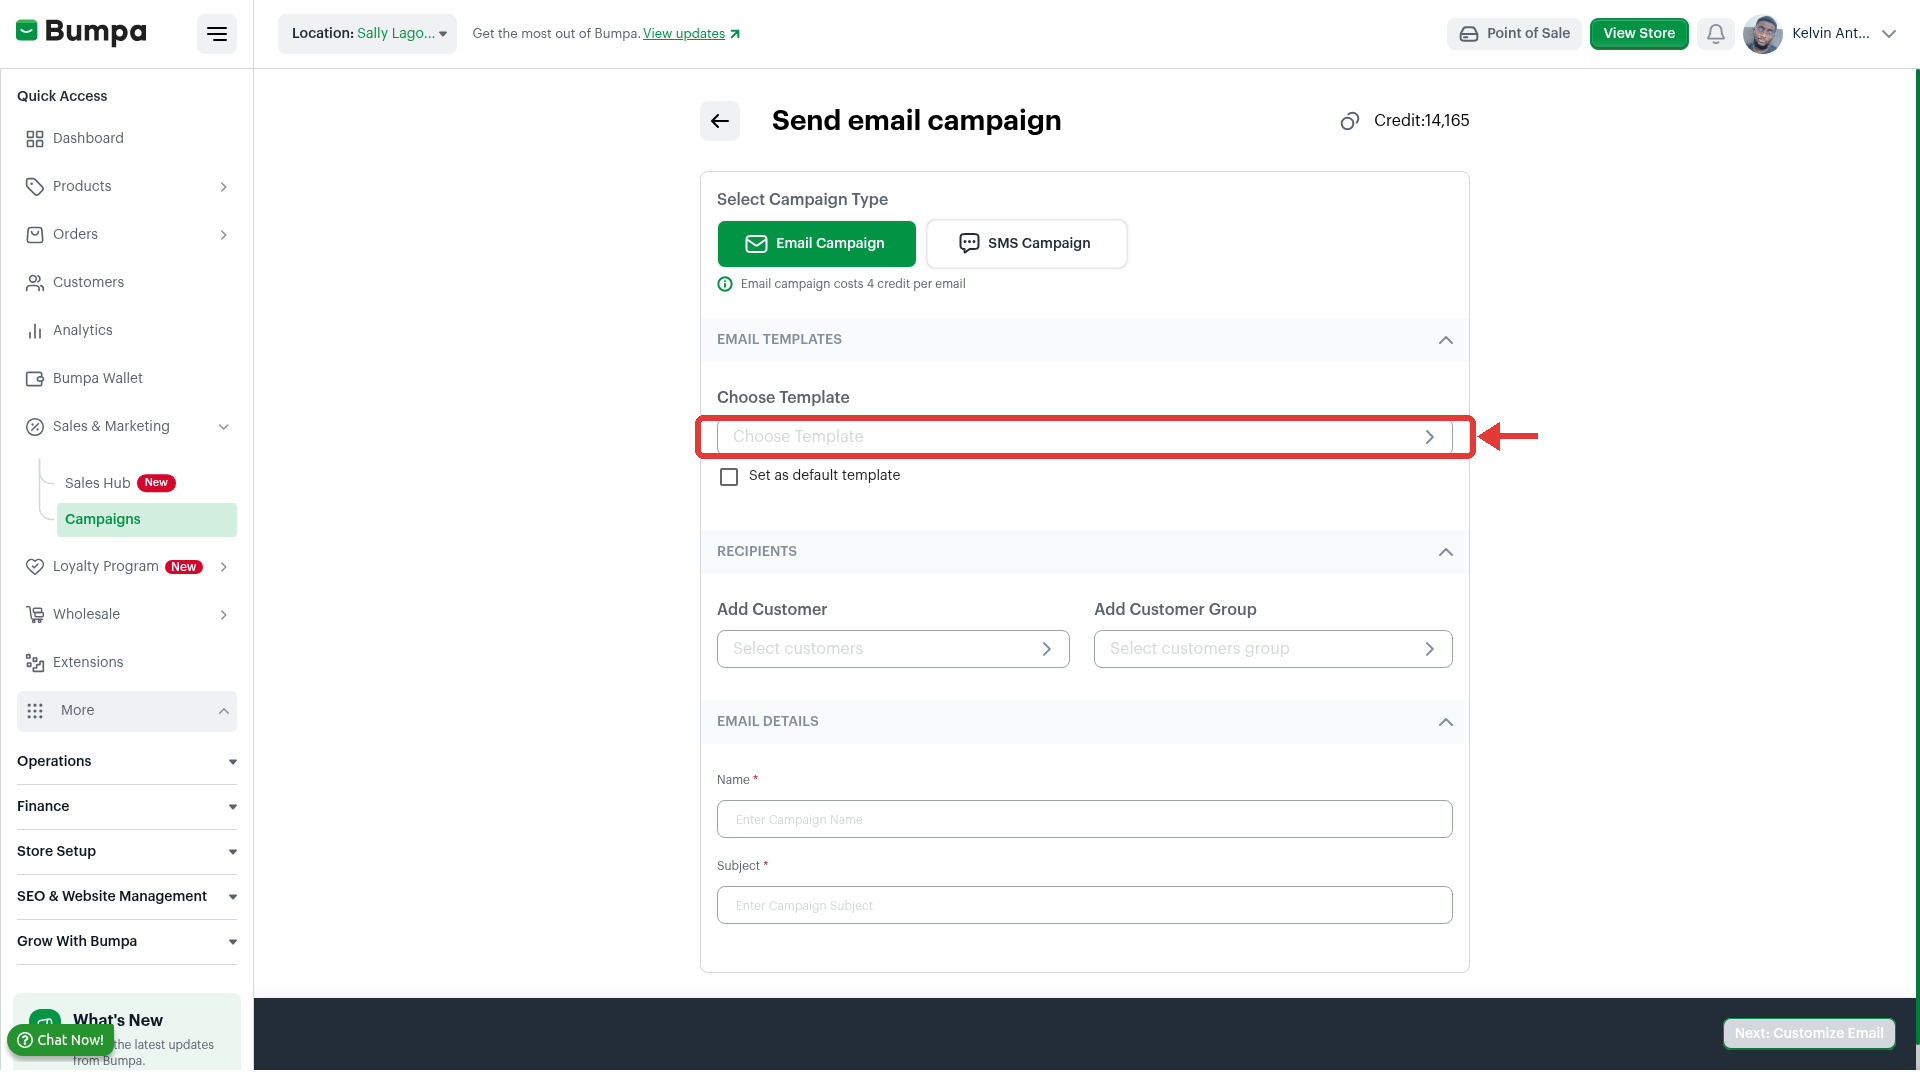
Check that Email Campaign is selected under Select Campaign Type.
Click Choose Template under Email Templates.
Select Default Email Template or Sales Email Template.
Click Continue.
Tip: Tick Set as default template to make the template you picked your default.
3. Add Your Recipients
You can send your campaign to single customers, to customer groups, or to both.
To add recipients, follow these steps:
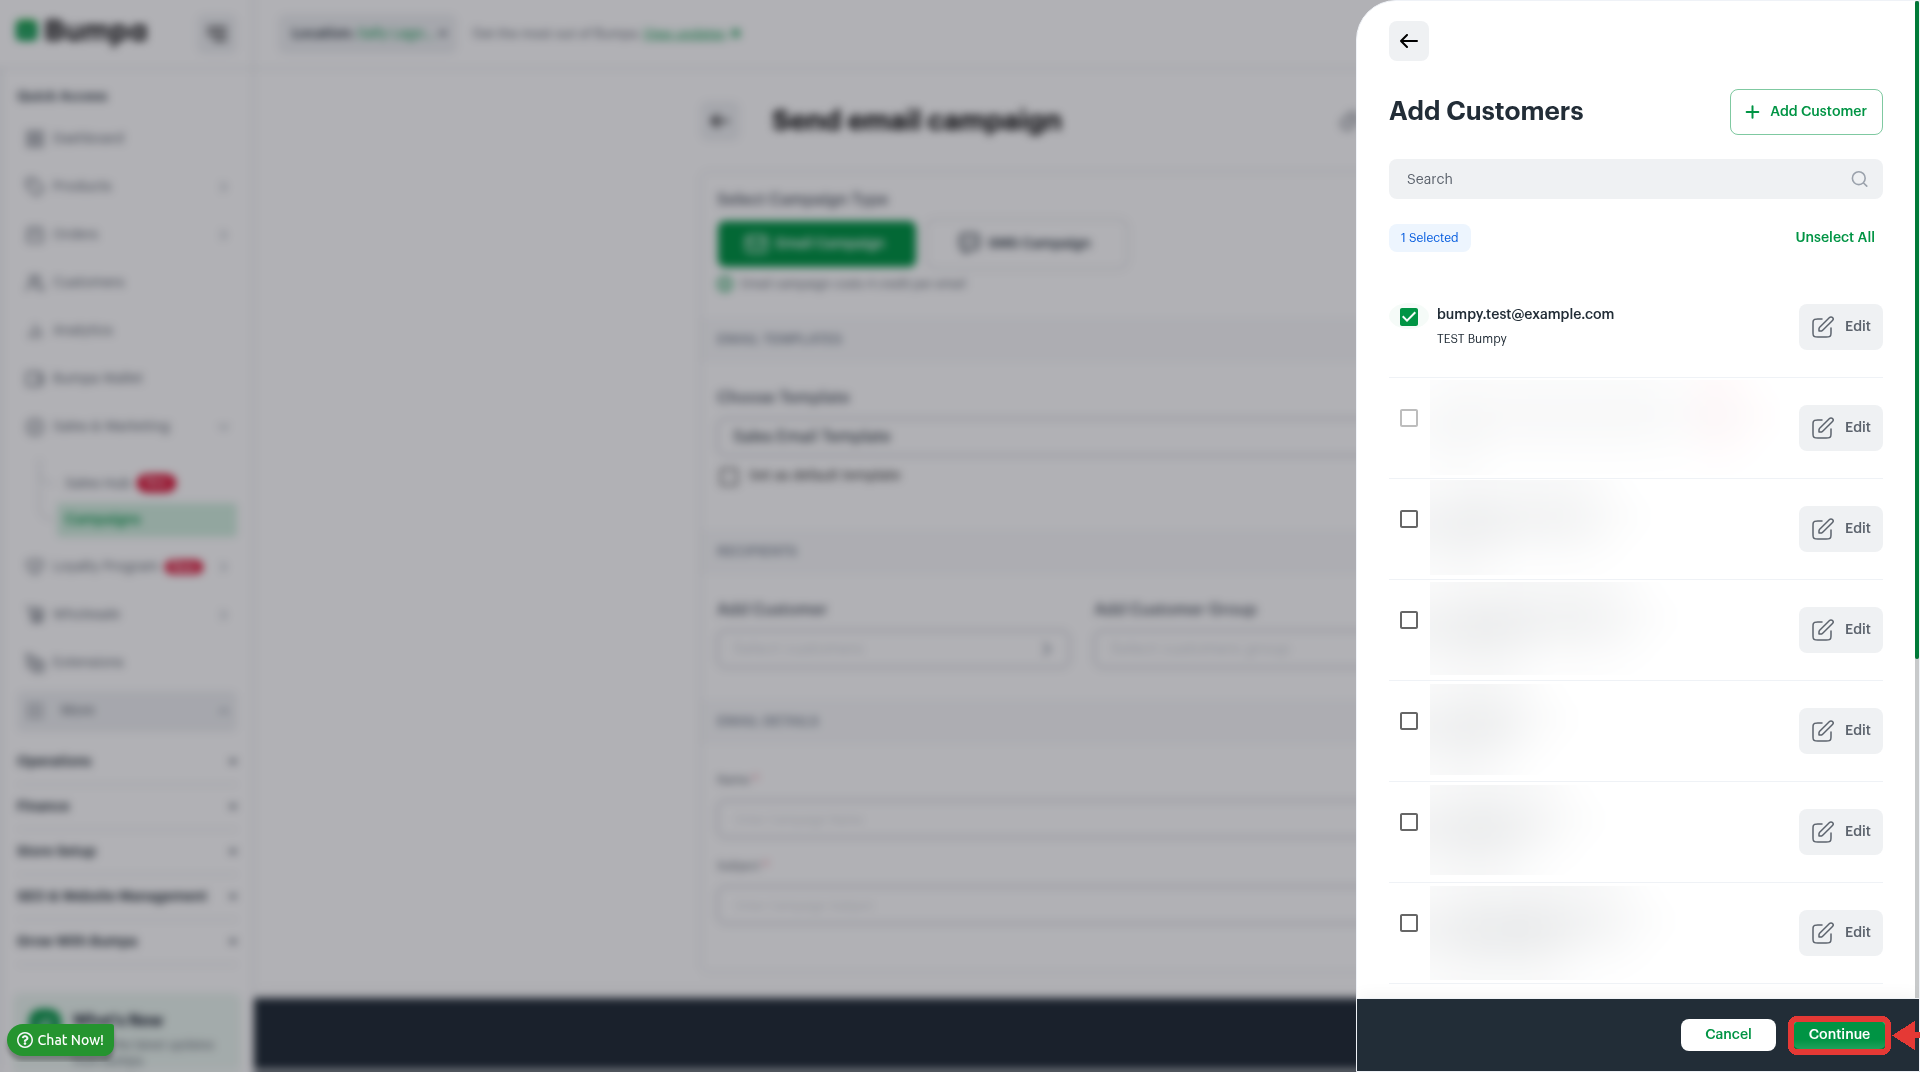
Click Add Customer, then tick the customers you want. To pick everyone on the list, click Select All.
Click Continue.
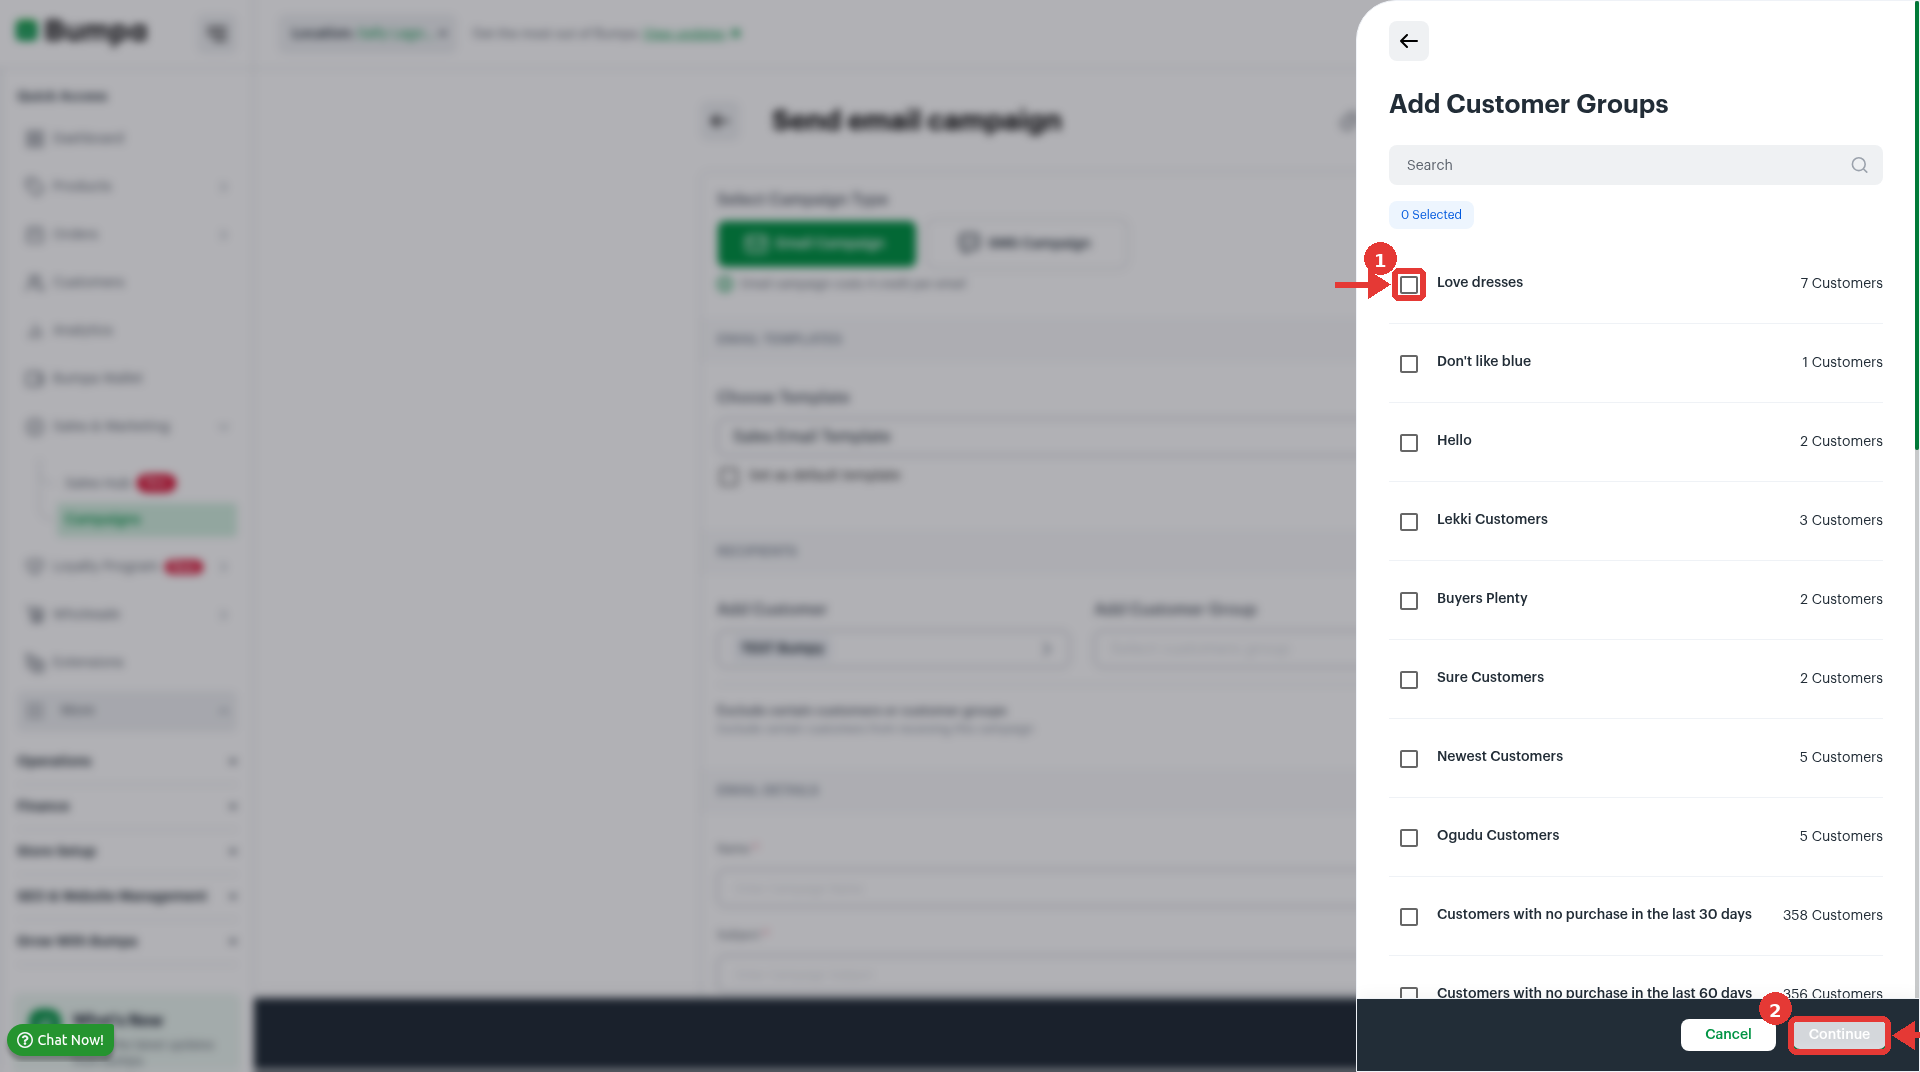
Click Add Customer Group, tick a group, then click Continue.
Turn on Exclude certain customers or customer groups if some people should not get this email, then select them.
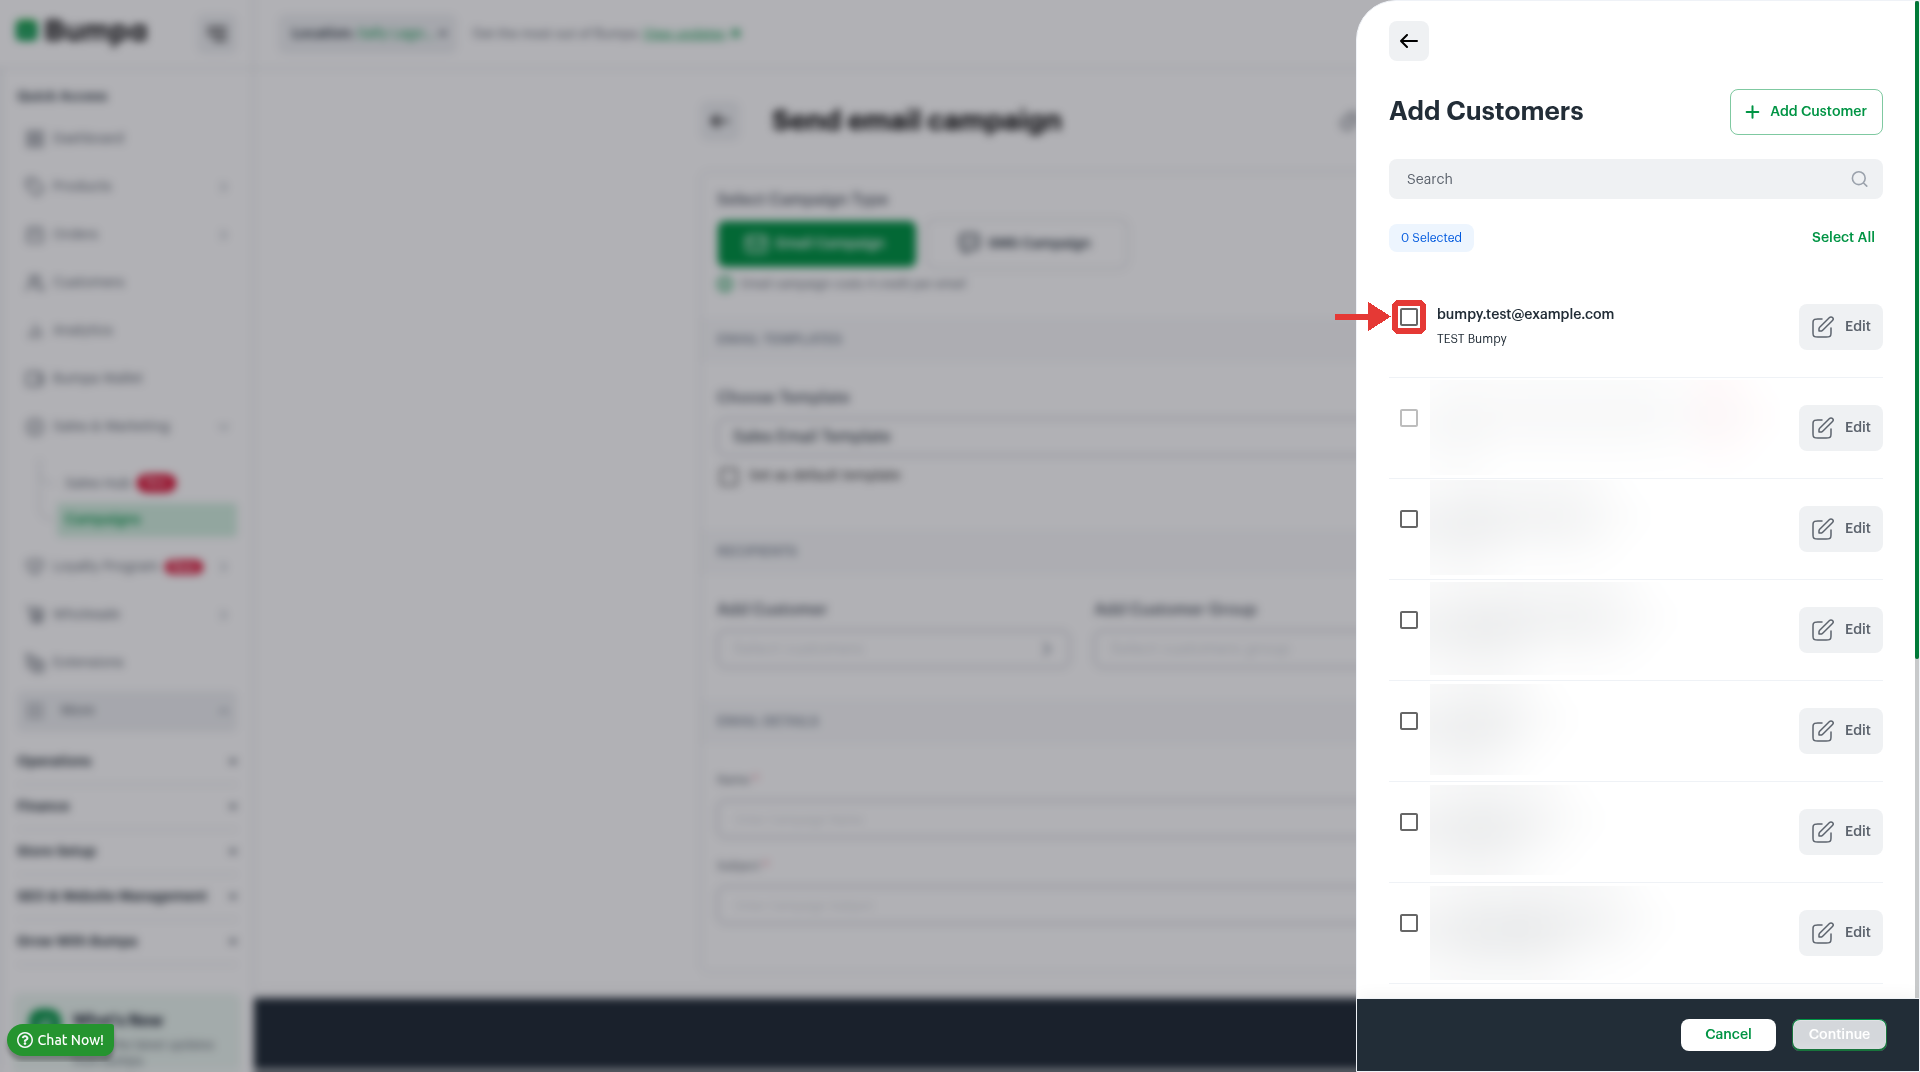
Note: You cannot select customers who unsubscribed from email campaigns. Their checkbox is greyed out.
4. Add Your Campaign Details
The campaign name is only for you, so you can find the campaign later. The subject is the first line your customers see in their inbox.
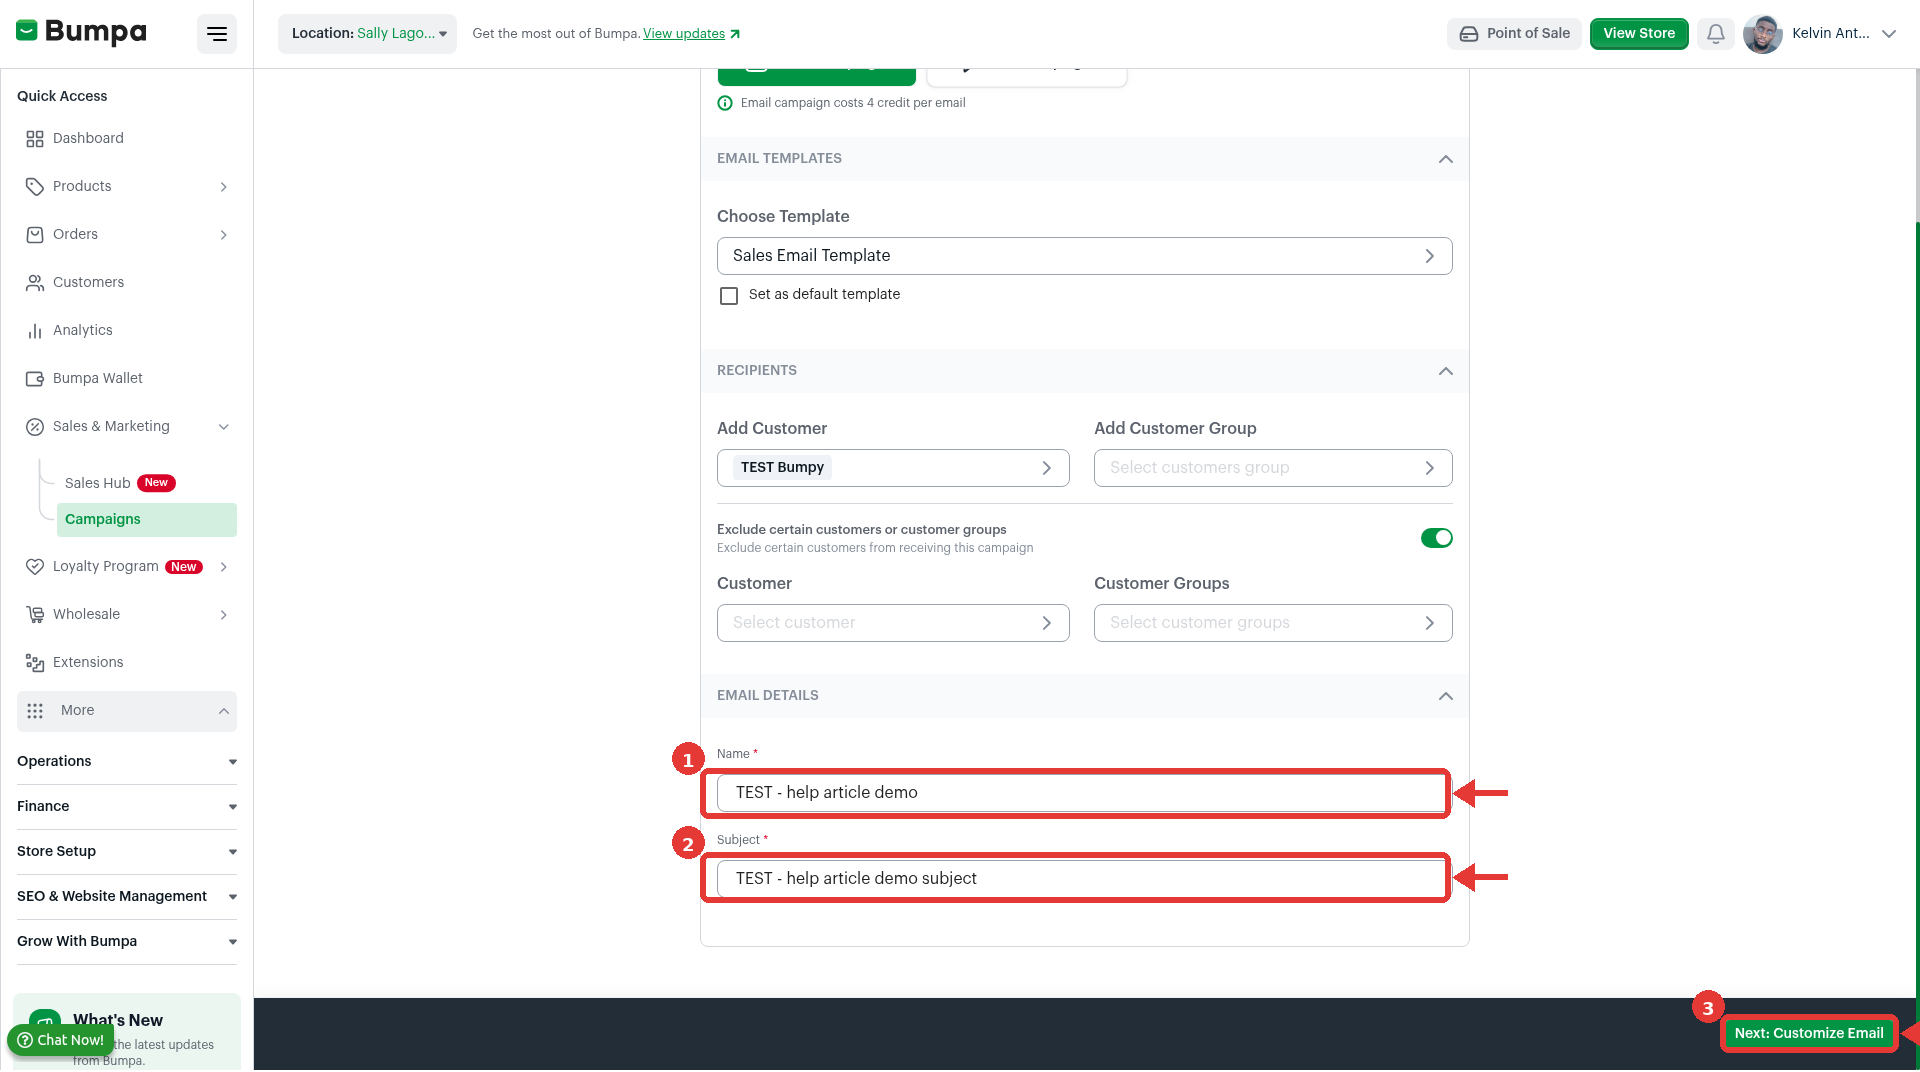
To add your campaign details, follow these steps:
Enter a Name for your campaign.
Enter a Subject.
Click Next: Customize Email.
Example: A subject like "Our Christmas sale starts today: 30% off all shoes" tells customers why they should open the email.
5. Customise Your Email
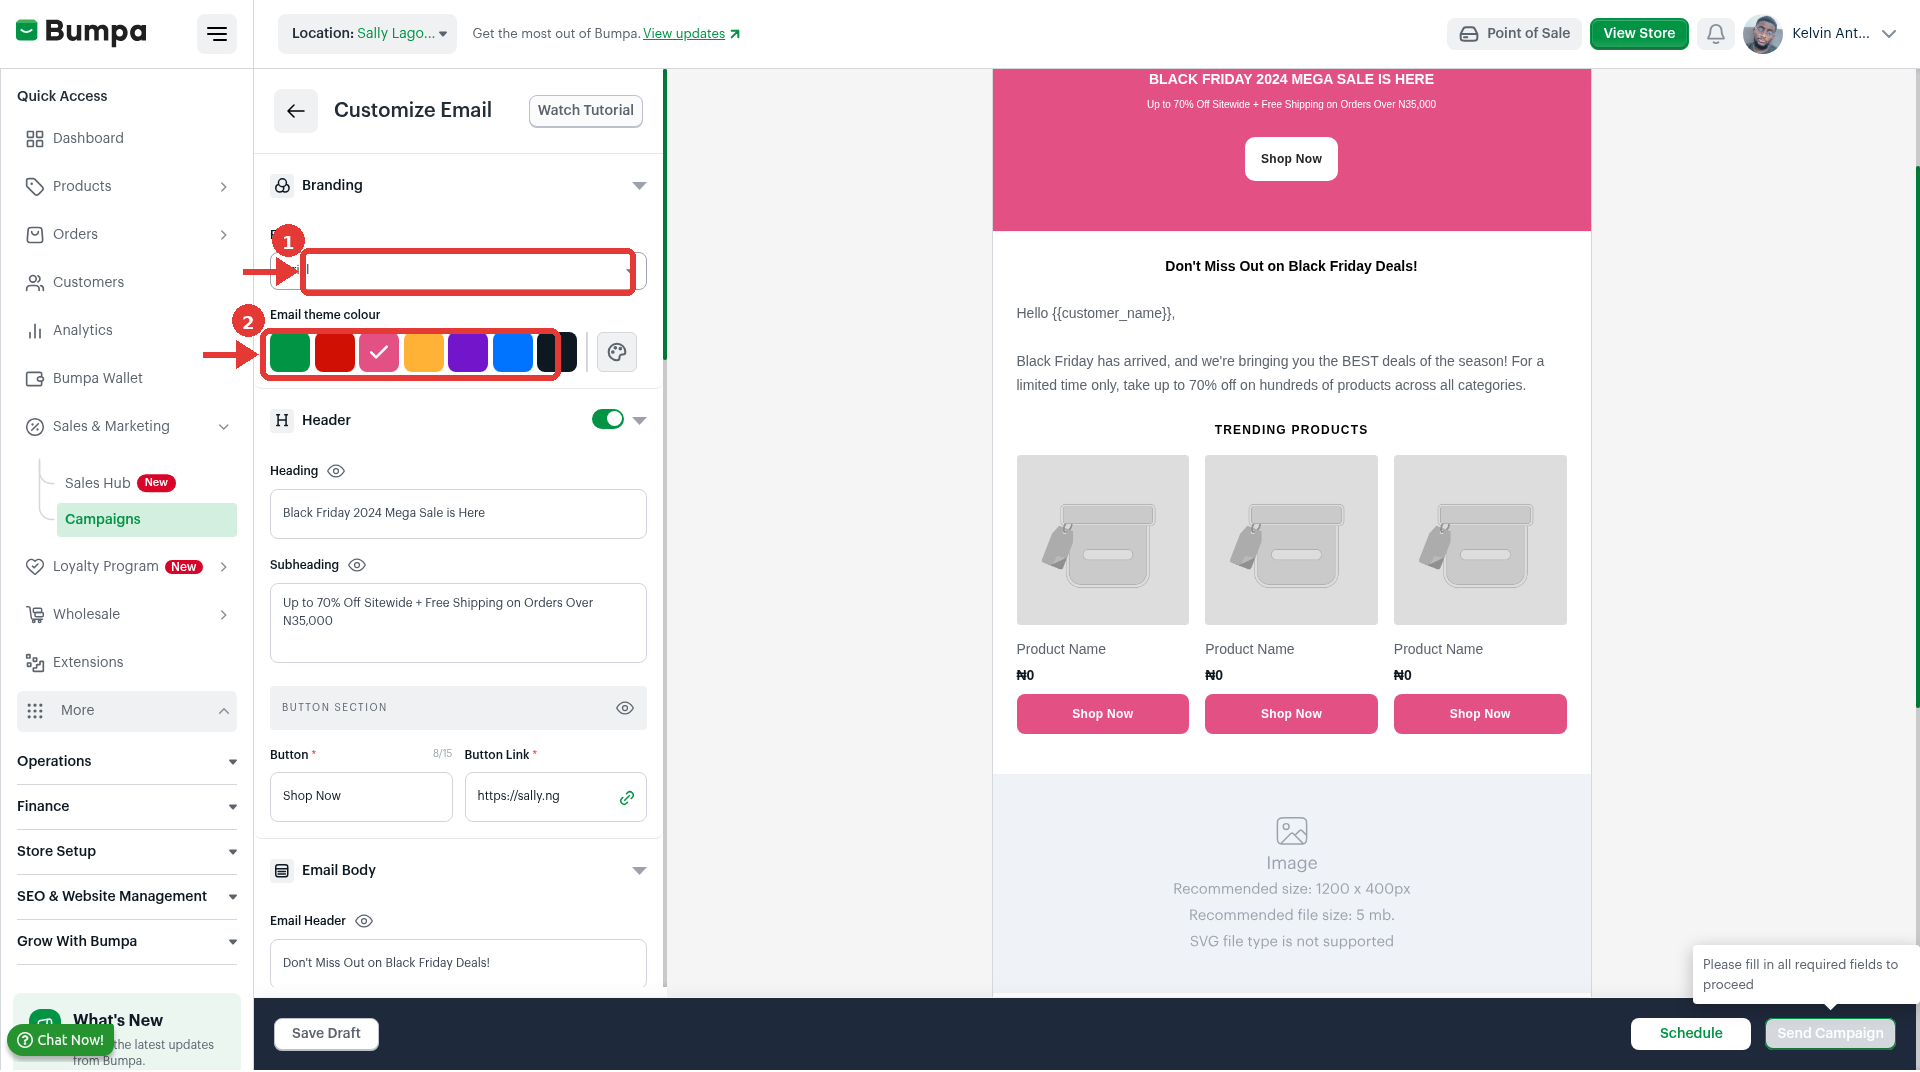
On the Customize Email page, you edit your email on the left and see a live preview on the right. You can hide most sections with the eye icon or the on/off toggle. Fields marked * are required.
To customise your email, follow these steps:
Choose a Font and an Email theme colour under Branding.
Edit the Heading, Subheading and Button in the Header section. The Button Link is filled with your website link, but you can change it.
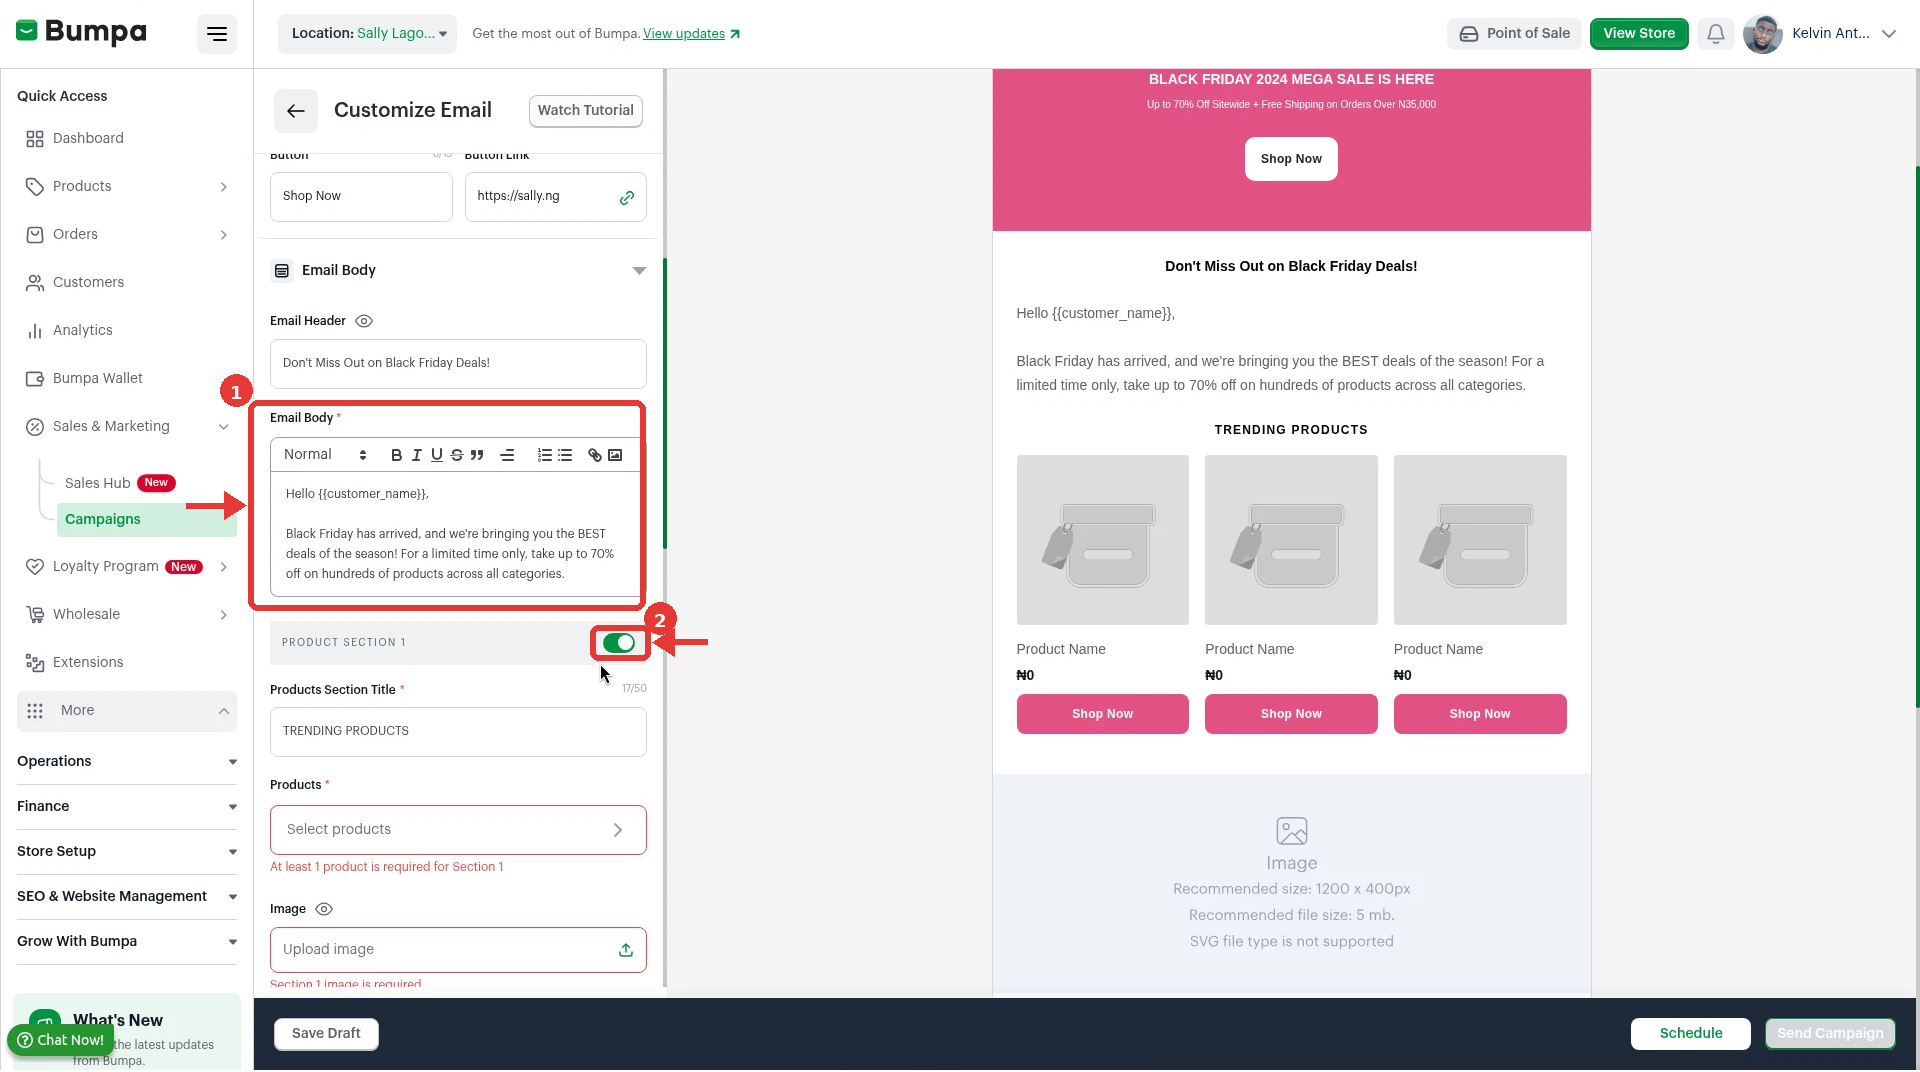
Write your message in the Email Body. Use the toolbar to add headings, bold text, lists, links or images.
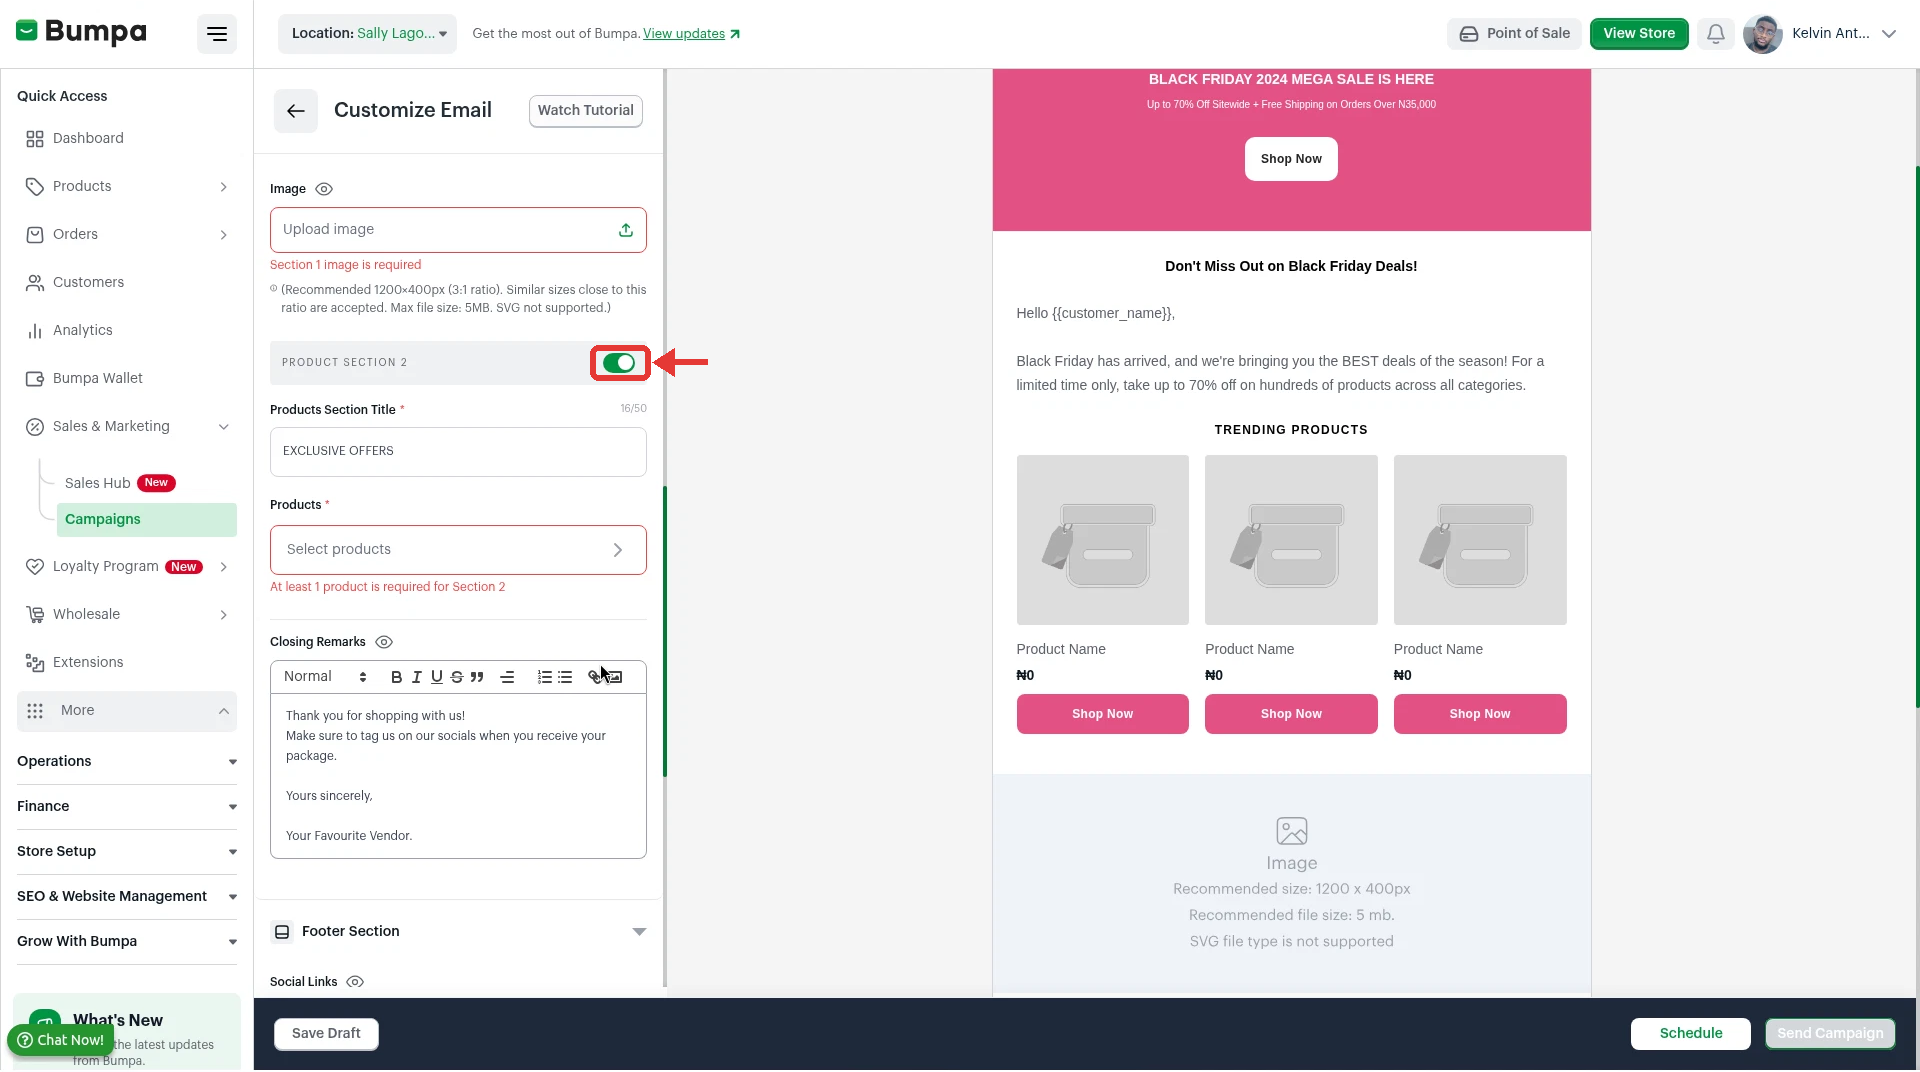
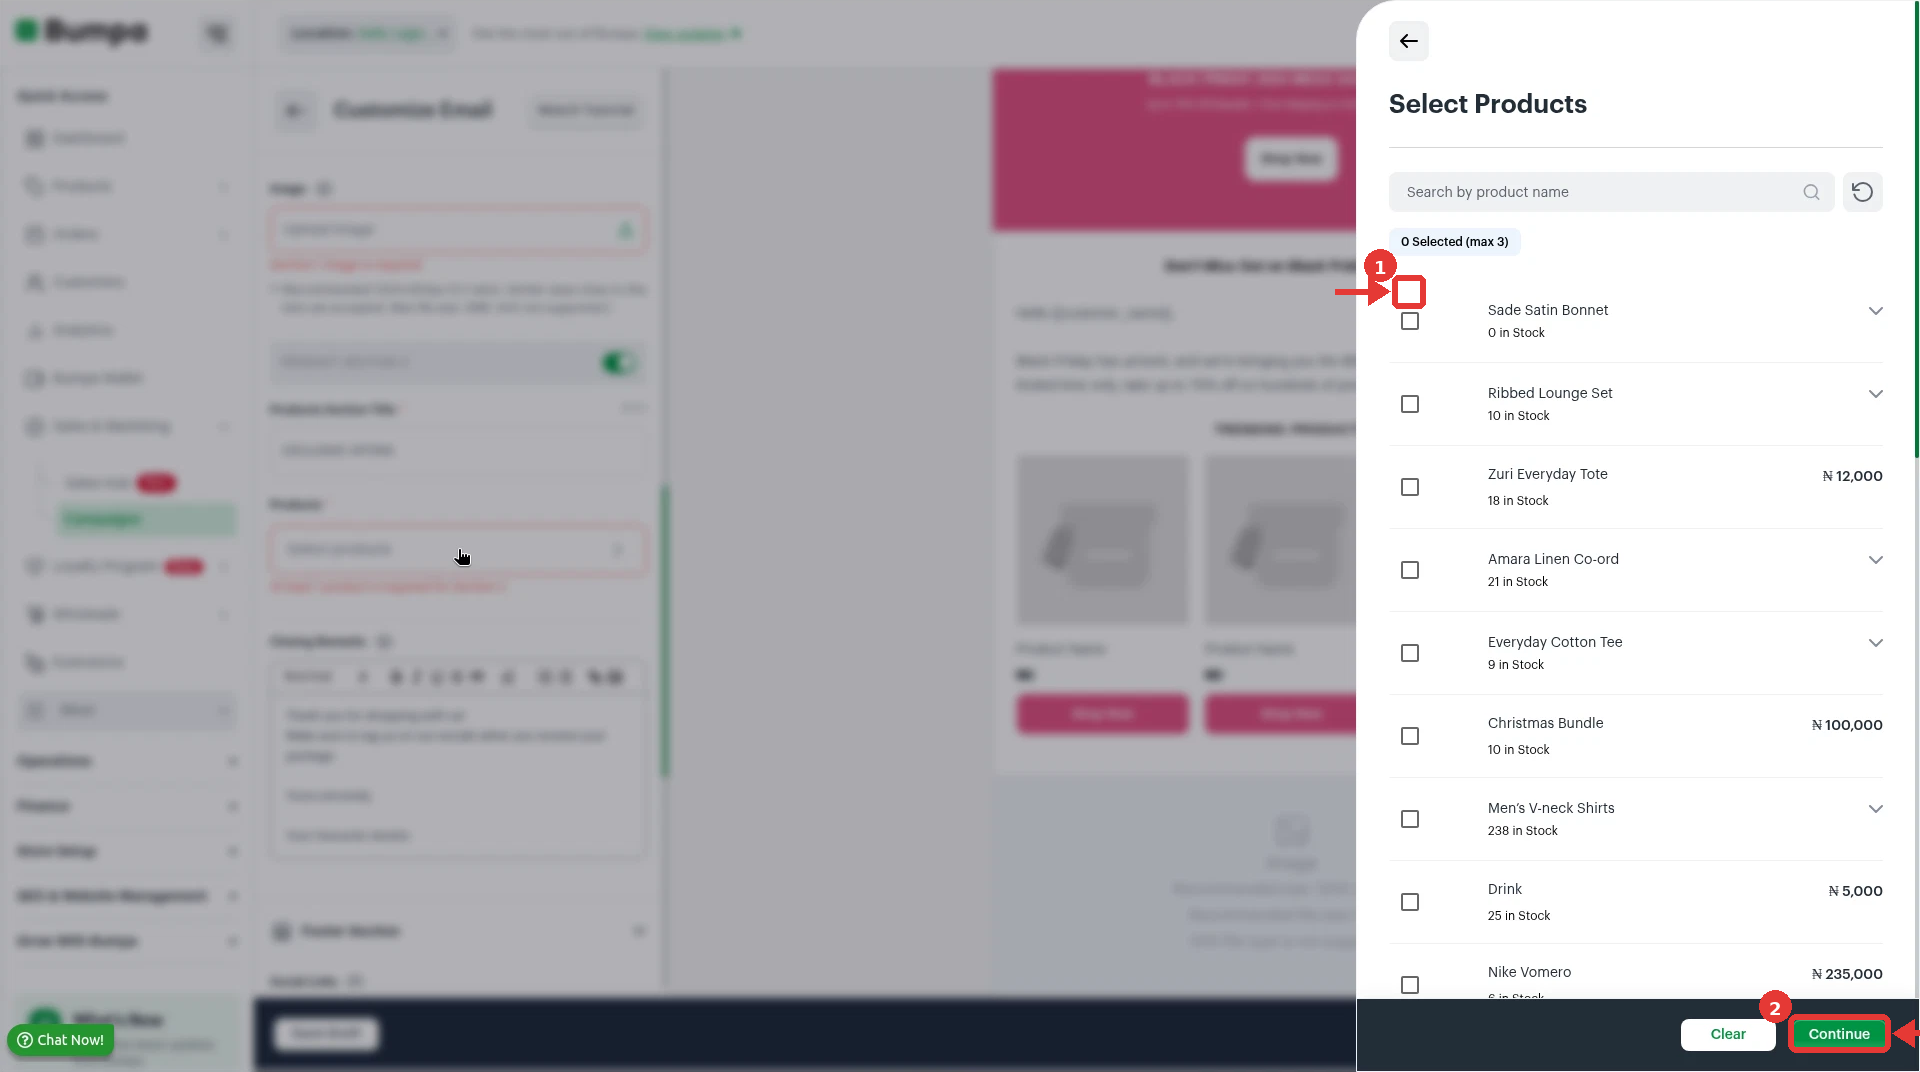
Add products to Product Section 1 and Product Section 2. Click Select products and choose up to 3 products for each section. Section 1 also needs an image. If you don't need a section, turn it off.
Edit the Closing Remarks.
Check the Footer Section. Add at least one social media link. You can also show your store address.
Click the desktop or mobile icon above the preview to see how your email looks on a computer or a phone.
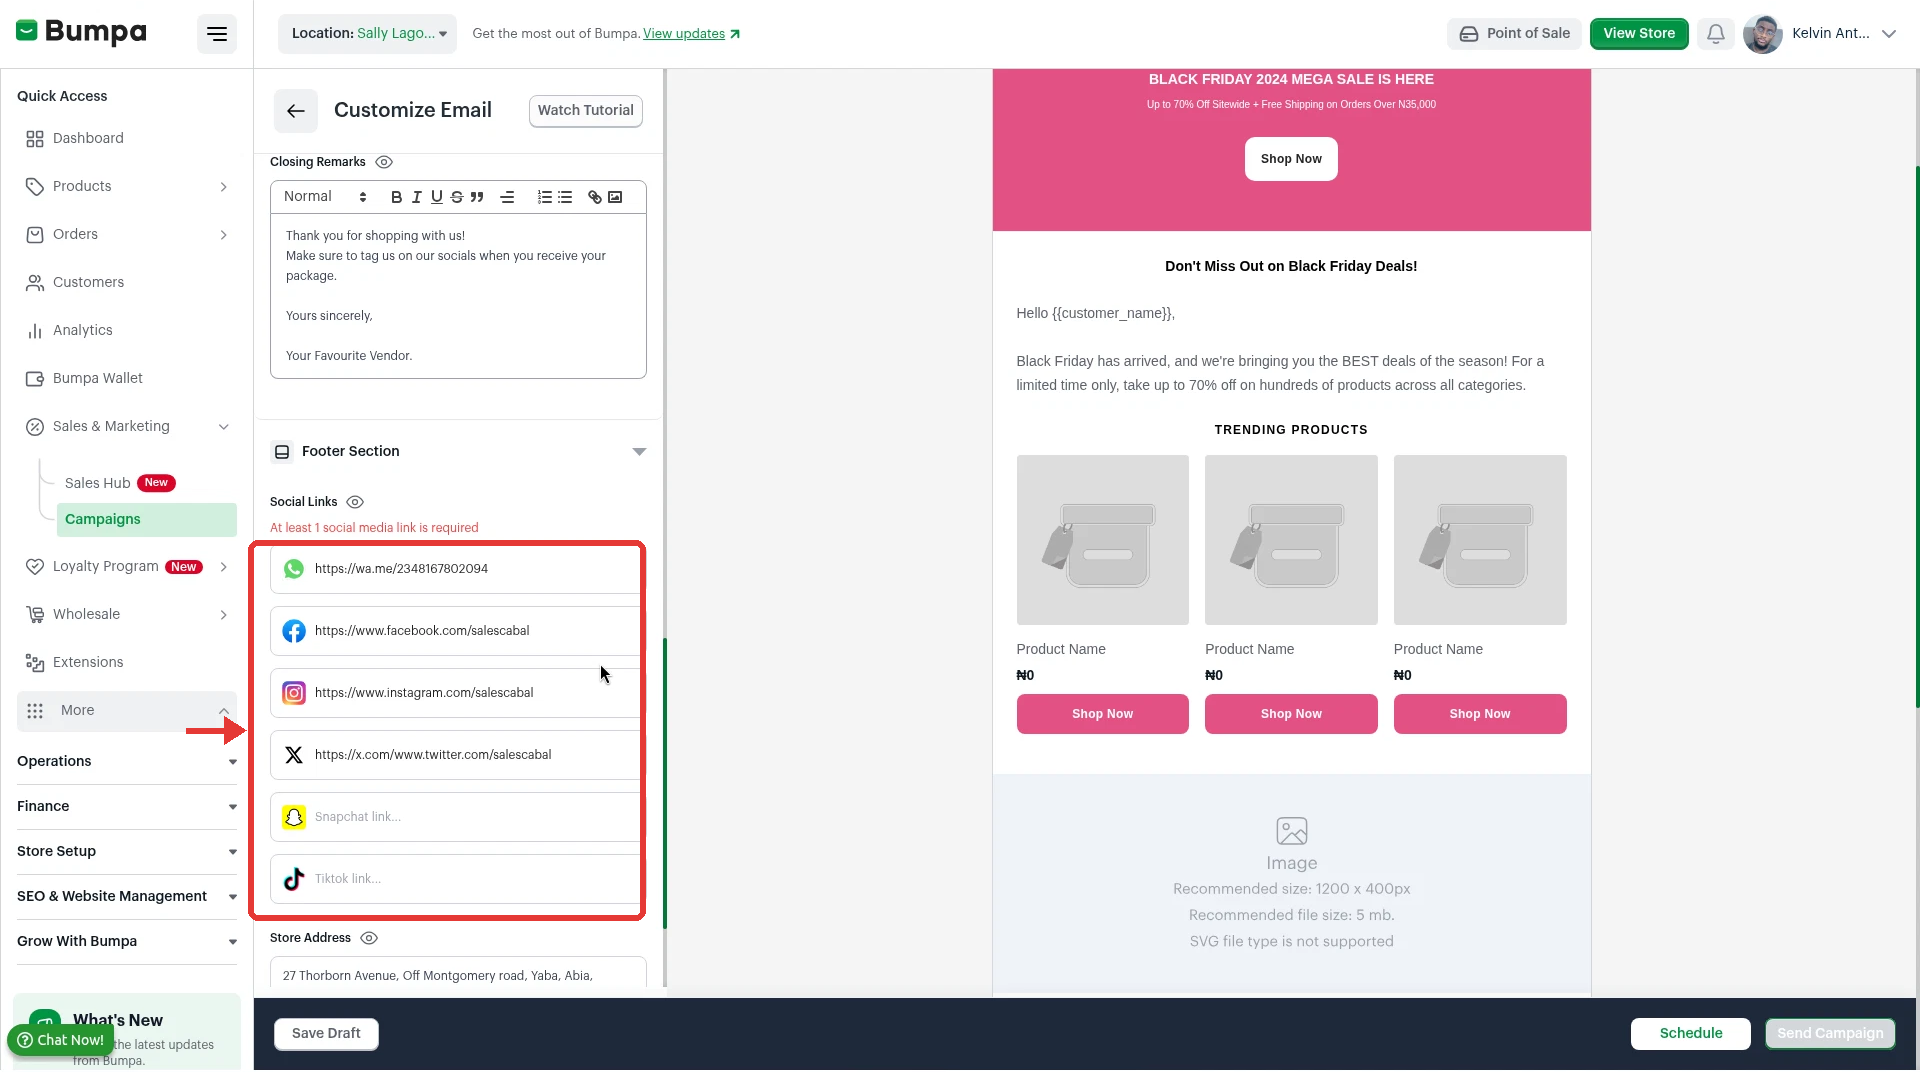
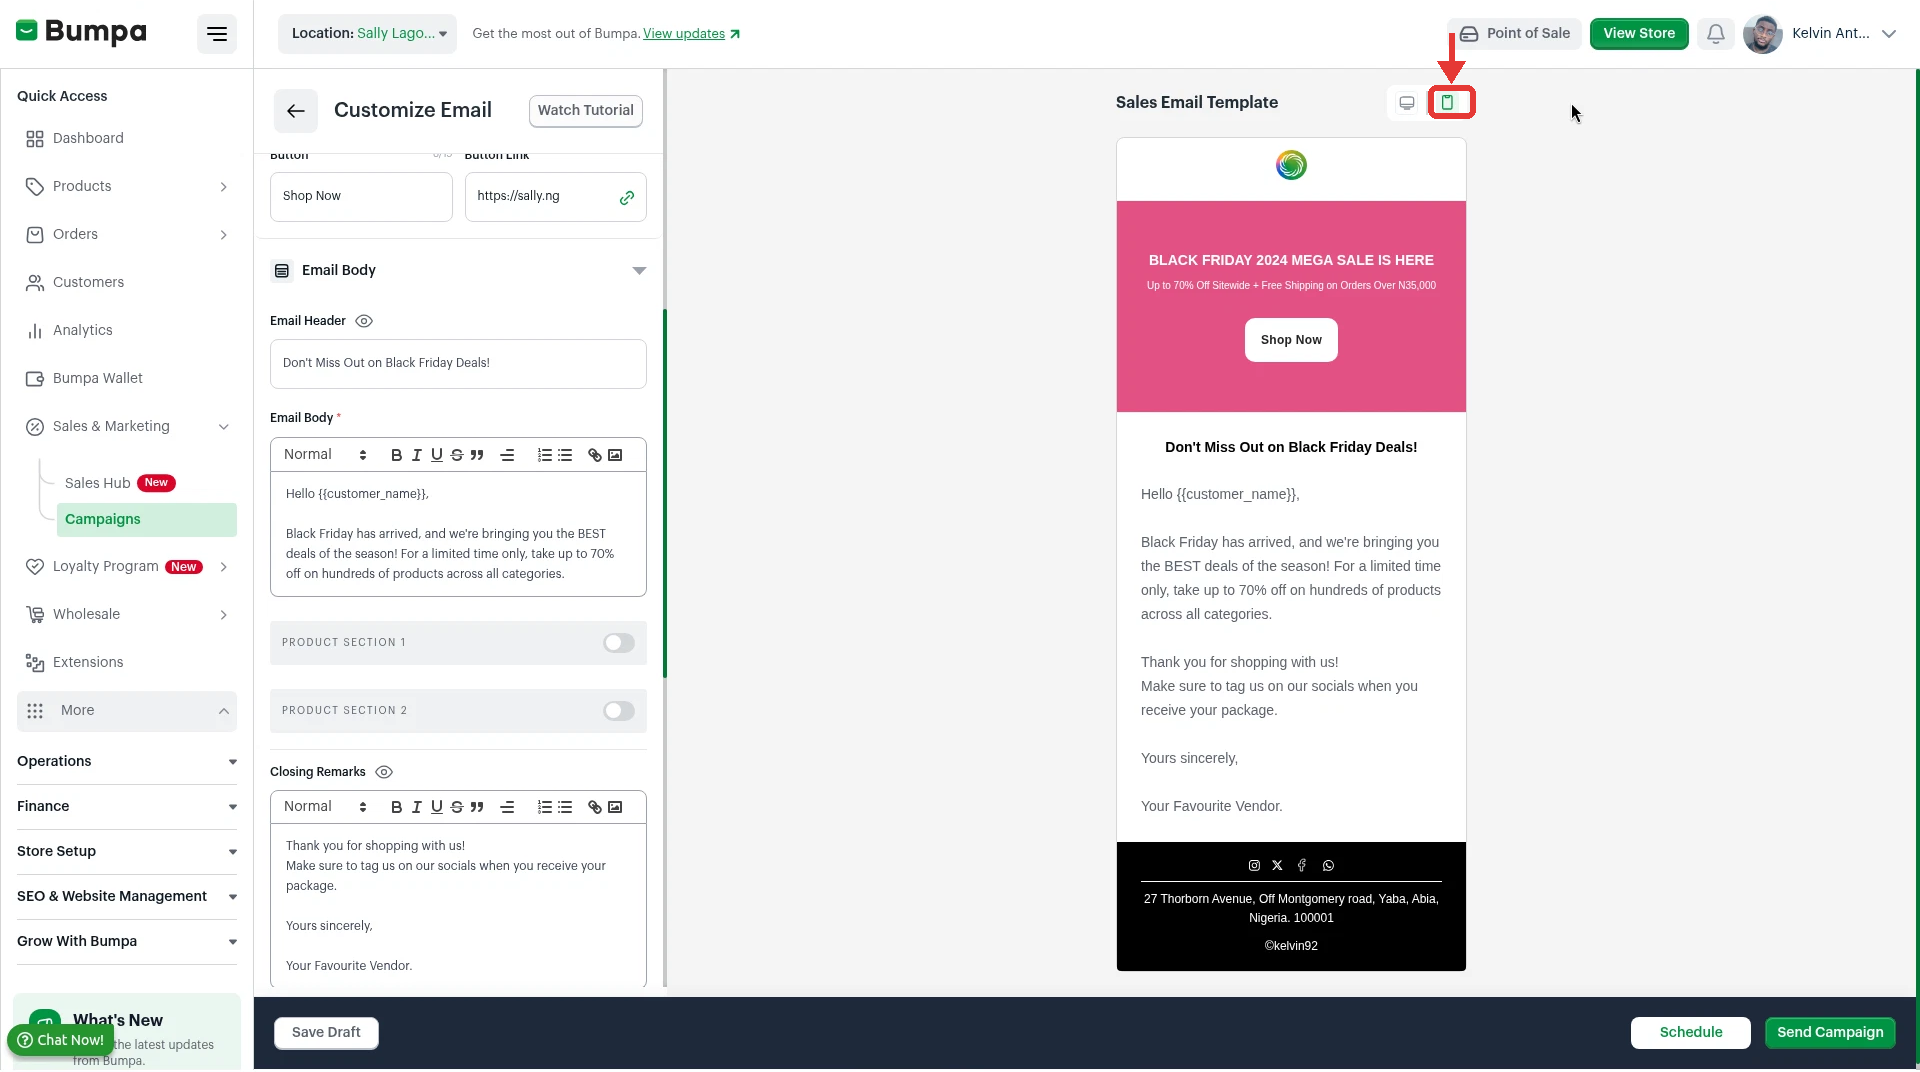
Note: Product section image: use 1200 x 400 px (a 3:1 ratio) for the best result. The file must be 5MB or less. SVG files are not supported.
The template comes with sample text, such as a Black Friday heading. Replace it with your own text before you send.
Tip: Type {{customer_name}} in the email body to greet each customer by name.
Example: "Hello {{customer_name}}, our new Ankara collection is here."
6. Send or Schedule Your Campaign
You can send your campaign now, schedule it for later, or save it as a draft.
To send or schedule your campaign, follow these steps:
Click Send Campaign to send it now.
Click Schedule to send it later. Choose your time zone, pick the Date and Time, then click Continue.
Click Save Draft to finish it later. You will find it in the Drafts tab on the Campaigns page.
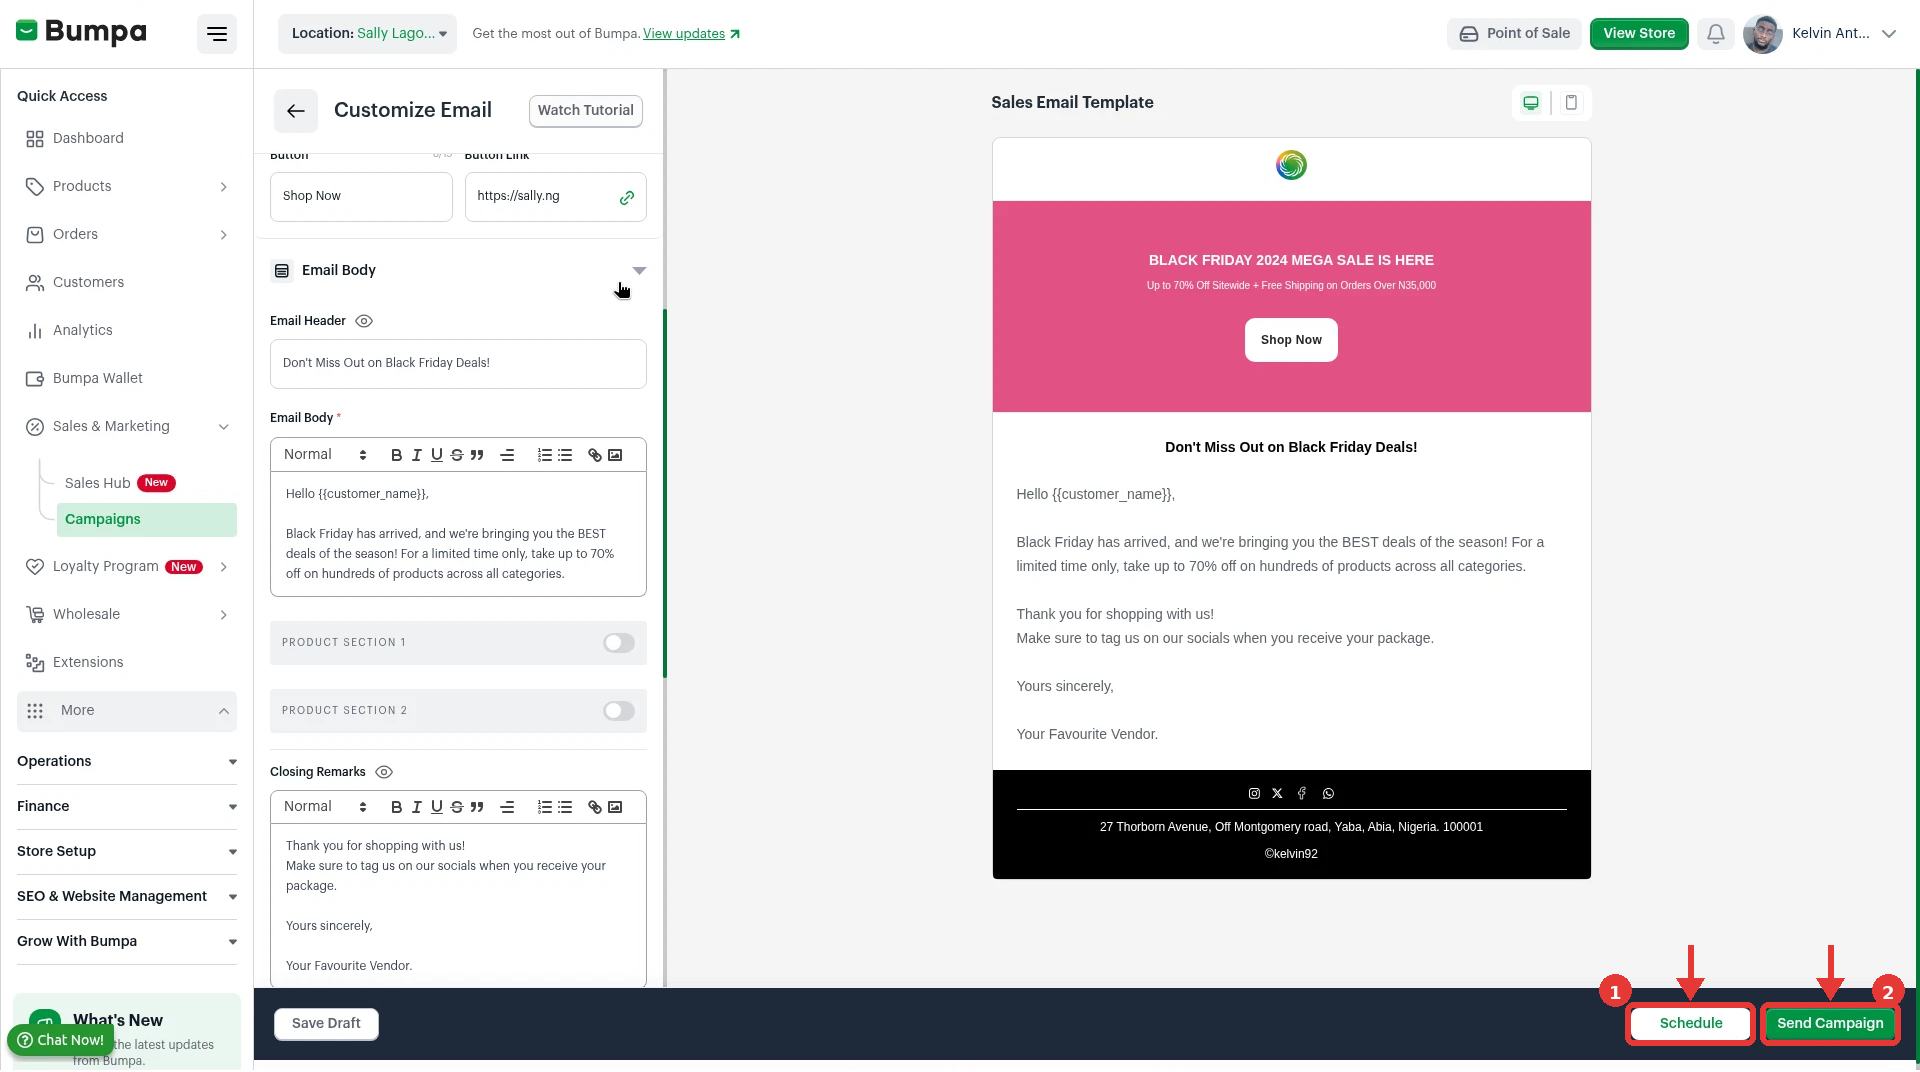
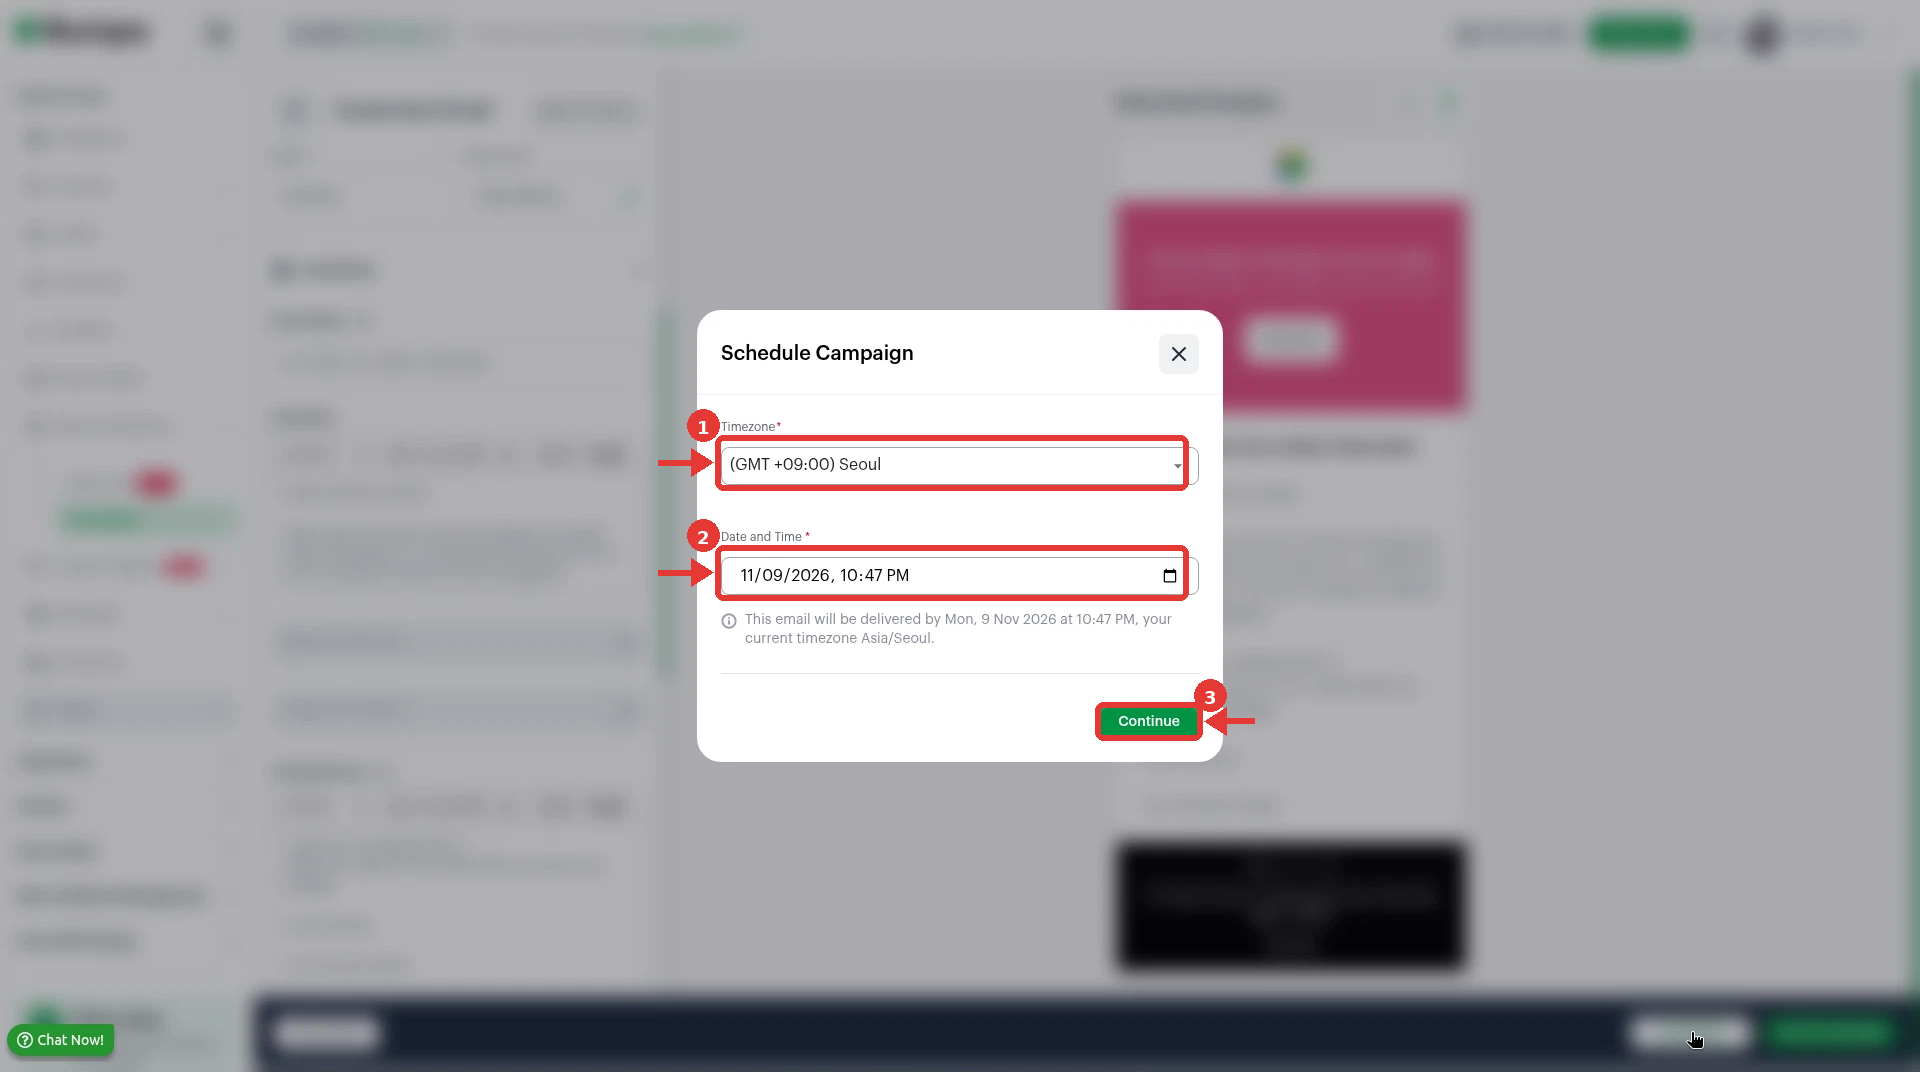
Note: Schedule and Send Campaign stay greyed out until you fill all required fields. If a product section shows an error, add a product or turn that section off. The timezone starts as your device's timezone, so check it before you schedule.
Related articles:
How to Read Your Email Campaign Report
How to add or edit the newsletter and pop-up notification
How To Send Email To The Newsletter Subscribers
Was this article helpful?
That’s Great!
Thank you for your feedback
Sorry! We couldn't be helpful
Thank you for your feedback
Feedback sent
We appreciate your effort and will try to fix the article