As a business owner, you may need a clear record of money in your Bumpa Wallet for bookkeeping or a loan. Bumpa lets you generate a statement of account and sends it to your registered email. You can pick a date range of up to three months. In this article, learn how to download your wallet account statement.
1. Open Bumpa Wallet
To open your Bumpa Wallet, follow these steps:
Log in to your Bumpa dashboard at https://app.getbumpa.com.
Click Bumpa Wallet under Quick Access in the left menu.
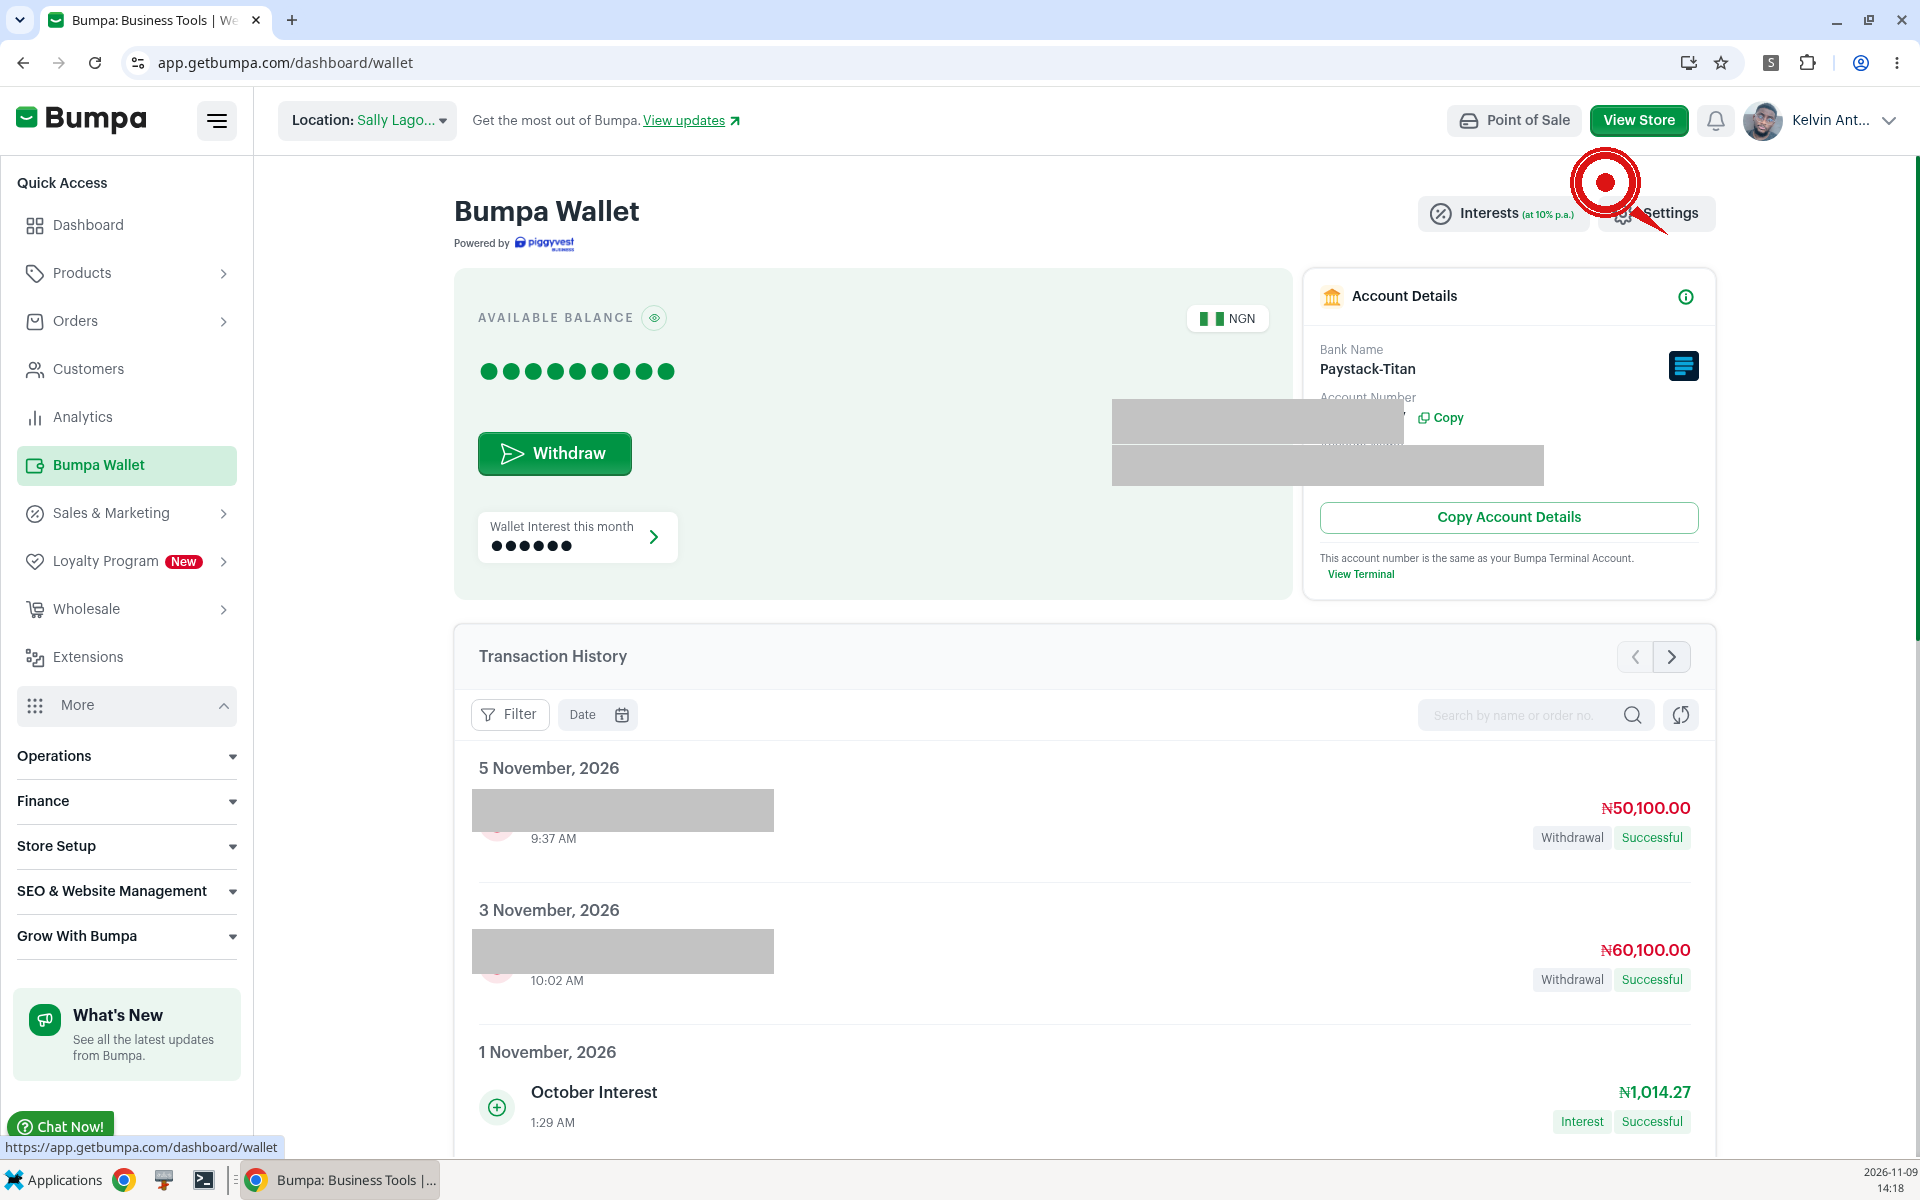
Example: Ada runs a cosmetics store in Enugu. She opens Bumpa Wallet every Monday to check her balance before she asks for a statement.
2. Open Generate Statement of Account
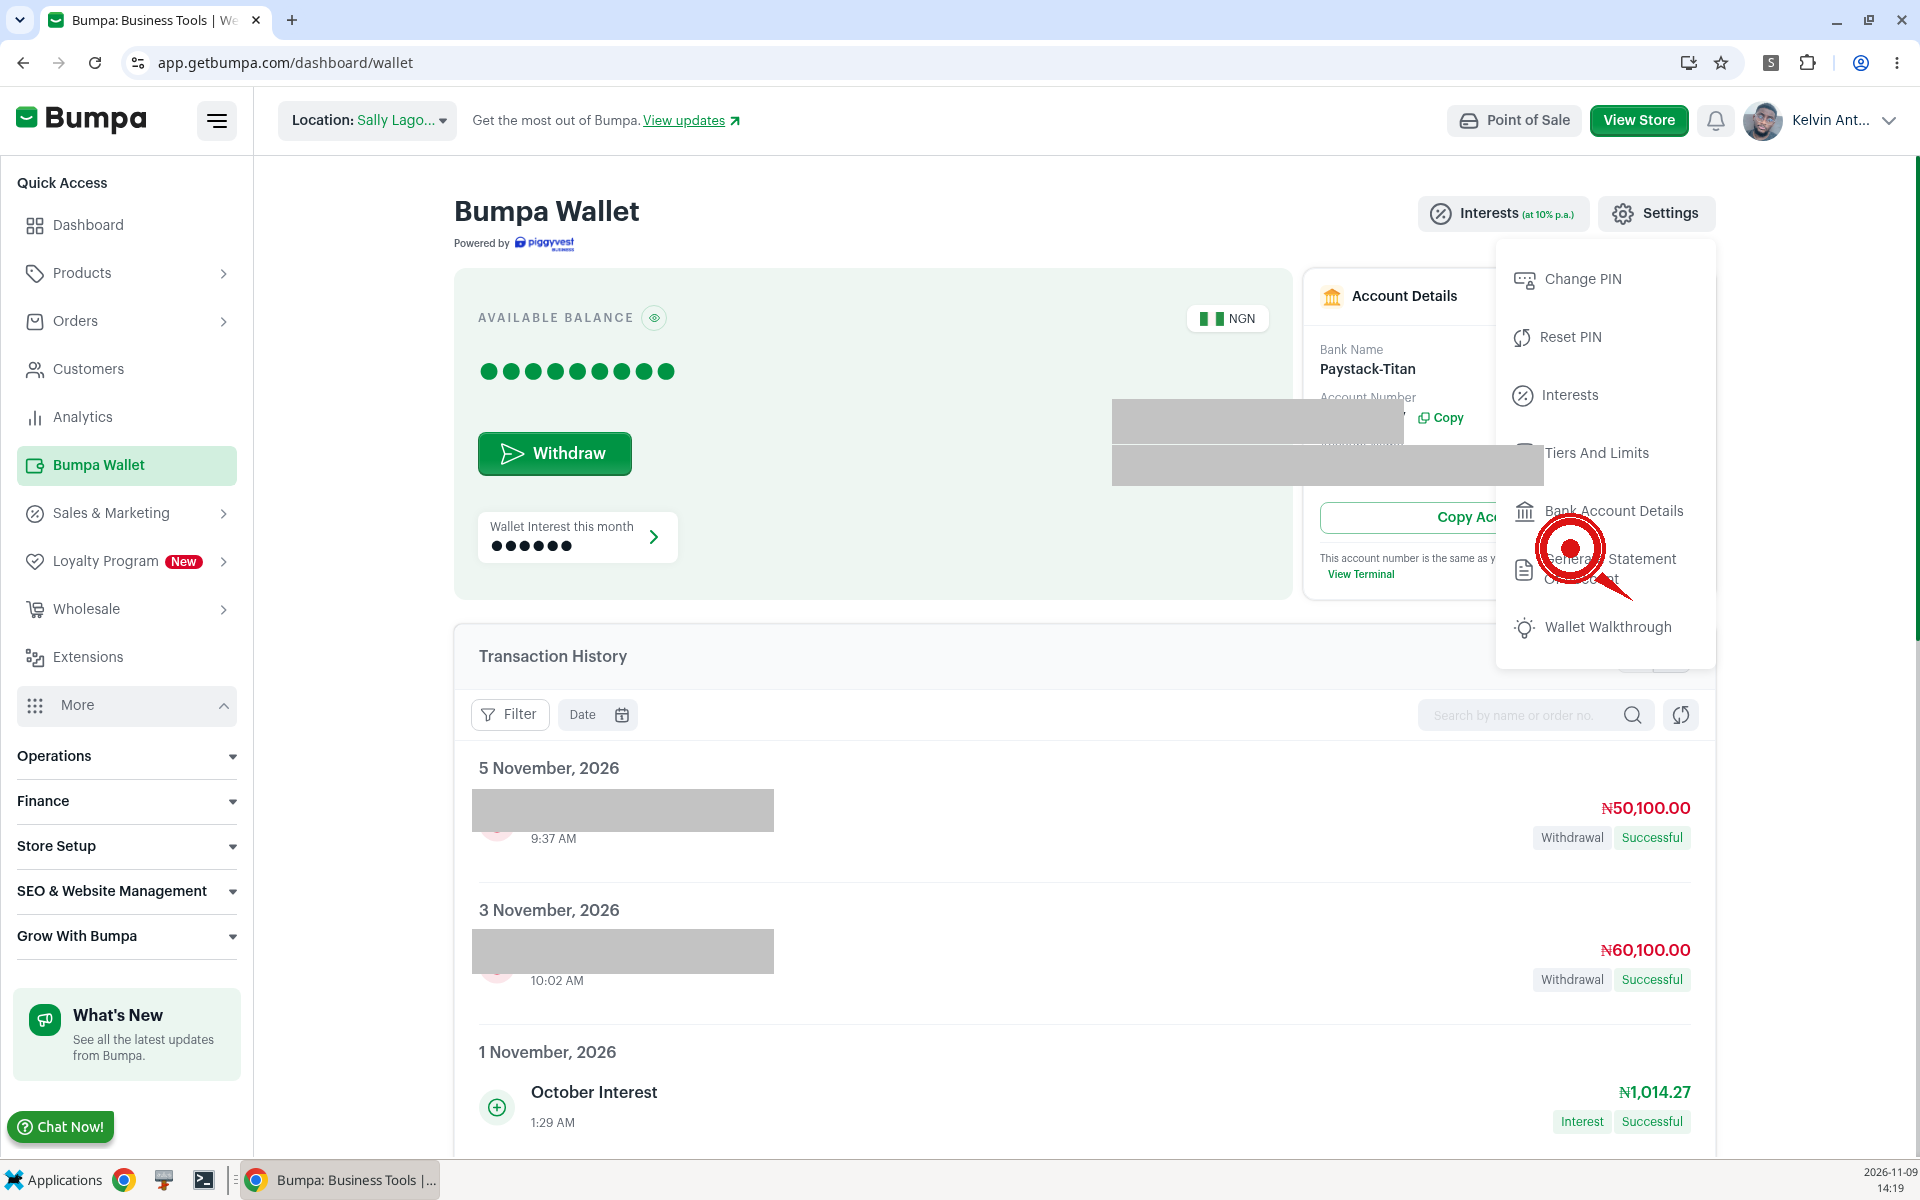
Settings sits at the top right of the Bumpa Wallet page. Generate Statement of Account is one of the items in that menu.
To open the statement panel, follow these steps:
Click Settings at the top right of the Bumpa Wallet page.
Click Generate Statement of Account.
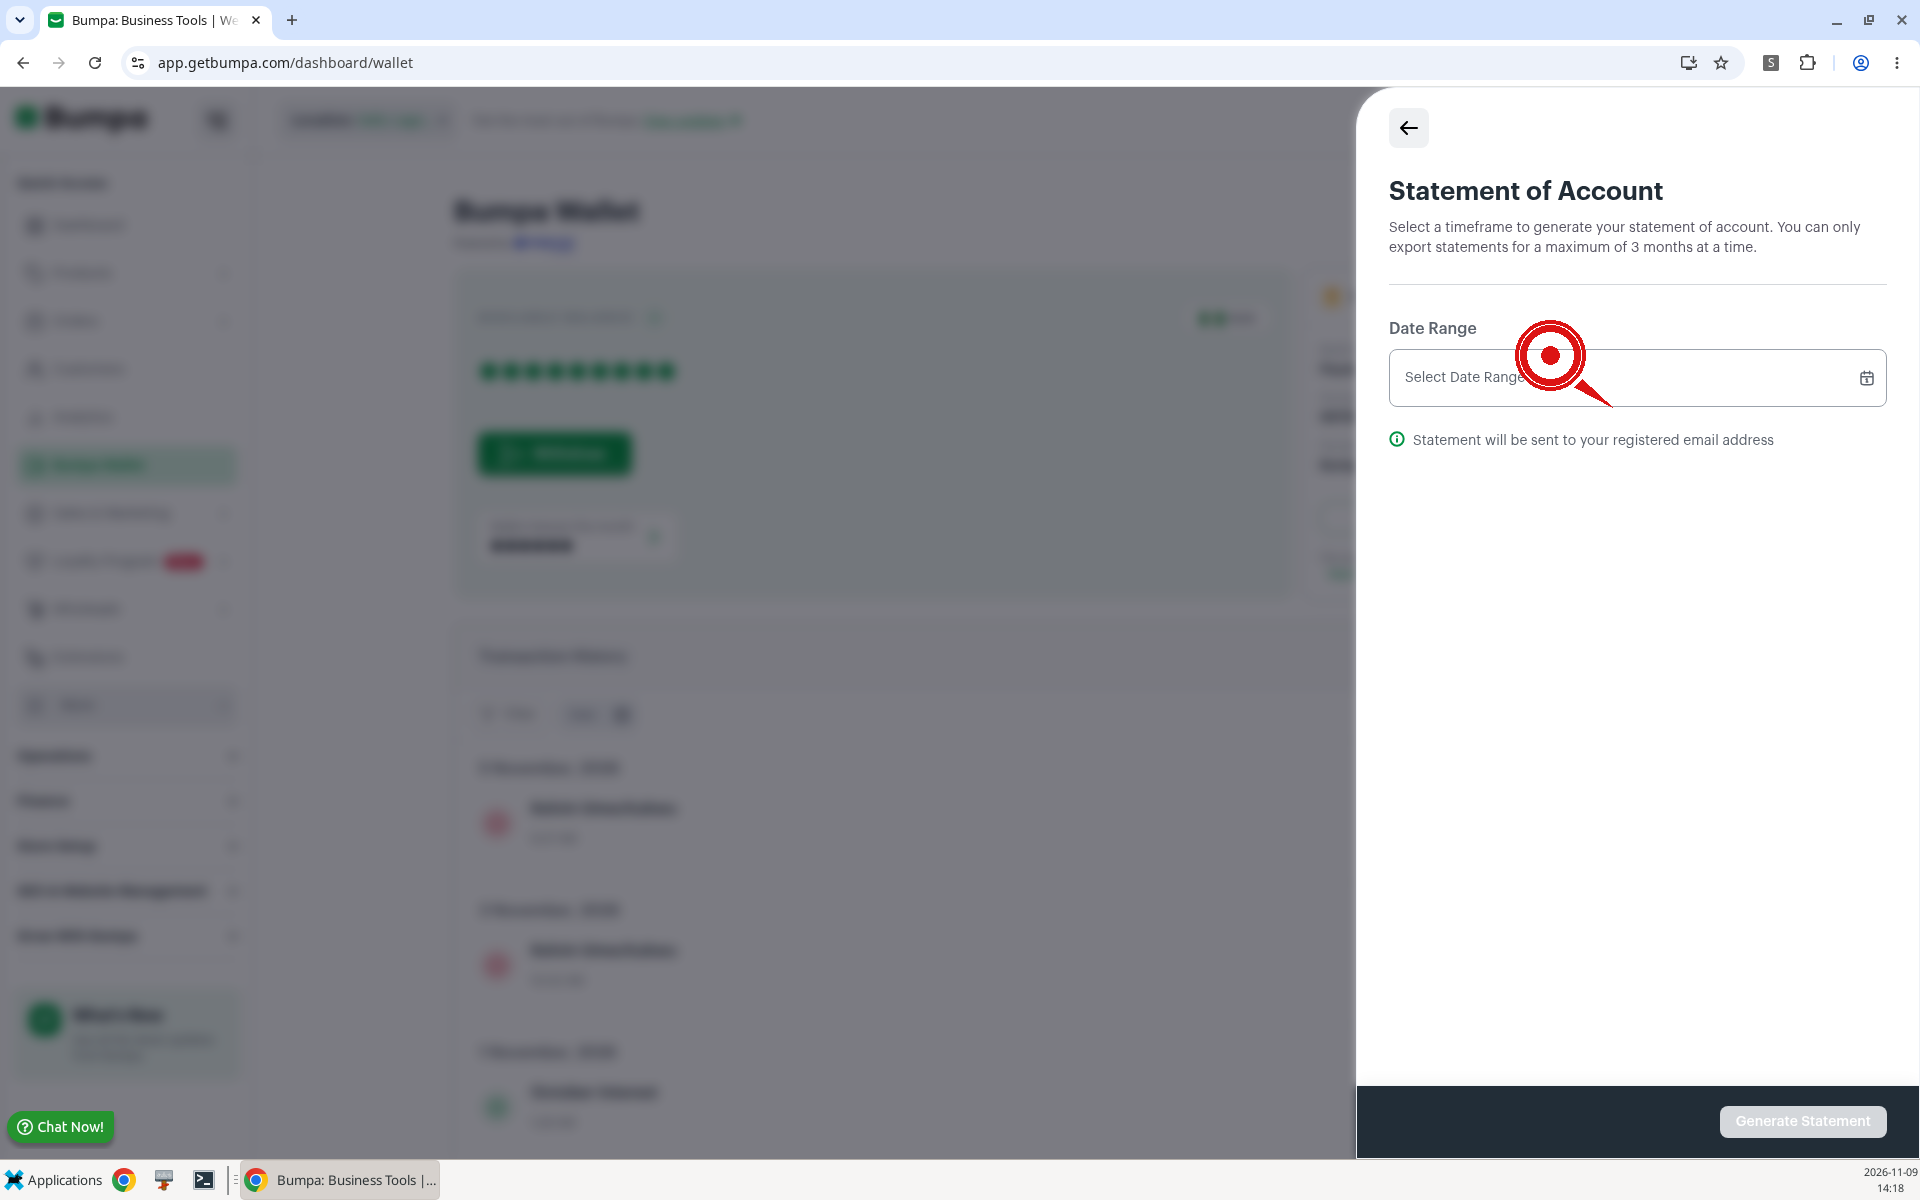
A Statement of Account tab opens on the right. On screen, it says: "Select a timeframe to generate your statement of account. You can only export statements for a maximum of 3 months at a time."
Example: Chidi clicks Settings, then Generate Statement of Account, and the Statement of Account panel slides in from the right.
Note: You can only export statements for a maximum of 3 months at a time.
The statement is sent to your registered email address.
3. Choose a date range
Date Range is the only field on the panel. The Generate Statement button stays disabled until you choose a range.
To choose a date range, follow these steps:
Click the Date Range field.
Pick one of the presets: Last Week, This Week, Last Month, This Month, Last Quarter, or This Quarter. You can also set your own dates in the calendar, then click Apply. Use Reset to clear your choice, or Close to dismiss the picker.
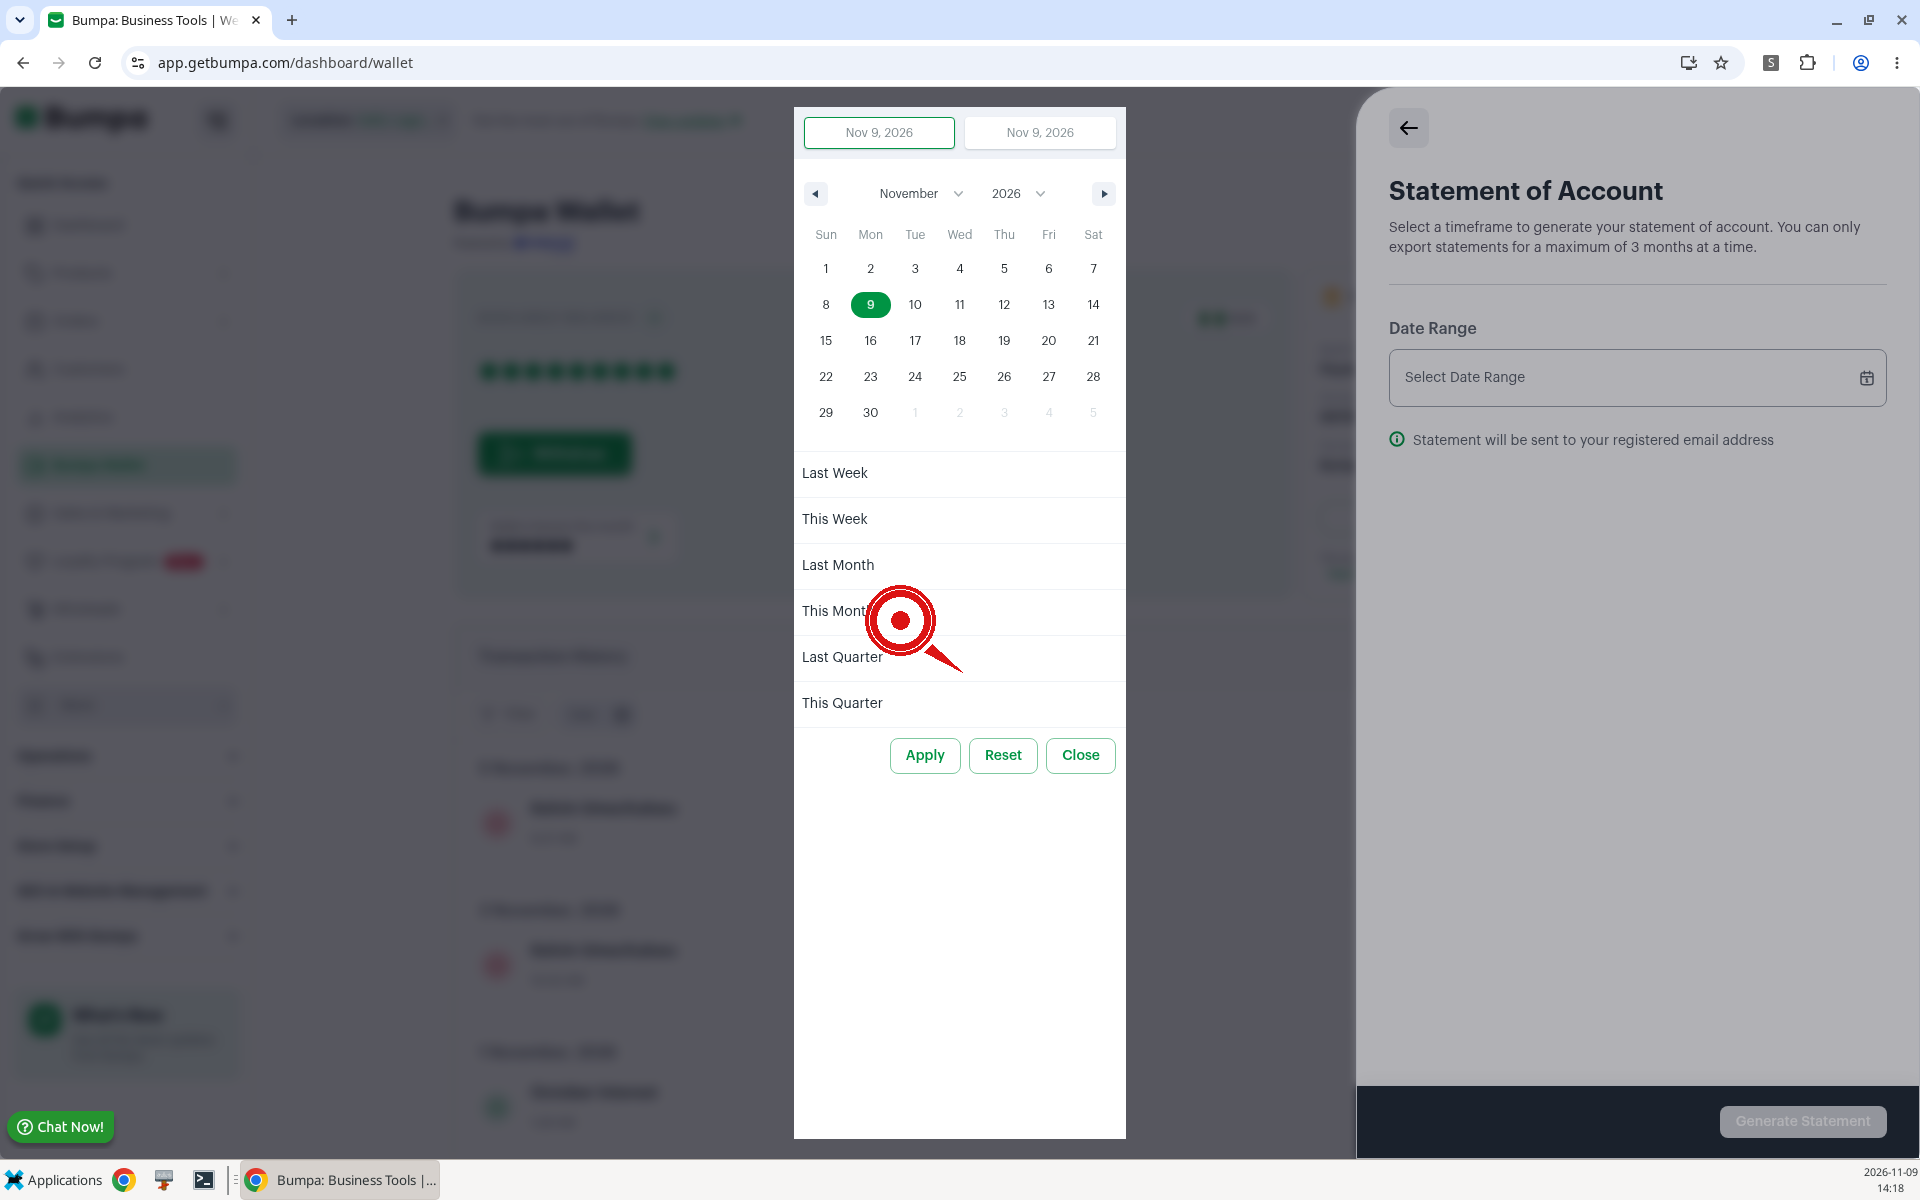
Example: Funmi picks This Month, clicks Apply, and the Date Range field fills with that period.
4. Generate the statement
When a date range is selected, Generate Statement becomes active.
To generate the statement, follow these steps:
Click Generate Statement.
Bumpa sends the statement to the email address on your account.
Example: Tunde clicks Generate Statement after picking Last Month, then checks the inbox he used to sign up on Bumpa.
Related Articles:
Was this article helpful?
That’s Great!
Thank you for your feedback
Sorry! We couldn't be helpful
Thank you for your feedback
Feedback sent
We appreciate your effort and will try to fix the article