Help your customers find exactly what they're looking for without scrolling through your entire product catalogue! With Bumpa’s Product Filters, customers can narrow down products on your website using options such as size, colour, and other product attributes. This makes browsing easier and helps customers find the right products faster. In this guide, we'll show you how to create, display, hide, edit, and delete product filters.
Filter Types
Global Filters: apply across your entire website. They're ideal for product options that are common to most of your items, such as size or colours.
Collection Filters: apply only to specific collections you select. They're useful for options that are relevant to certain products, such as Sleeve Length for shirts.
Note: Product filters use the product options already on your products, such as size, colour or material. You cannot type new values into a filter. If an option is missing, add it to your products first.To get started:
- Log in to your Bumpa dashboard at app.getbumpa.com.
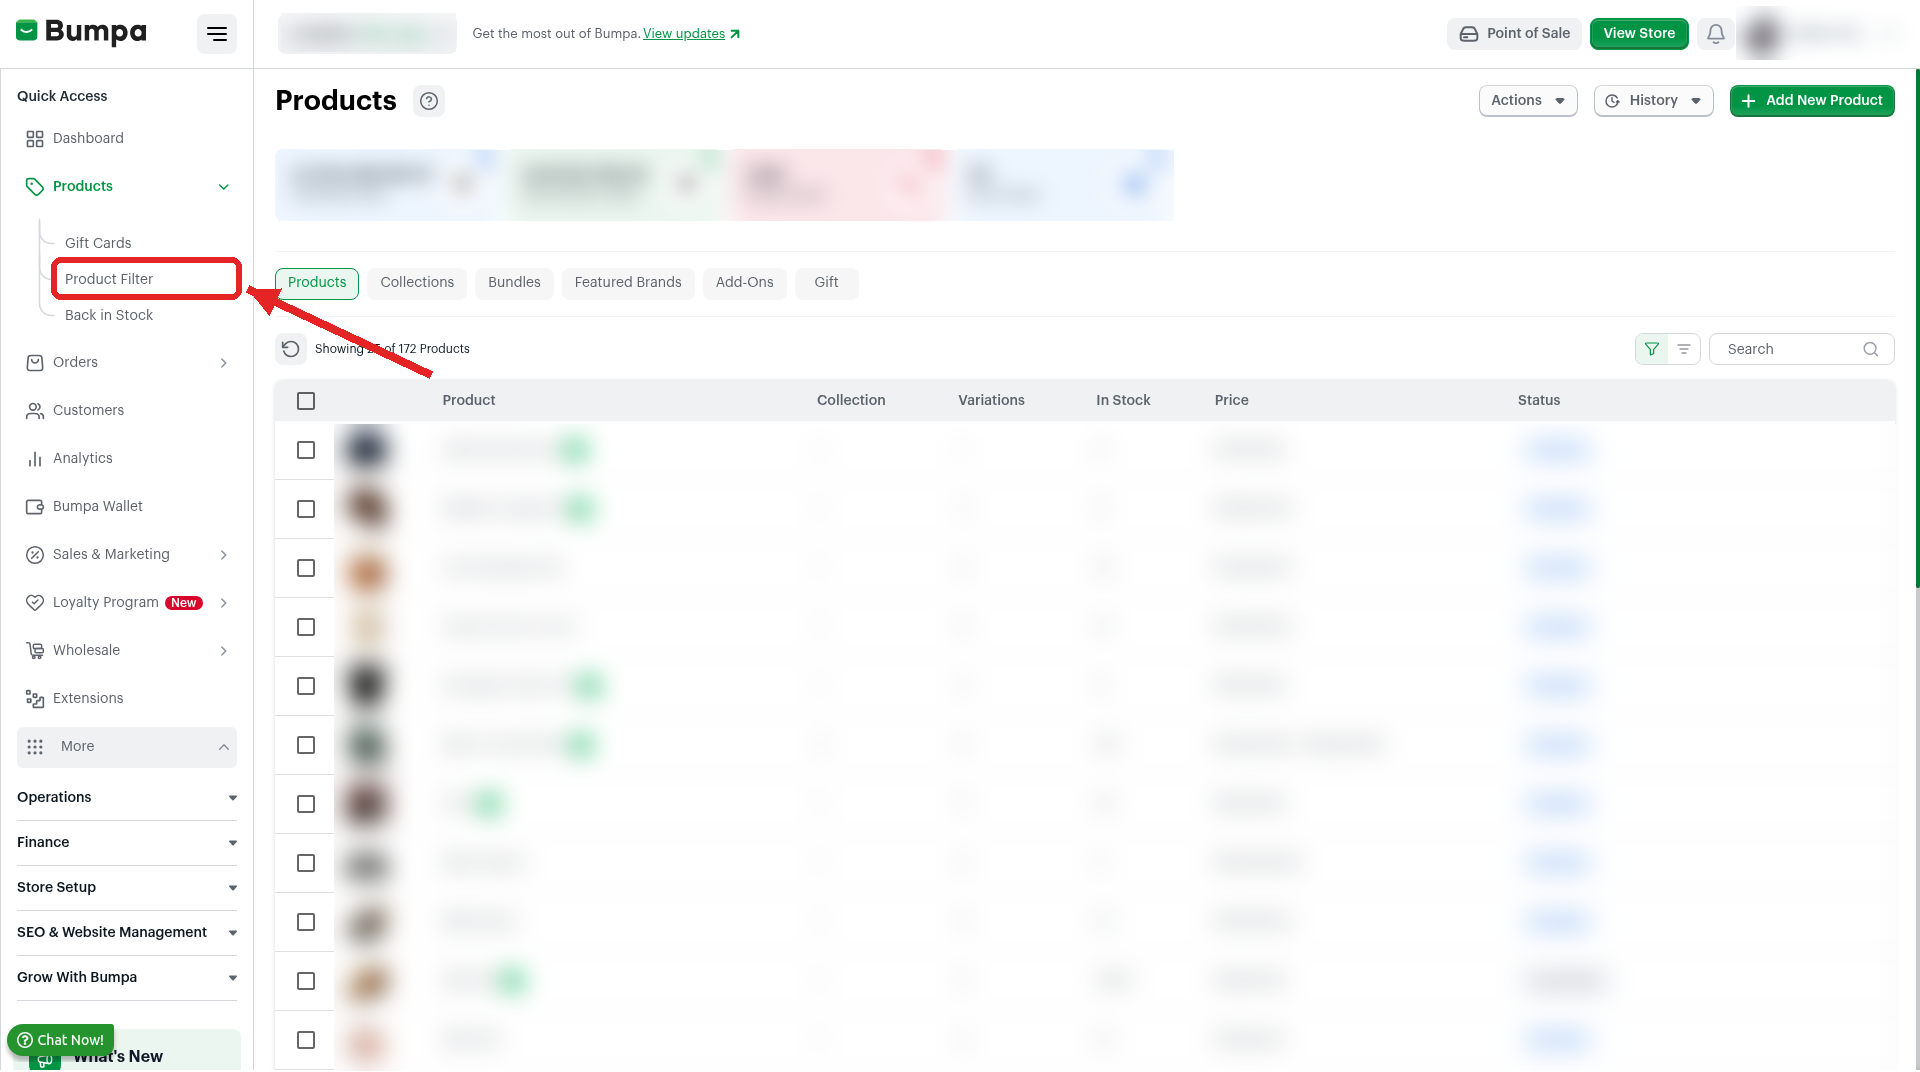
- Click Products in the menu on the left.
- Click Product Filter. It sits between Gift Cards and Back in Stock.
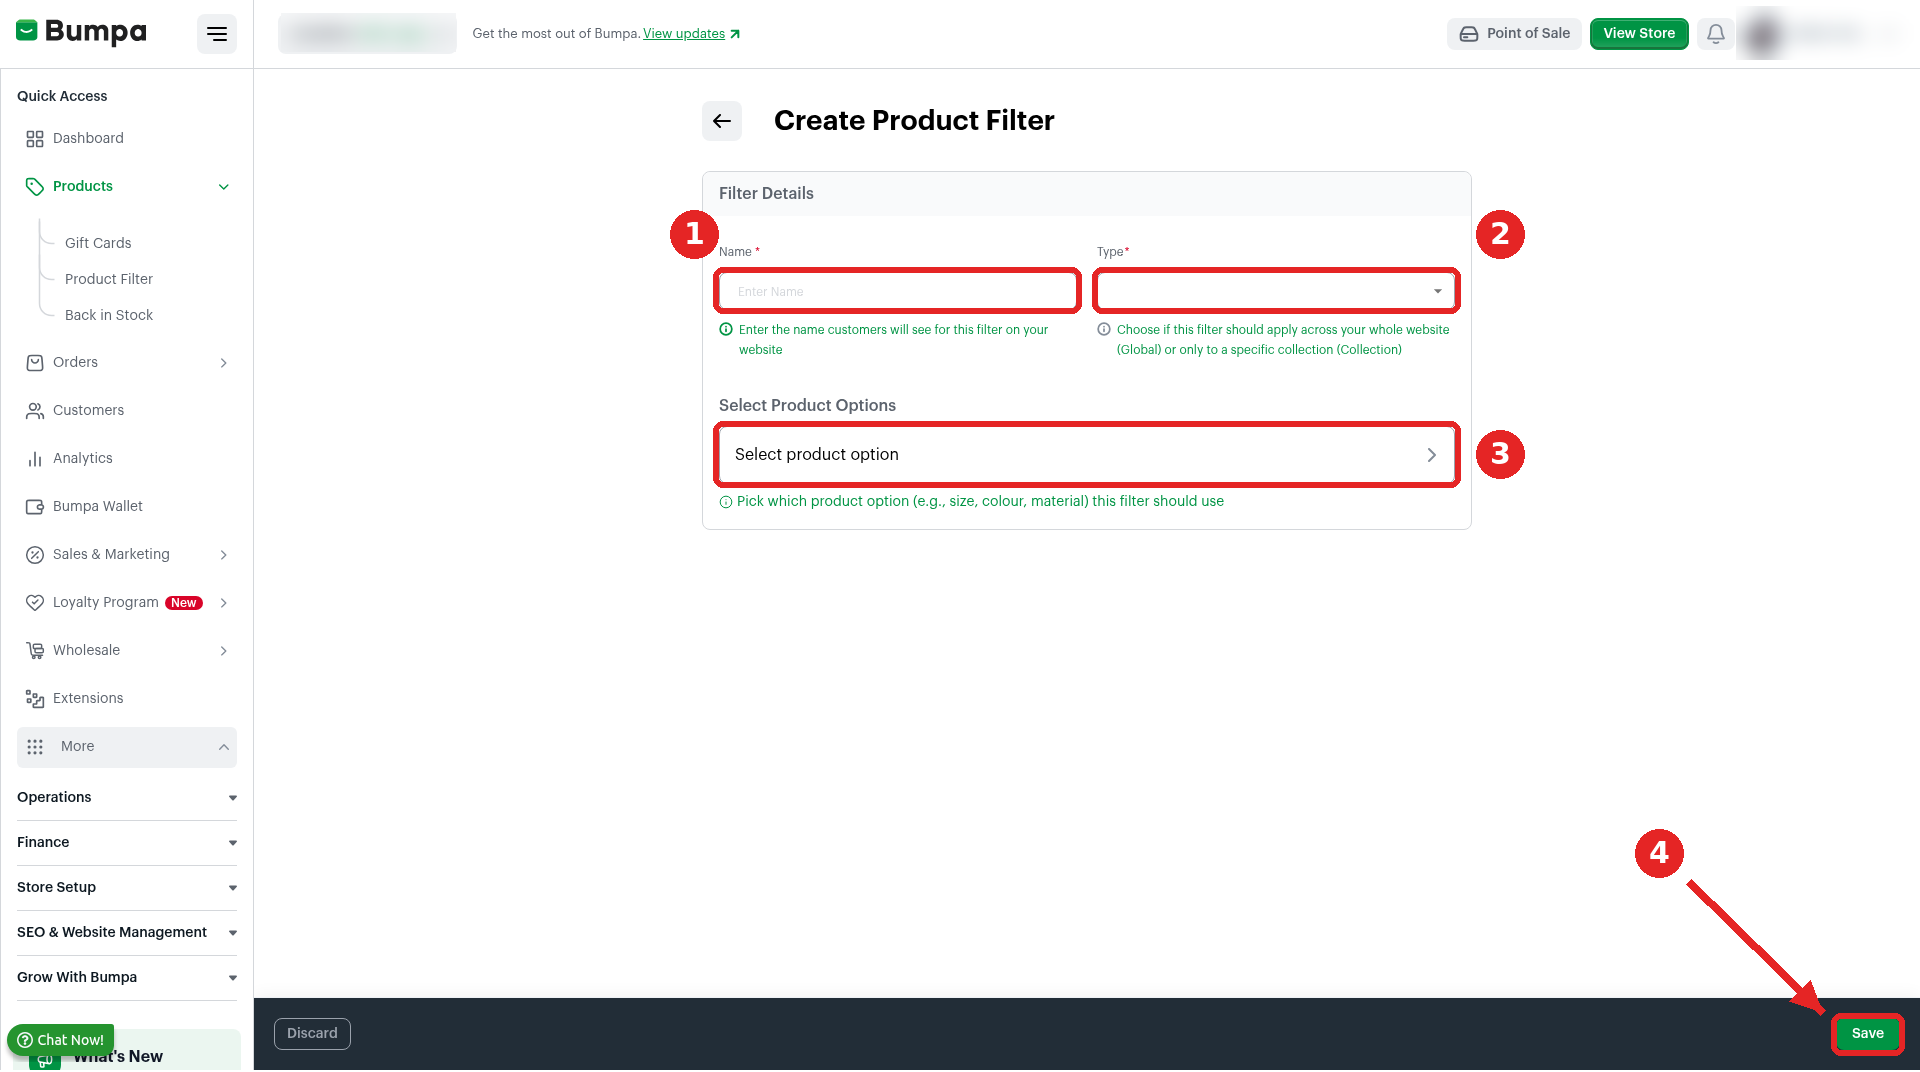
Name the filter and choose its type
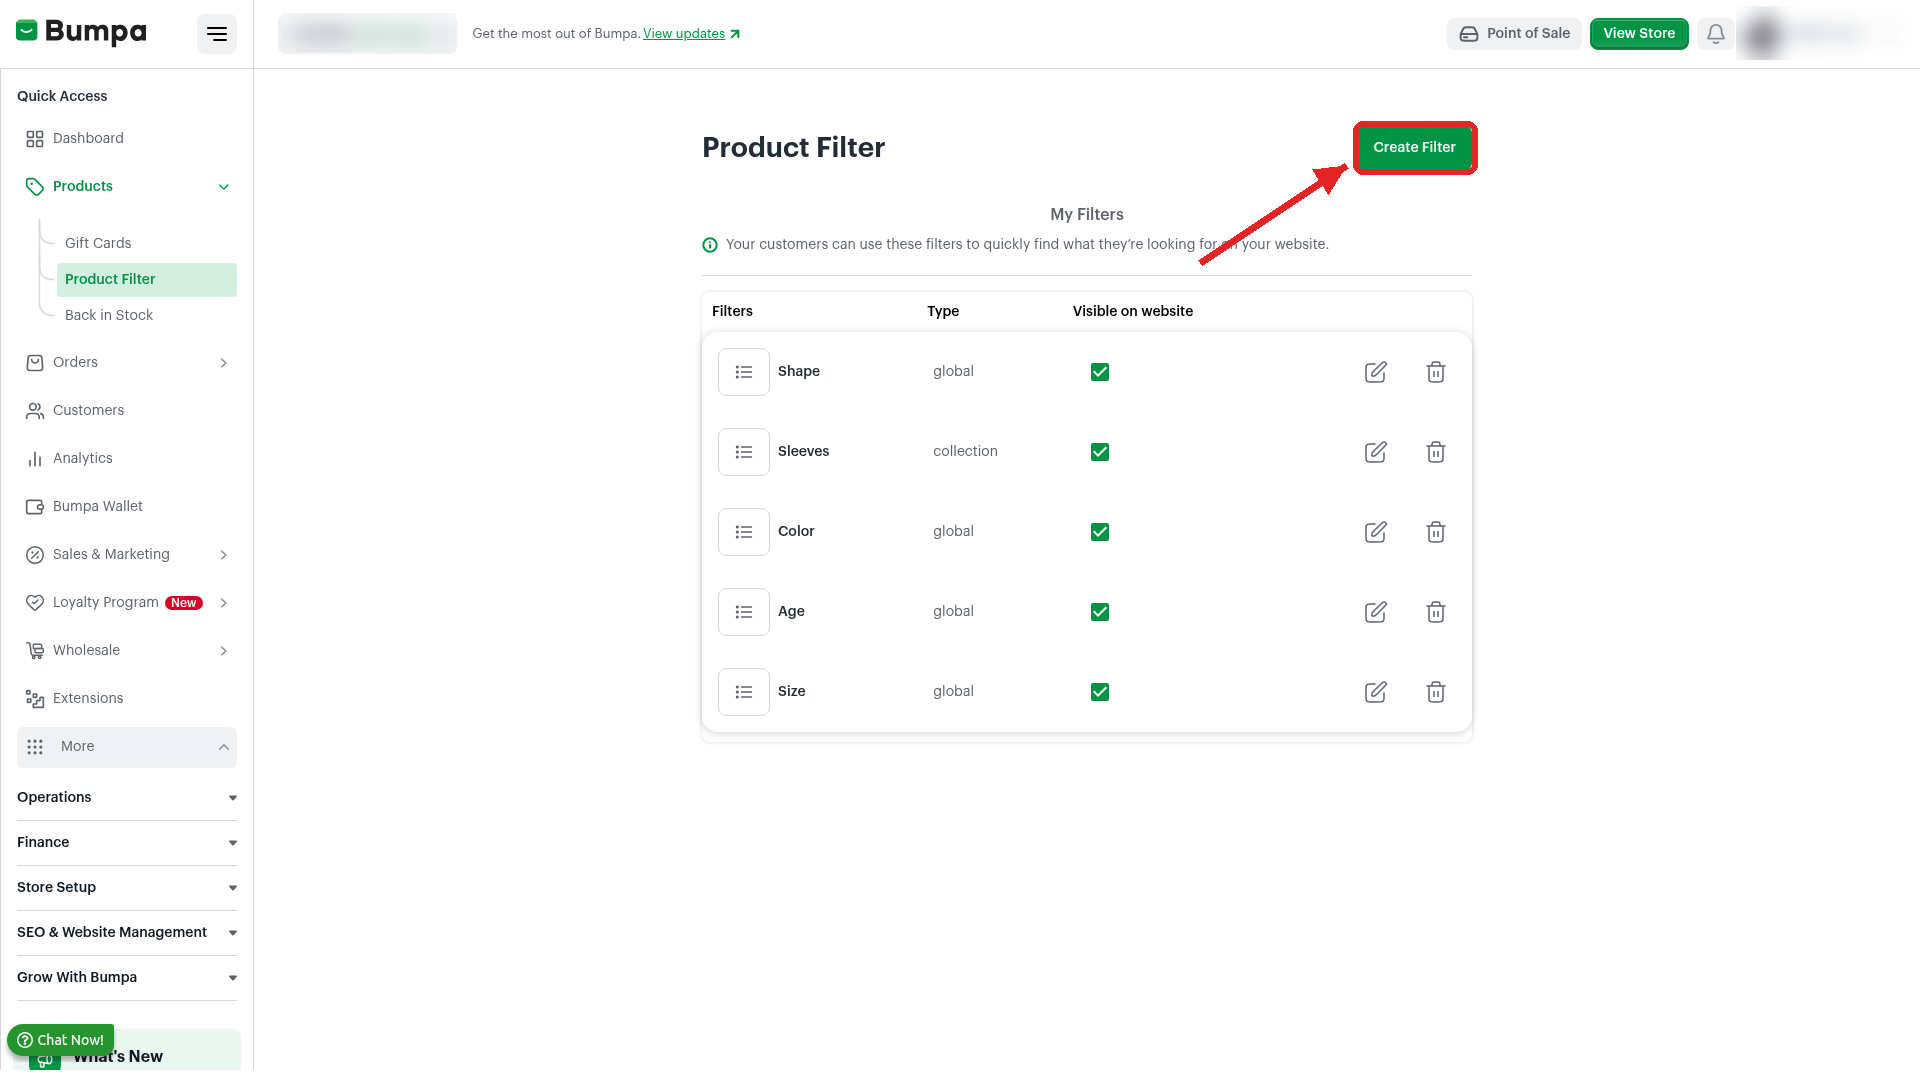
- Click Create Filter at the top right.
- Enter a name in the Name box. Customers see this name on your website.
- Choose Global or Collection in the Type box.
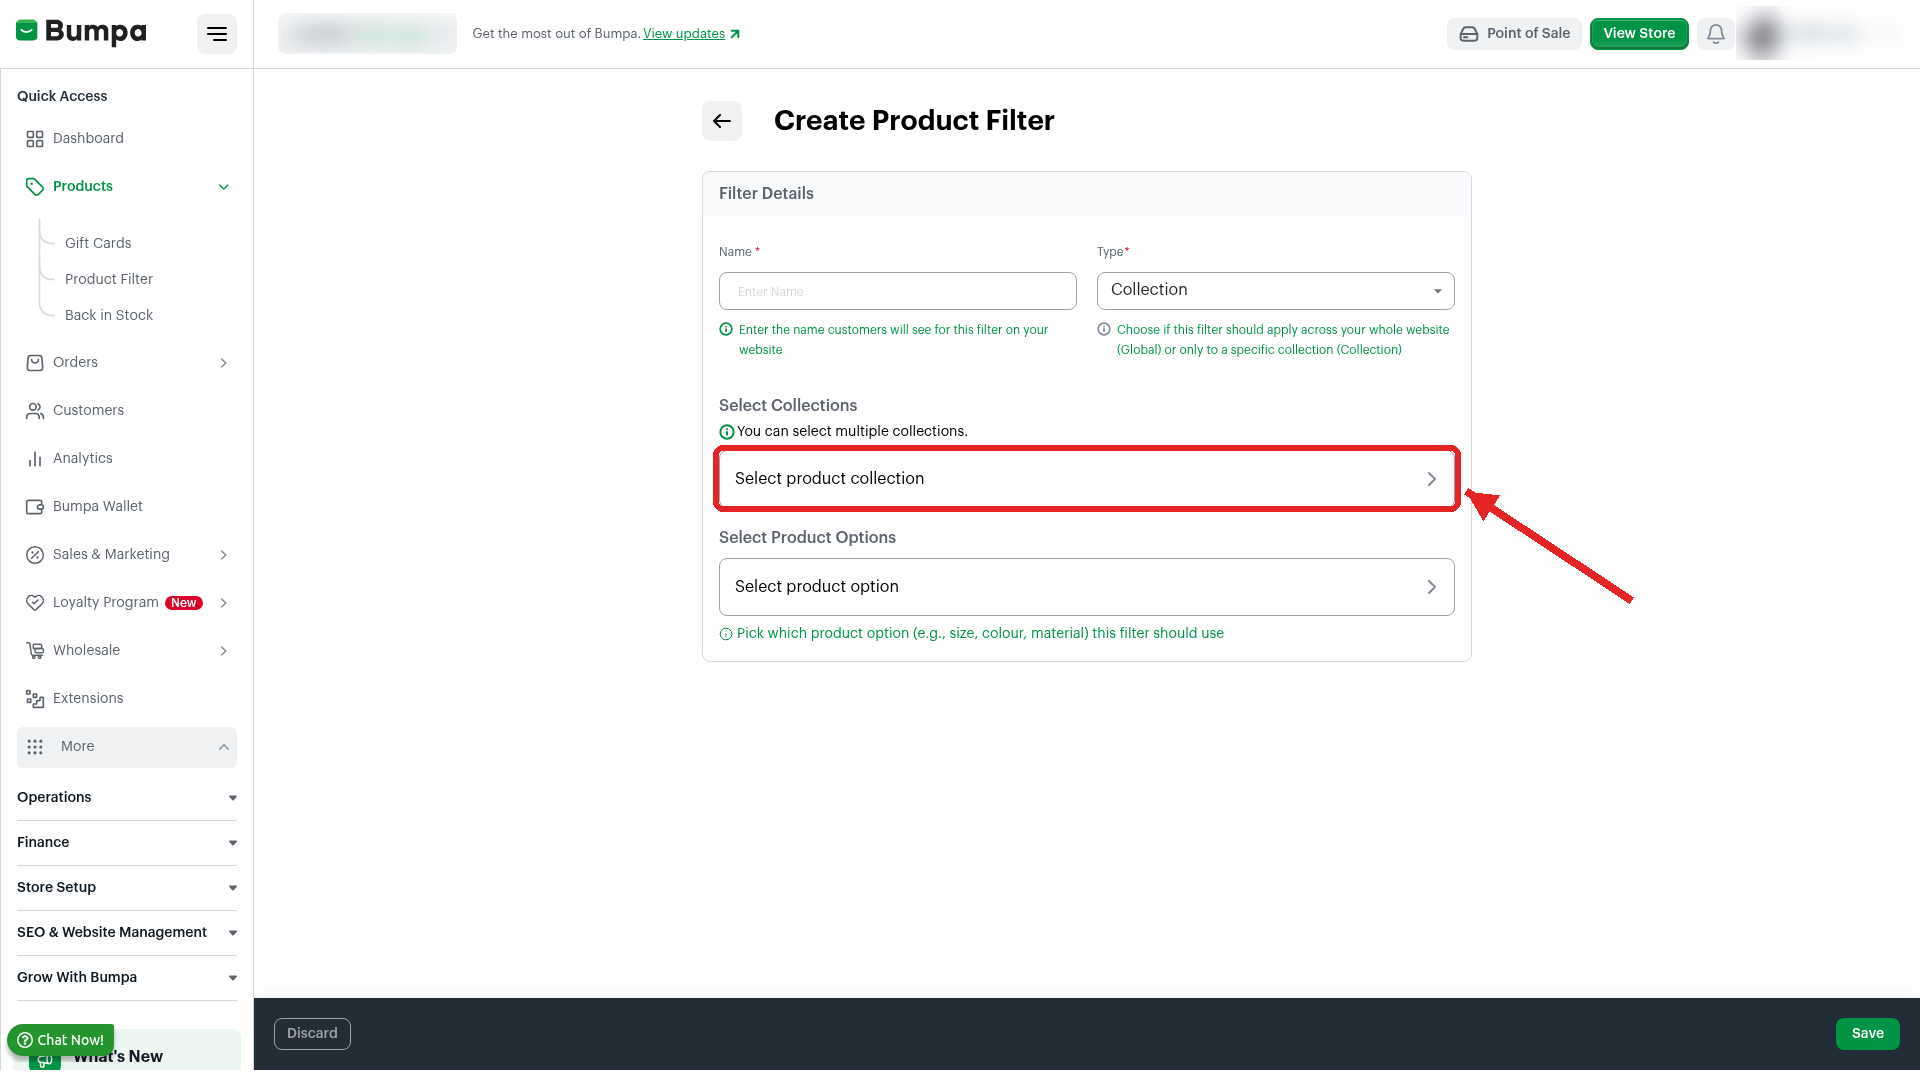
Choose collections (Collection filters only)
Skip this step if you chose Global.
- Click Select product collection under Select Collections.
- Tick each collection the filter should apply to, then click Save.
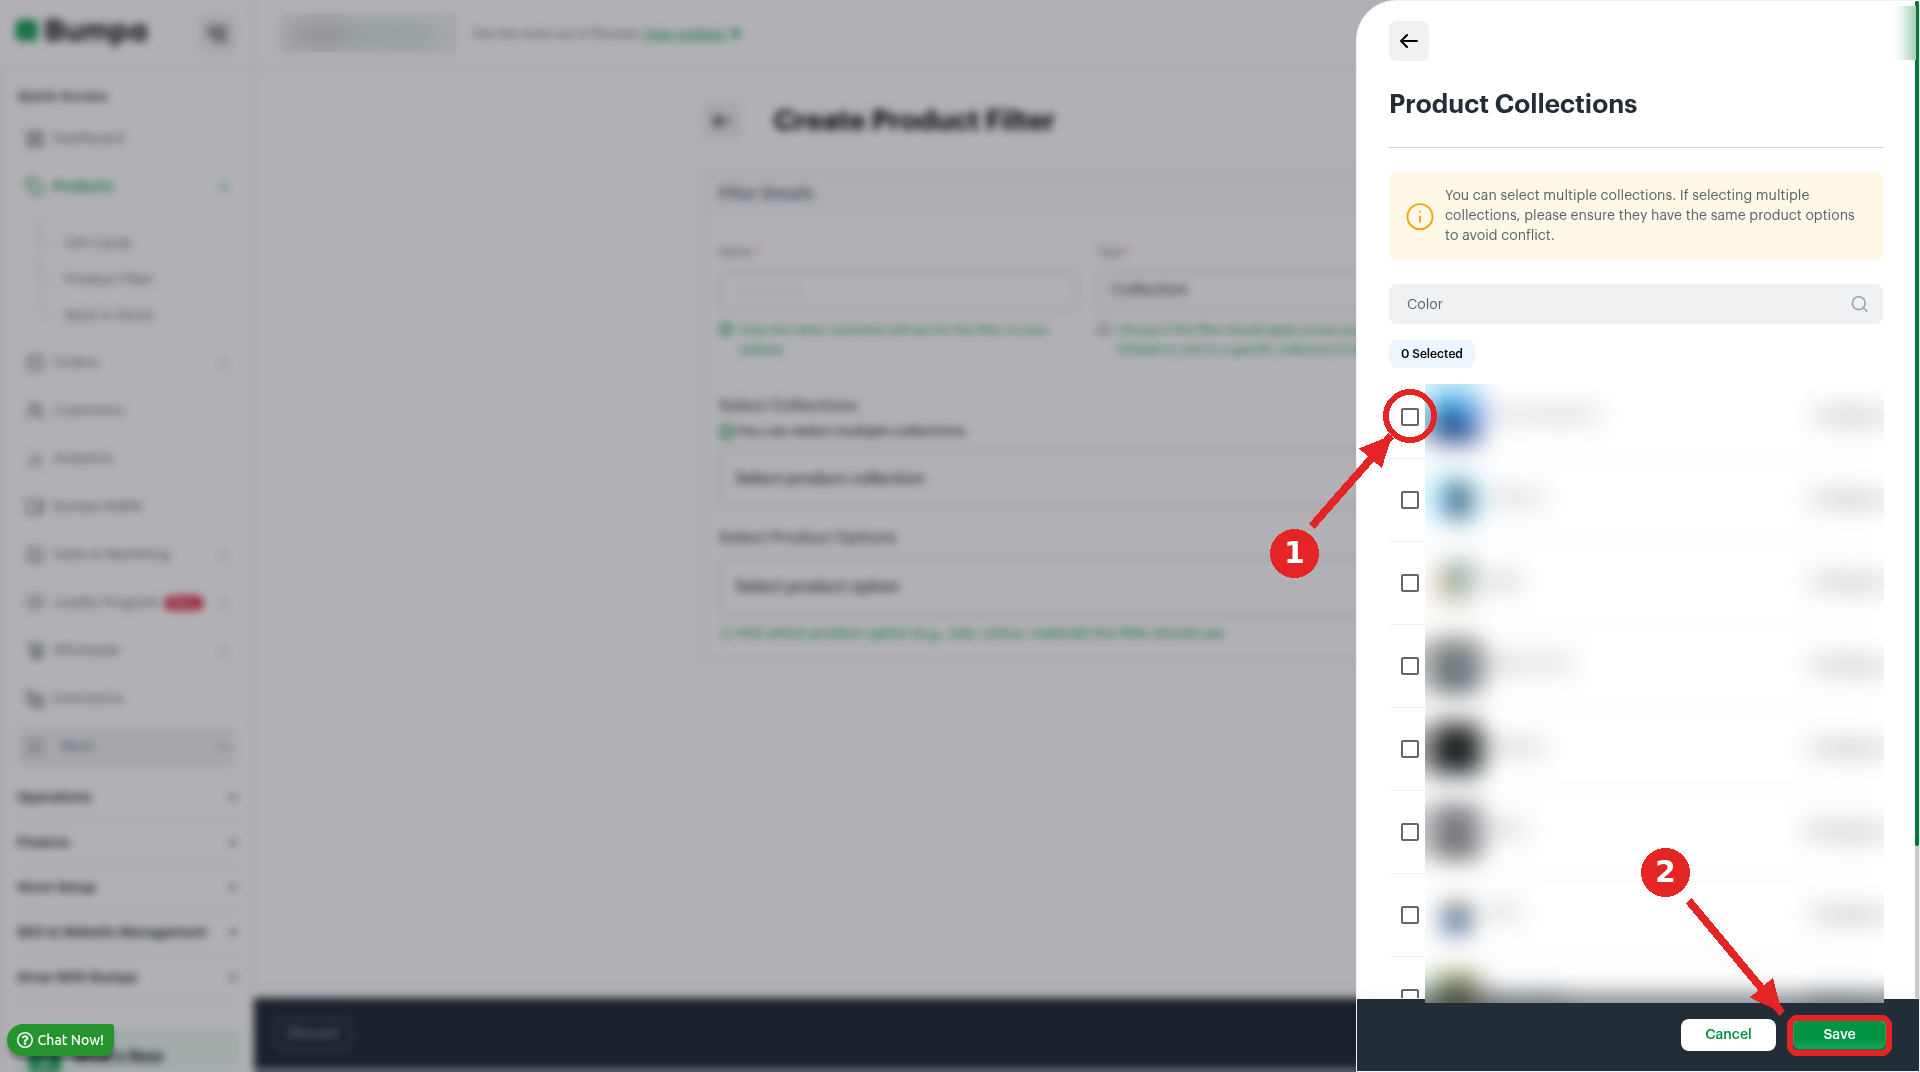
Note: You can select more than one collection. If you do, make sure they all have the same product options. Bumpa warns that different options can cause a conflict.Pick a product option and save
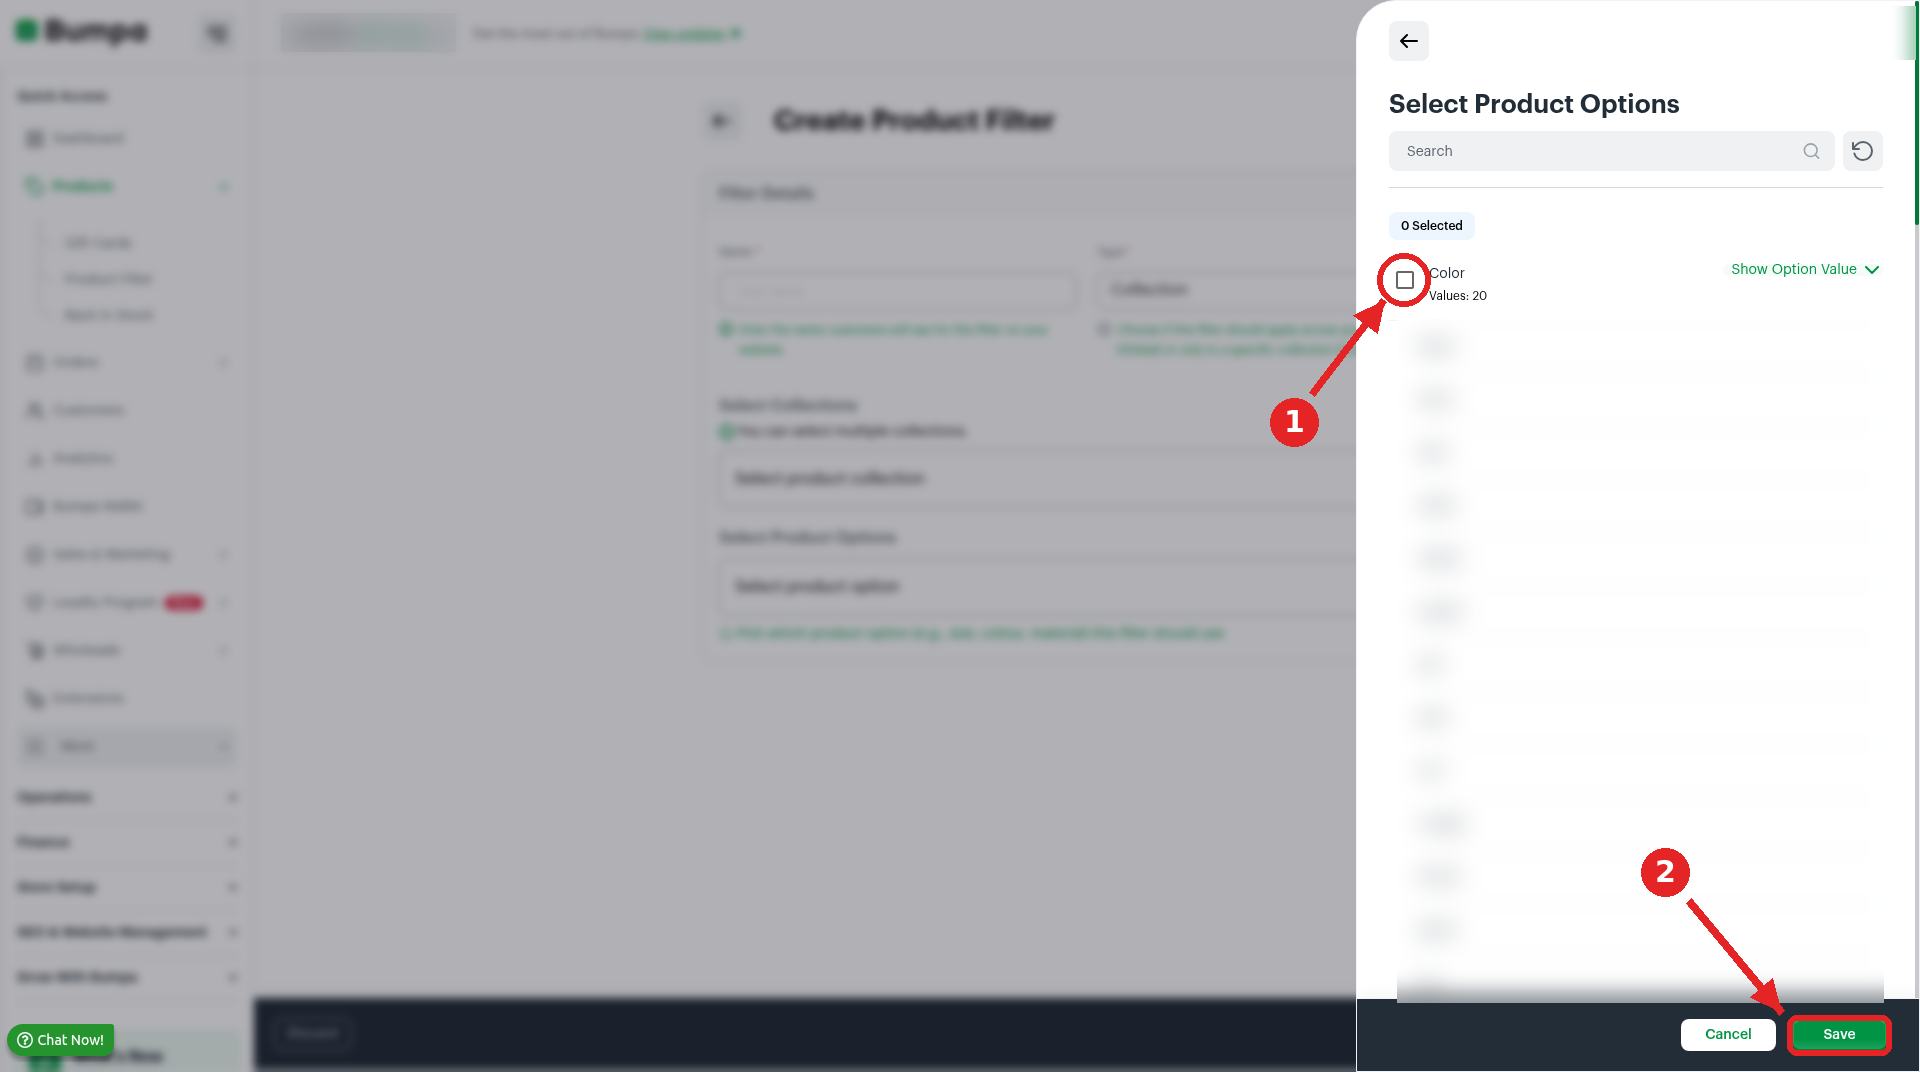
- Click Select product option under Select Product Options.
- Tick the option the filter should use, such as Size, then click Save. You can click Show Option Value to see its values first.
- Click Save at the bottom of the page to create the filter.
Note: Click Cancel at the bottom of the page if you want to leave without saving the changes you made.
Show or hide a filter on your website
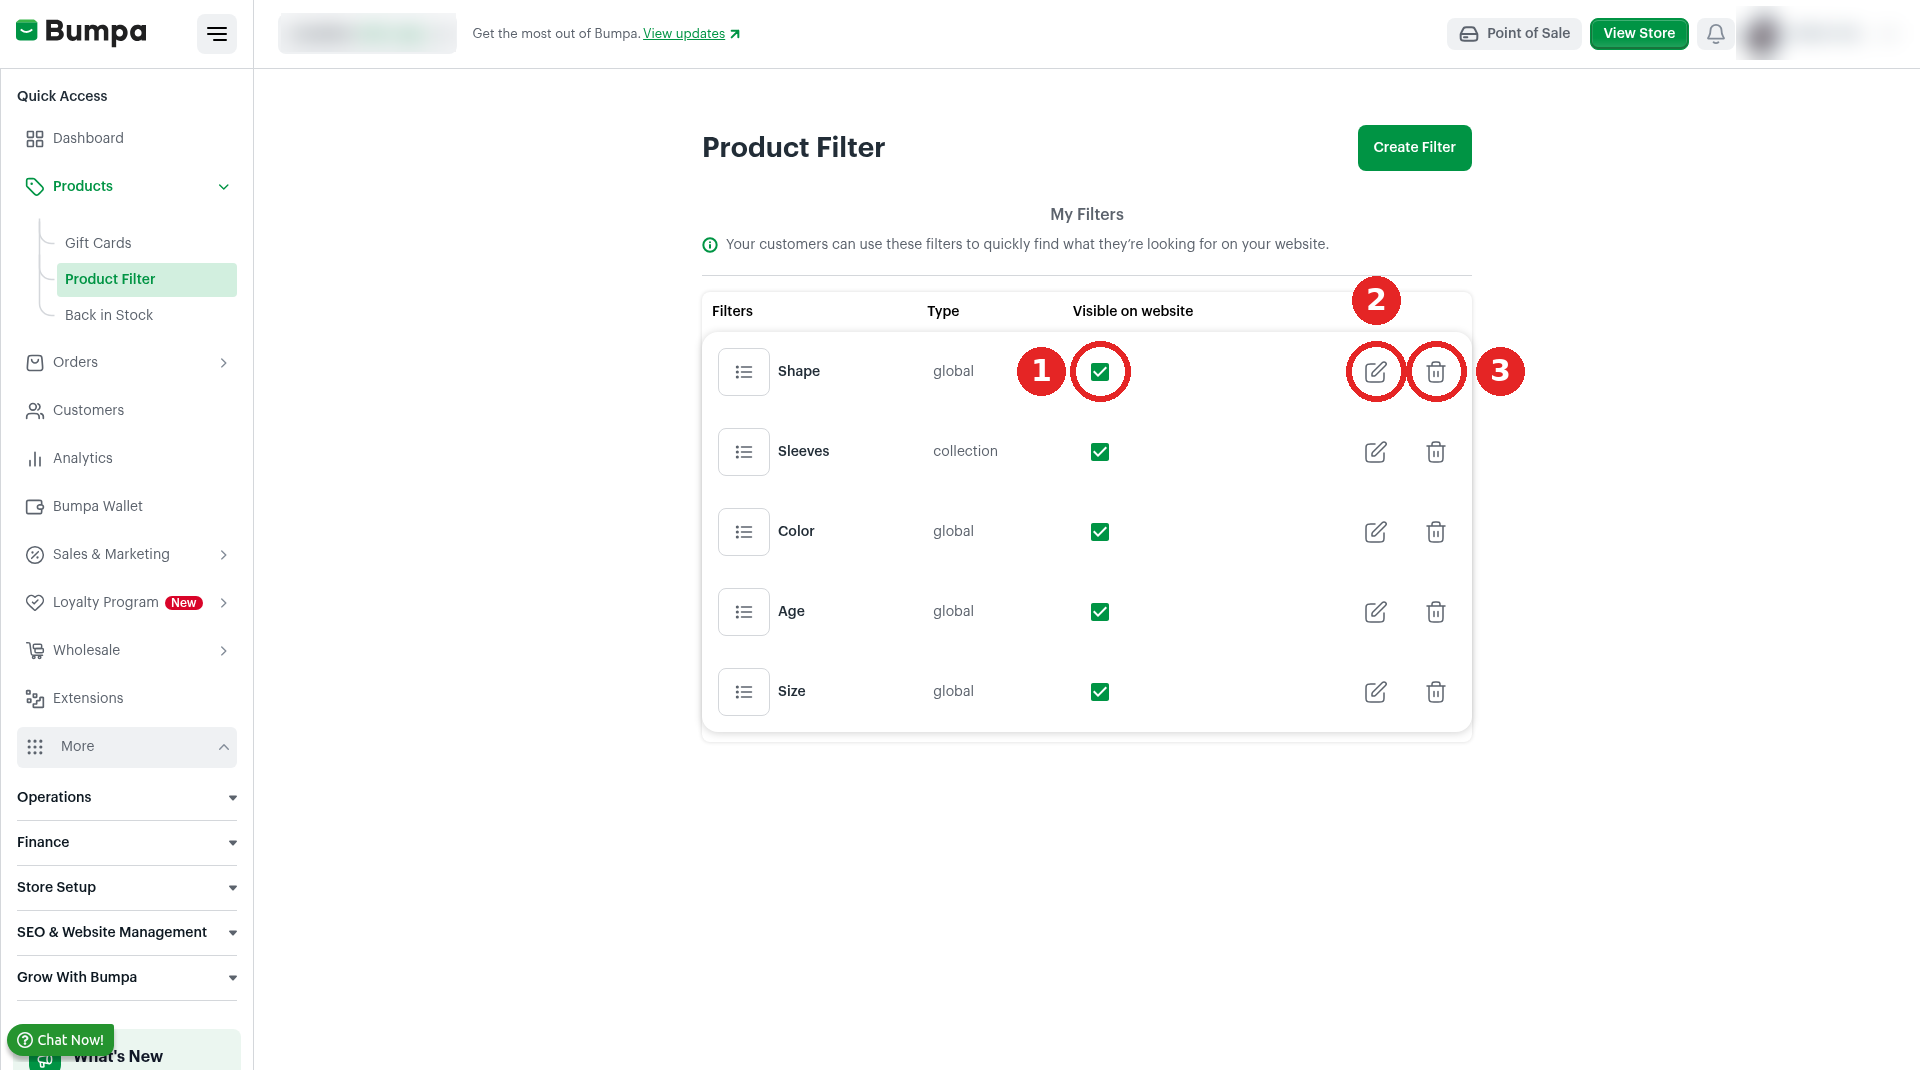
Each filter has a Visible on website box on the Product Filter page. Use it to choose whether customers see that filter.
Go to Products, then Product Filter.
Tick Visible on website next to a filter to show it to customers.
Untick the box to hide the filter.
Edit or delete a filter
Go to Products, then Product Filter.
Click the pencil icon on the filter's row to edit it.
Click the trash icon on the filter's row to delete it.
Additional info:
This feature is only available on paid plans (Pro, Growth, Scale, Premium)
Related articles:
How to Create Product Variations on Bumpa
Was this article helpful?
That’s Great!
Thank you for your feedback
Sorry! We couldn't be helpful
Thank you for your feedback
Feedback sent
We appreciate your effort and will try to fix the article