Running your business across multiple locations means managing expenses for each store separately. With Bumpa’s Expenses by Location feature, you can assign each business expense to the store it belongs to, making it easier to monitor spending and understand how much each location costs to run. You can also filter expenses by category, location, or date range, and search for specific records by amount or keyword. In this guide, we'll show you how to create expenses, assign them to a location, and view their details and history.
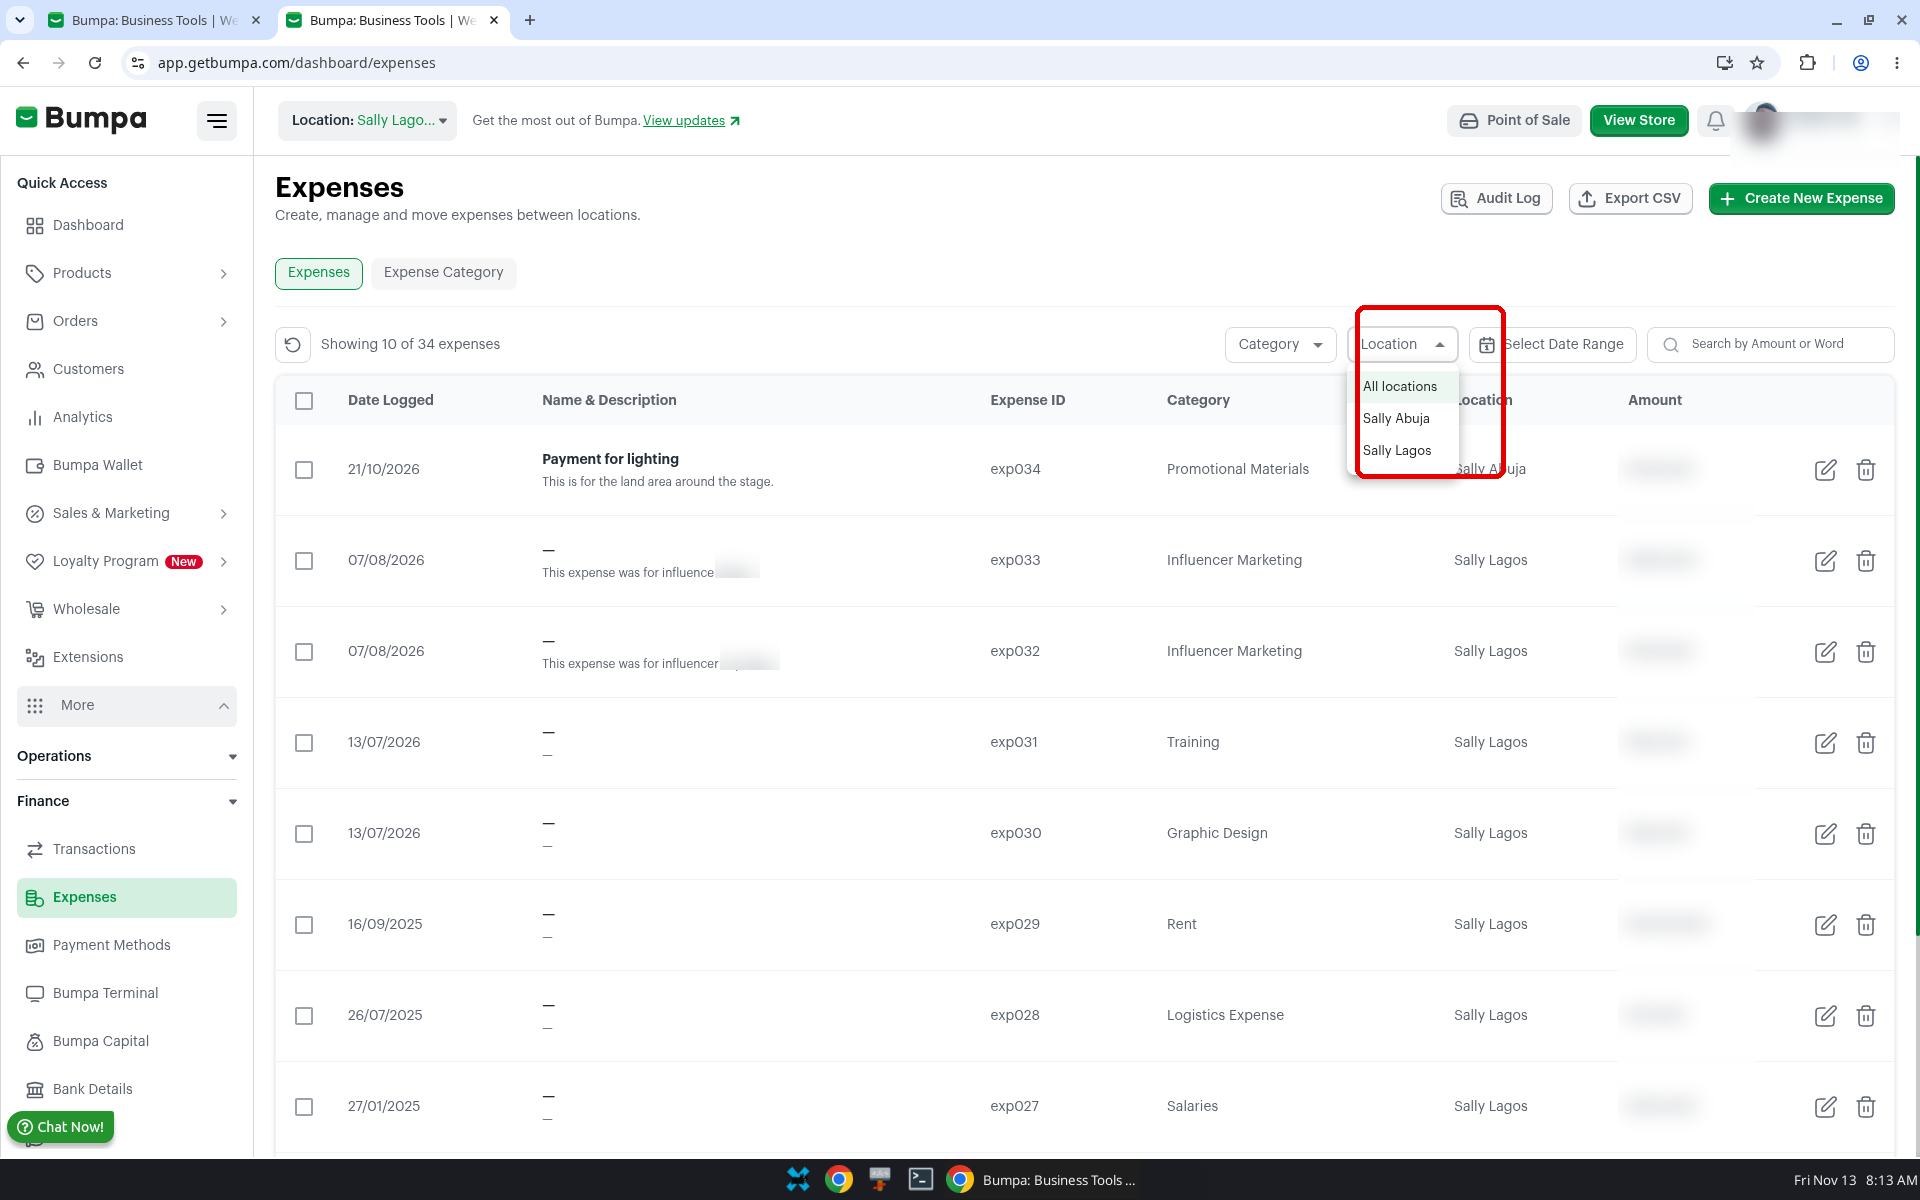
Filter by Category, Location, or Date
Use the Category, Location, and Select Date Range filters to narrow down your expense records. This makes it easier to review spending for a specific store, expense category, or period.
Search by Amount or Keyword
Use the Search by Amount or Word field to find a specific expense. You can search by amount with or without commas, or enter a keyword to find matching expense names and descriptions.
Managing Expenses by Location
You can manage your expenses in four simple steps:
Open the Expenses page.
Filter or search your expense records.
Create a new expense and assign it to the relevant location.
Review the expense details and history.
To get started, open the Expenses page
- Log in to your Bumpa dashboard app.getbumpa.com
- Click More, then Finance, then Expenses.
The list columns are Date Logged, Name & Description, Expense ID, Category, Location and Amount.
Note: The Date Logged column shows the date the expense was recorded, not the expense date you enter on the form.Filter or search the list
- Click Category, Location or Select Date Range to narrow the list.
- Use Search by Amount or Word to find a specific expense.
Create an expense and choose its location
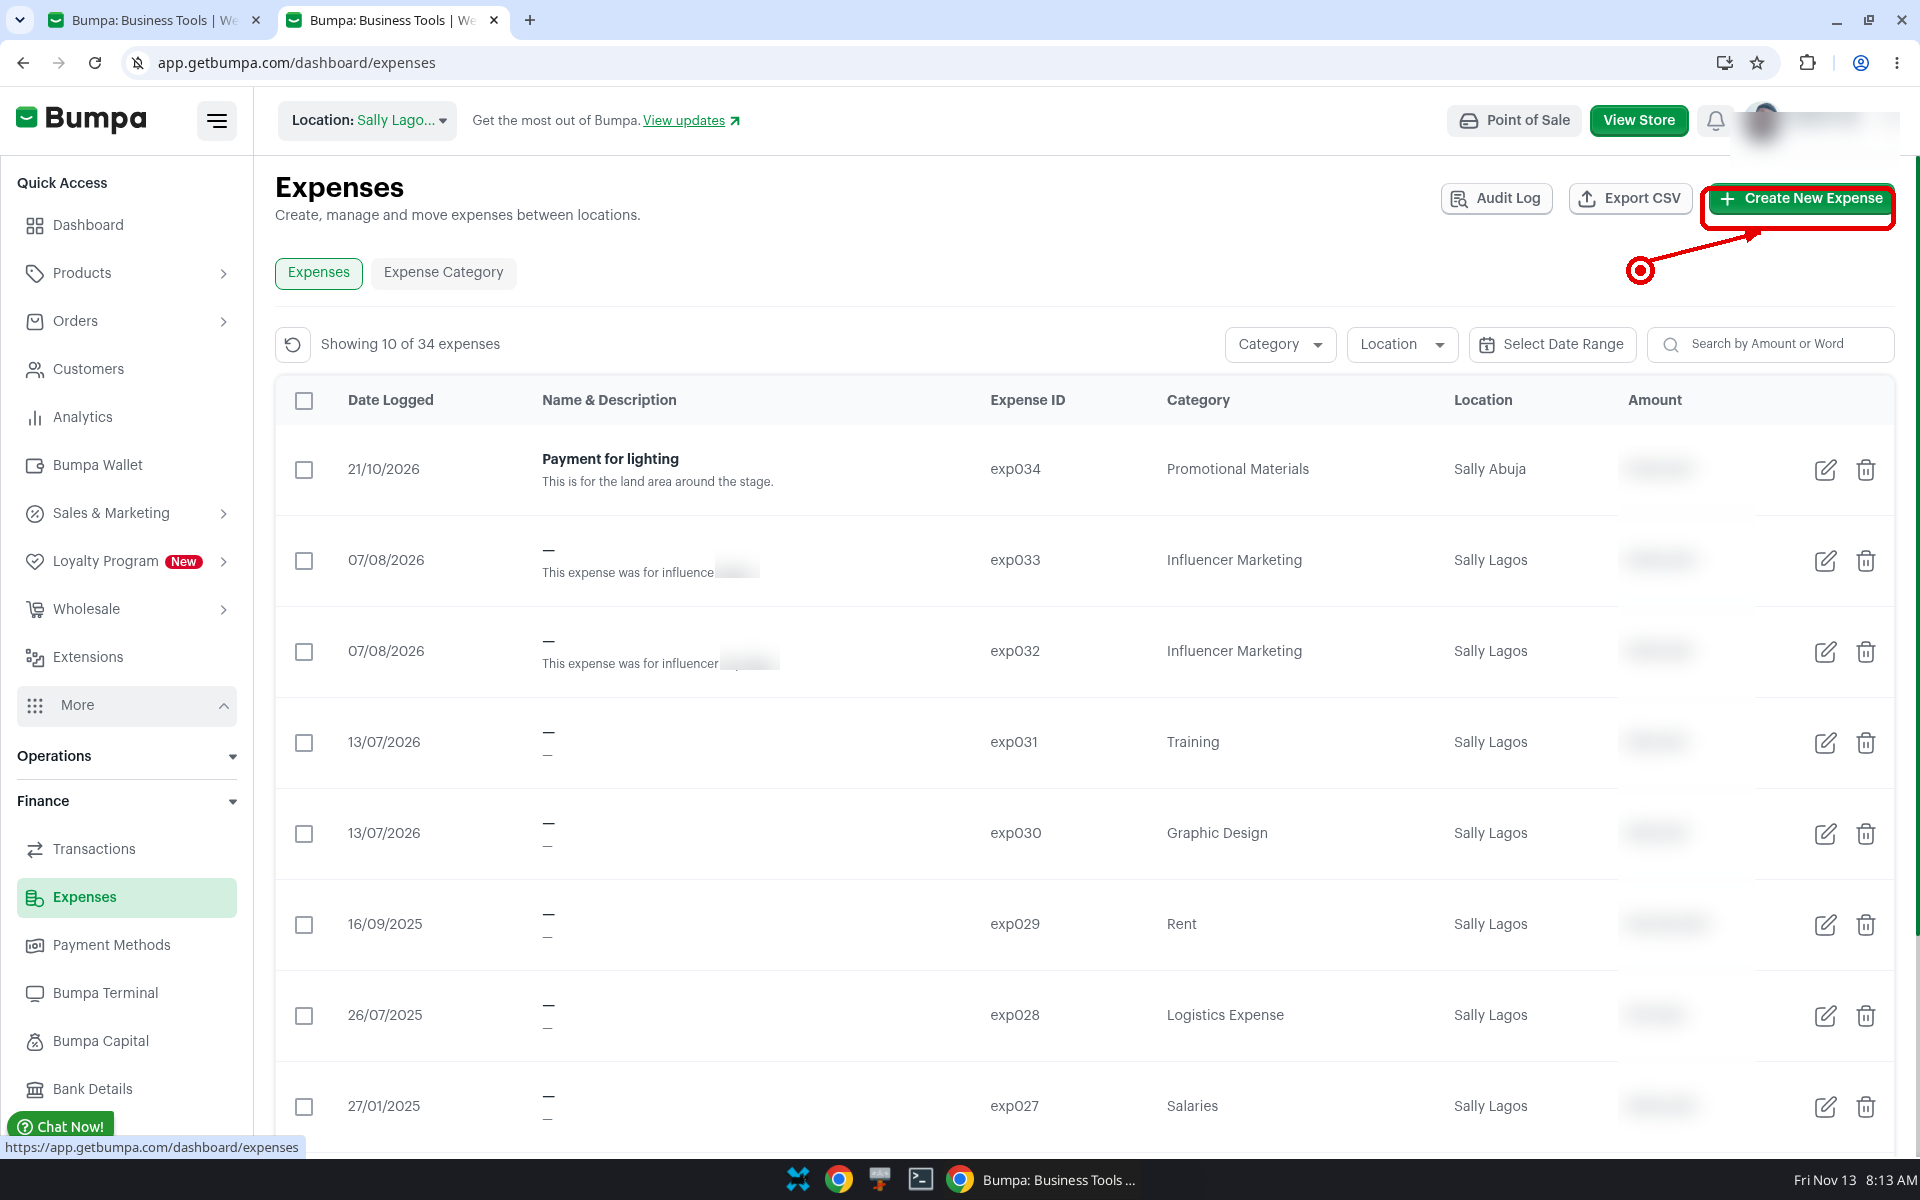
- Click Create New Expense. The Create Expense form opens.
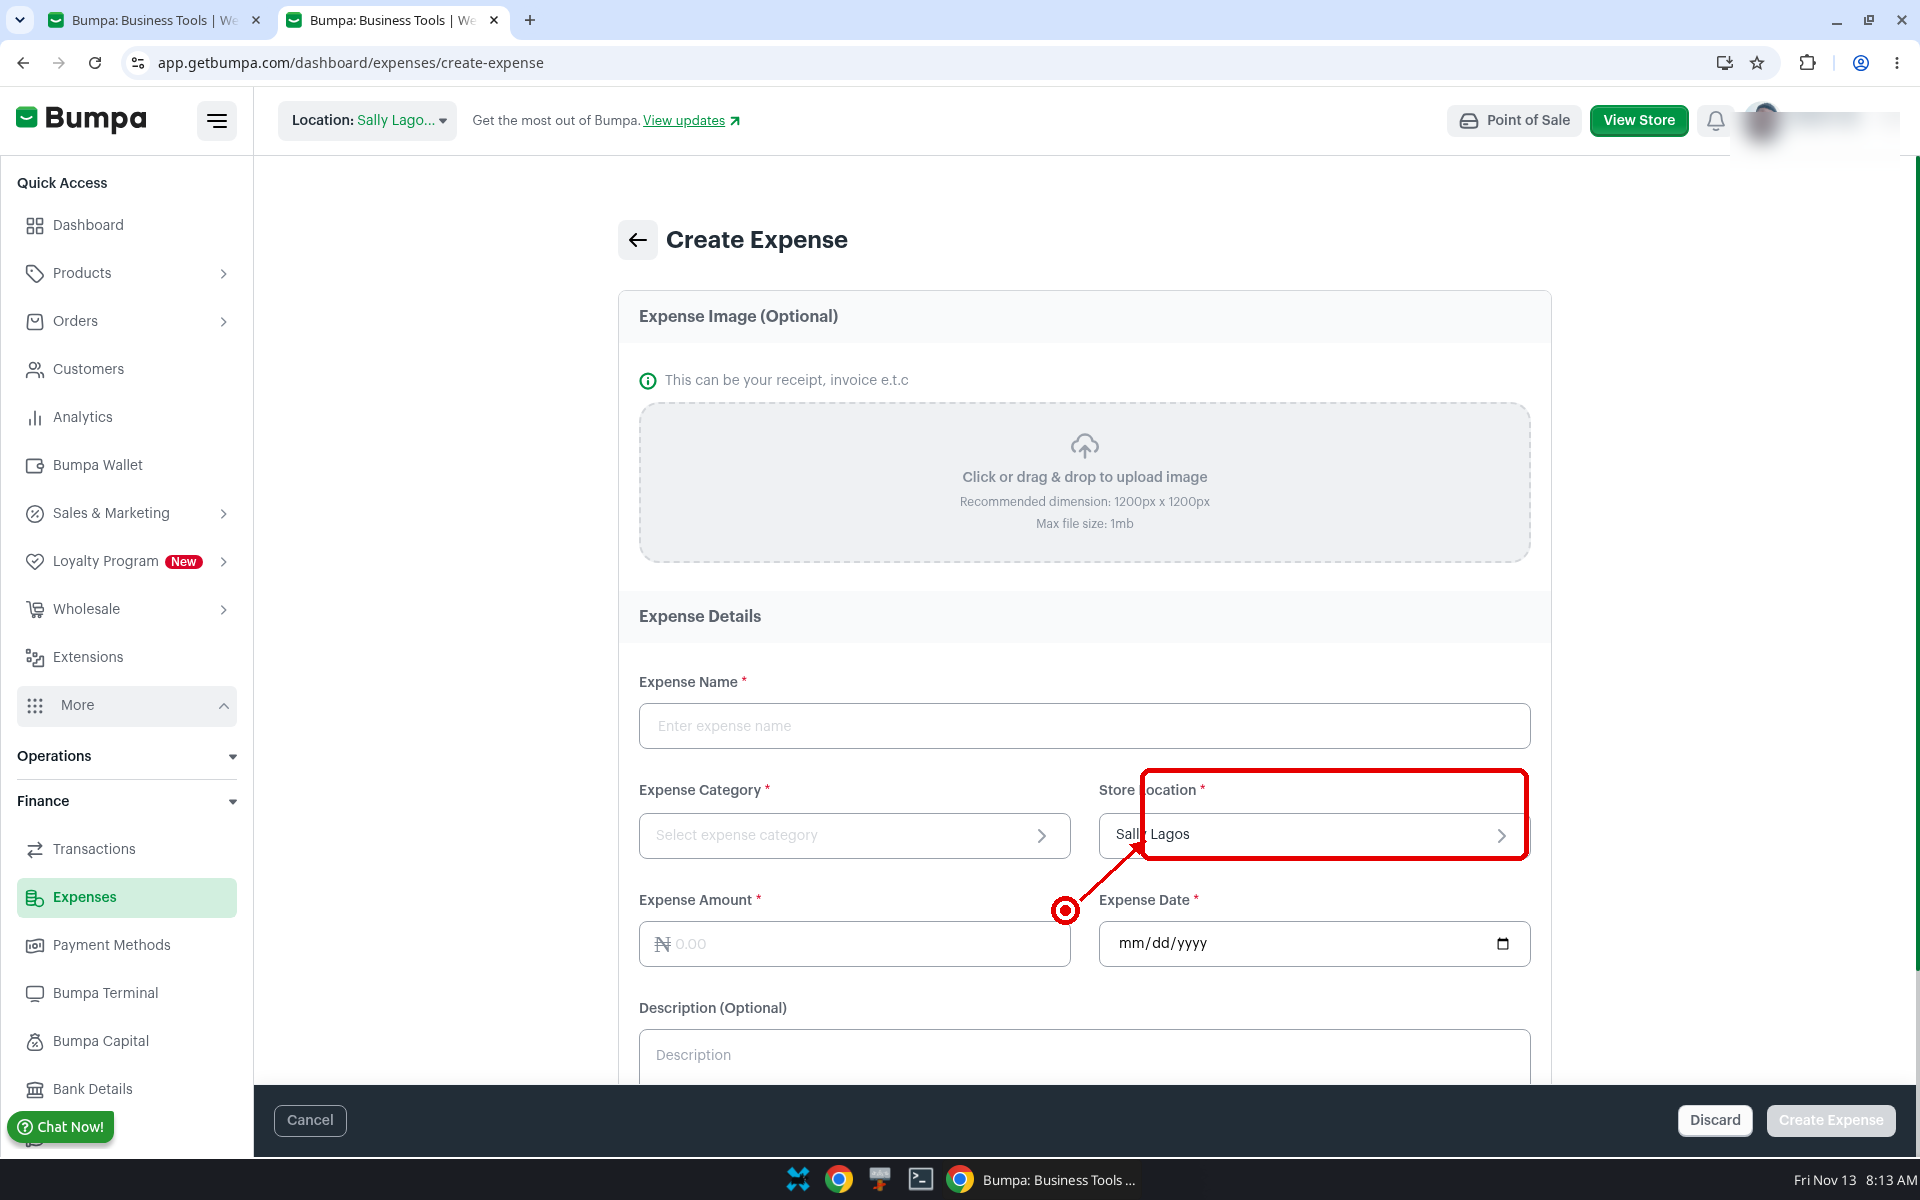
- Enter the required fields: Expense Name, Expense Category, Store Location, Expense Amount and Expense Date.
- Add a Description or an Expense Image if you want to. The image help text says "This can be your receipt, invoice e.t.c".
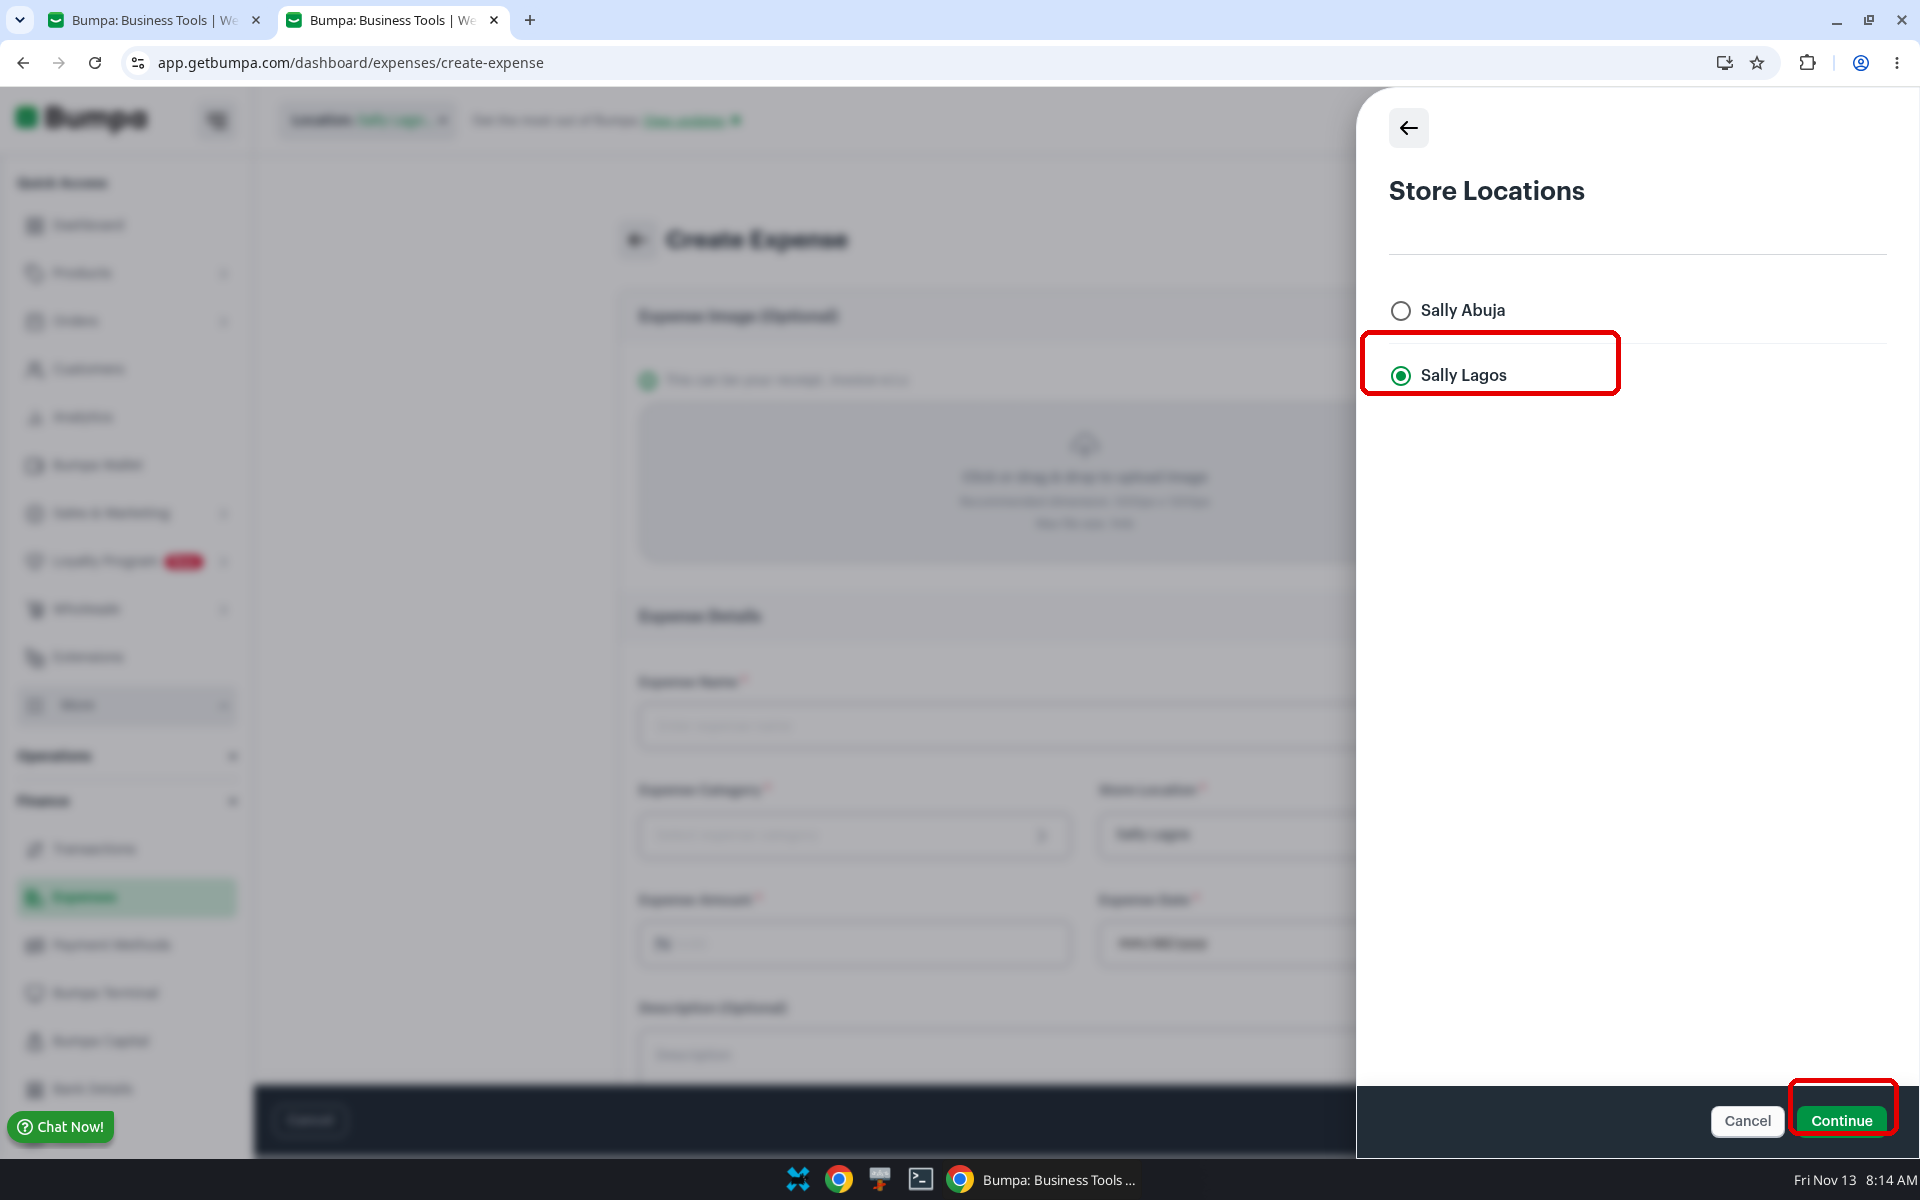
- Click Store Location to open the Store Locations picker. Your current location is already selected.
- Choose the location, then click Continue.
- Click Create Expense.
Note: For Expense Image, the recommended size is 1200px x 1200px, and the maximum file size is 1mb.

Every expense belongs to one location. You only see the locations you have access to
Review the expense details and history
- Click an expense in the list. The Expense Details panel opens.
- Use Change Location to move the expense to another location, or click Edit to update its details.
- Scroll to Expense History to see "Timelines of activity as they happen in real time".
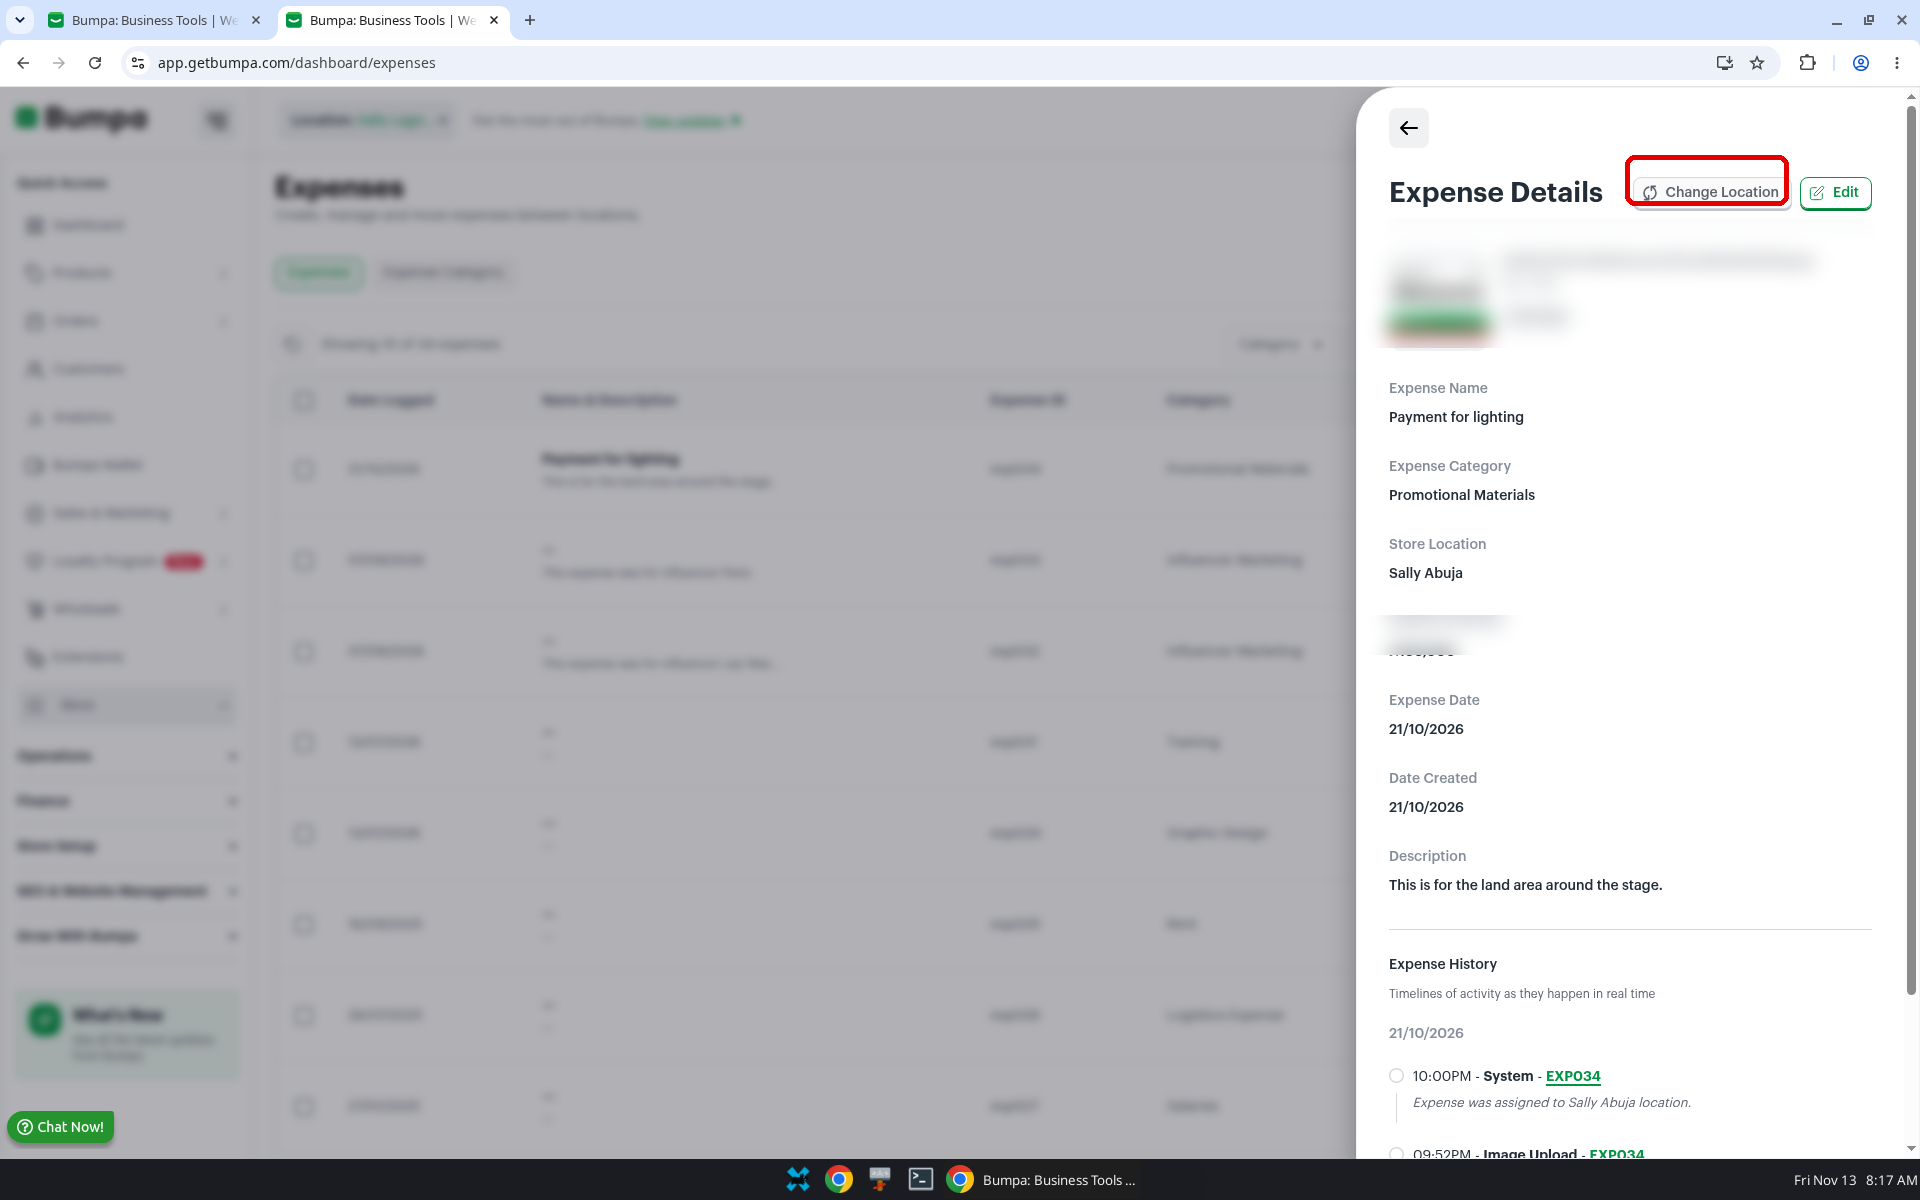
Note: Editing an expense does not change its location. Use Change location if you need to move it.
Related Articles
Was this article helpful?
That’s Great!
Thank you for your feedback
Sorry! We couldn't be helpful
Thank you for your feedback
Feedback sent
We appreciate your effort and will try to fix the article