As a business owner, you may run more than one store location or want withdrawals to go to a different bank from the one customers see. Bumpa lets you save multiple bank accounts, set defaults, and link an account to each location. In this article, learn how to add and manage multiple bank accounts.
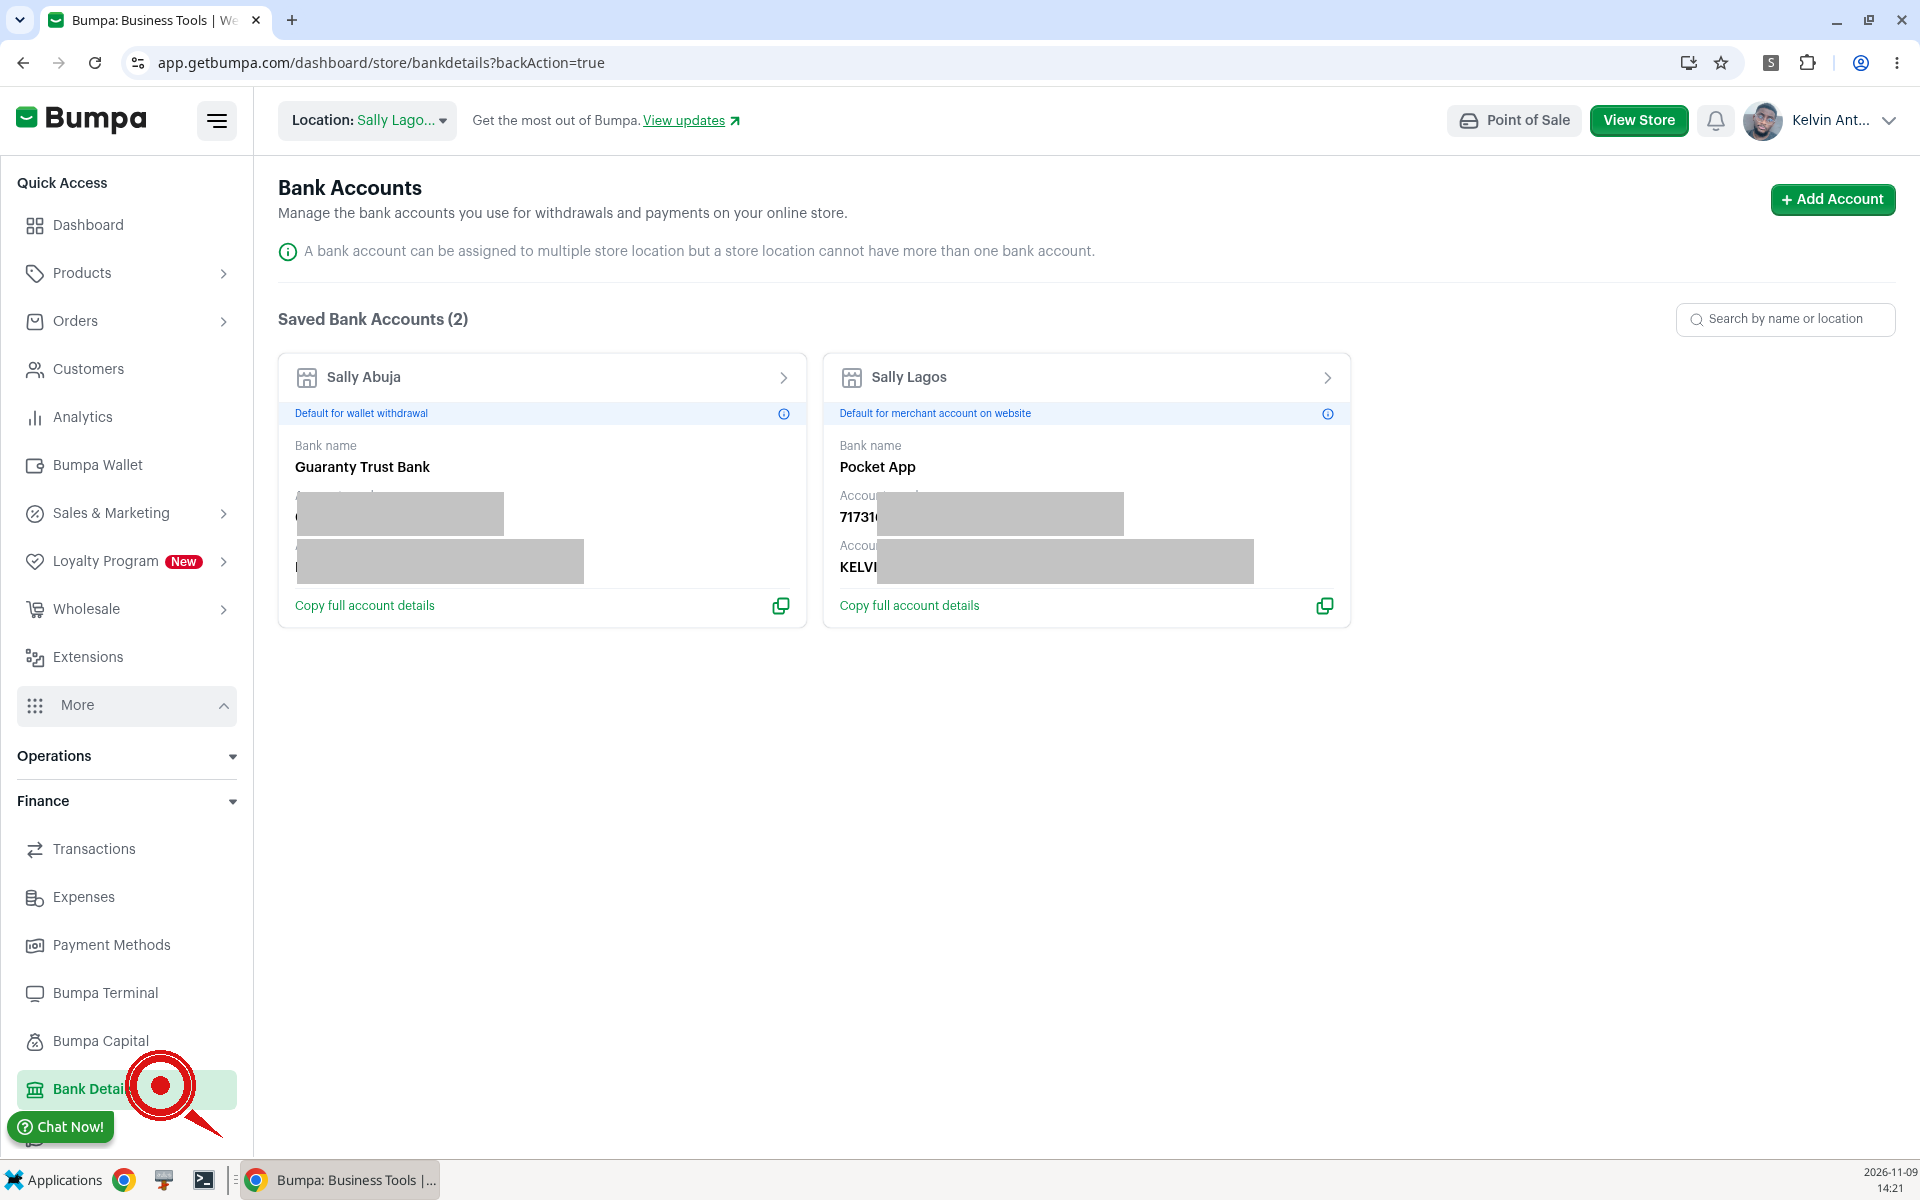
1. Open Bank Accounts
The Bank Accounts page says: "Manage the bank accounts you use for withdrawals and payments on your online store."
Note: Multiple bank accounts are available to Nigerian merchants on the Bumpa web dashboard and mobile app.
To open Bank Accounts, follow these steps:
Log in to your Bumpa dashboard at https://app.getbumpa.com.
Click More, then Finance, then Bank Details.
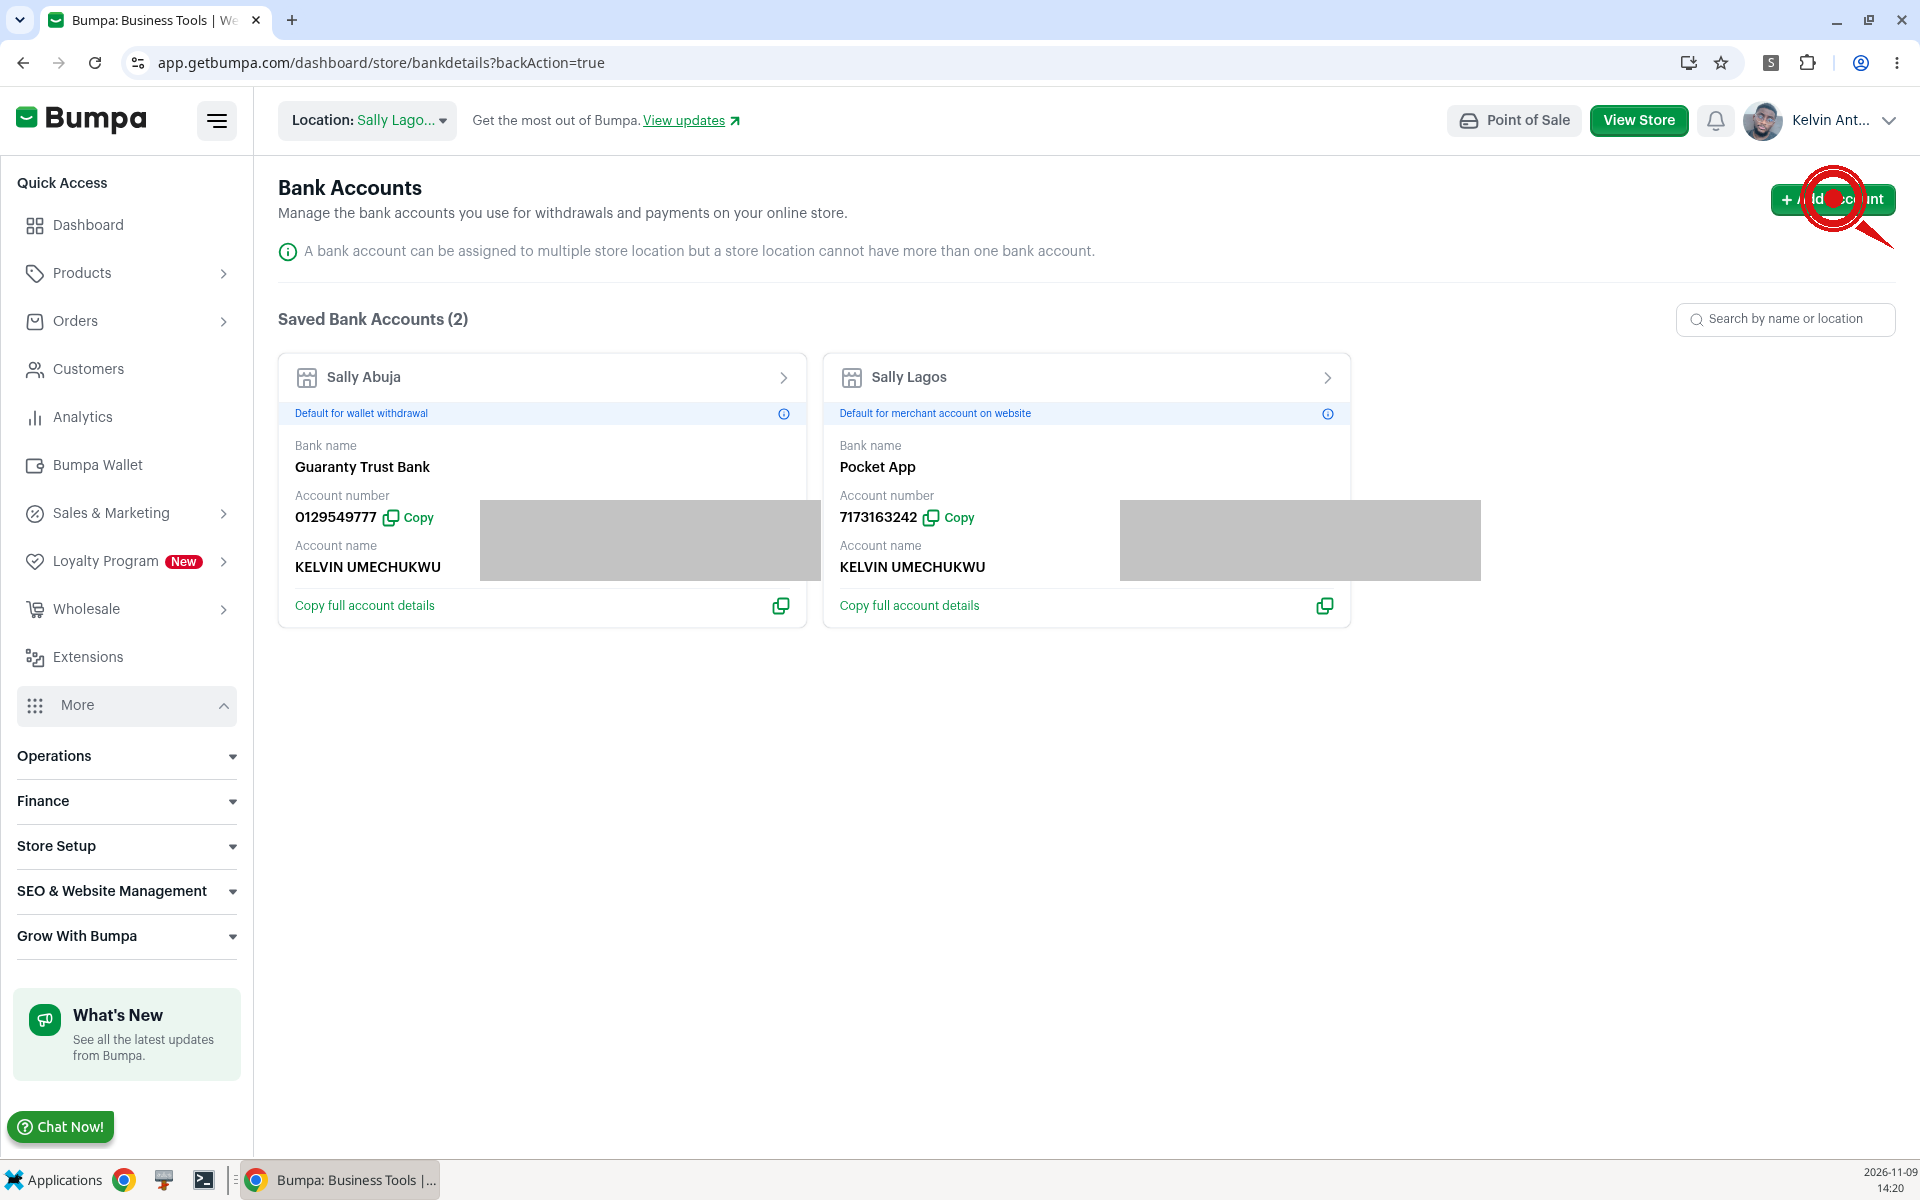
Note: You can assign a bank account to multiple store locations, but a store location can have only one bank account.
2. Add a bank account
You can add as many bank accounts as you need. The first account you add becomes your default. If you already had a bank account on Bumpa, it is now your default.
To add a bank account, follow these steps:
Click Add Account. The Add New Bank Account form opens.
Choose the Bank name.
Enter the Account Number.
Check the account name. Bumpa fills it in from the bank and account number. You can't type it yourself.
Optional: pick a Store Location. The note under this field says this account will be shown to customers paying by Merchant account at that location on your website.
Turn on Set as default merchant account if you want this account used for locations with no account assigned to them.
Turn on Set as default withdrawal account if you want this to be your default when you withdraw from your wallet. You can still change it during withdrawal.
Click Add Account.
Note: From your second account onwards, Bumpa sends an OTP to your registered email. Bumpa saves the account only after you enter the OTP.
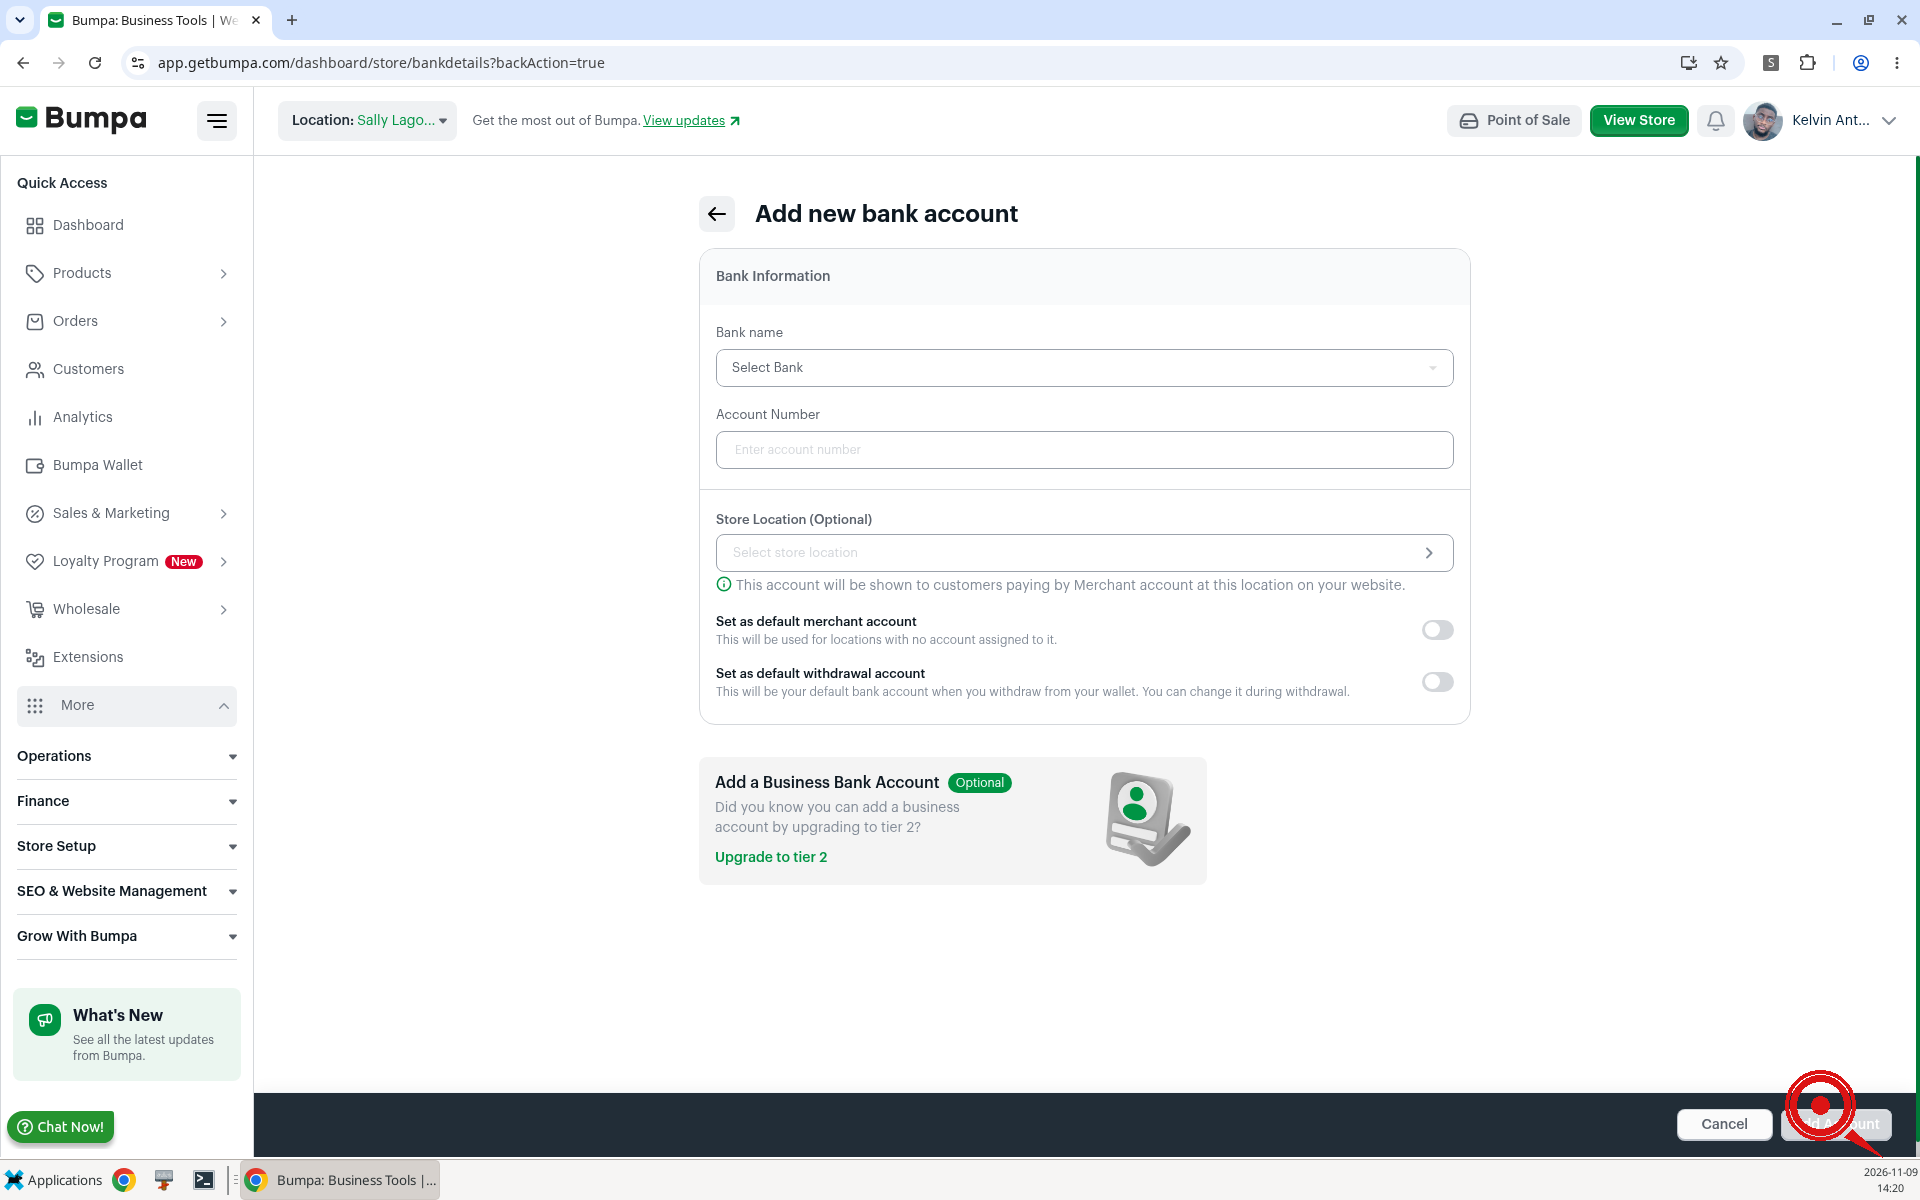
Example: Ifeoma adds her GTBank account, turns on Set as default withdrawal account, and clicks Add Account.
Note: Every account must match your KYC details, or Bumpa rejects it. On Tier 1, the account name must match your profile (BVN) name. On Tier 2, it must match your business name or your profile name. If you haven't finished KYC, Bumpa takes you to the KYC steps first.
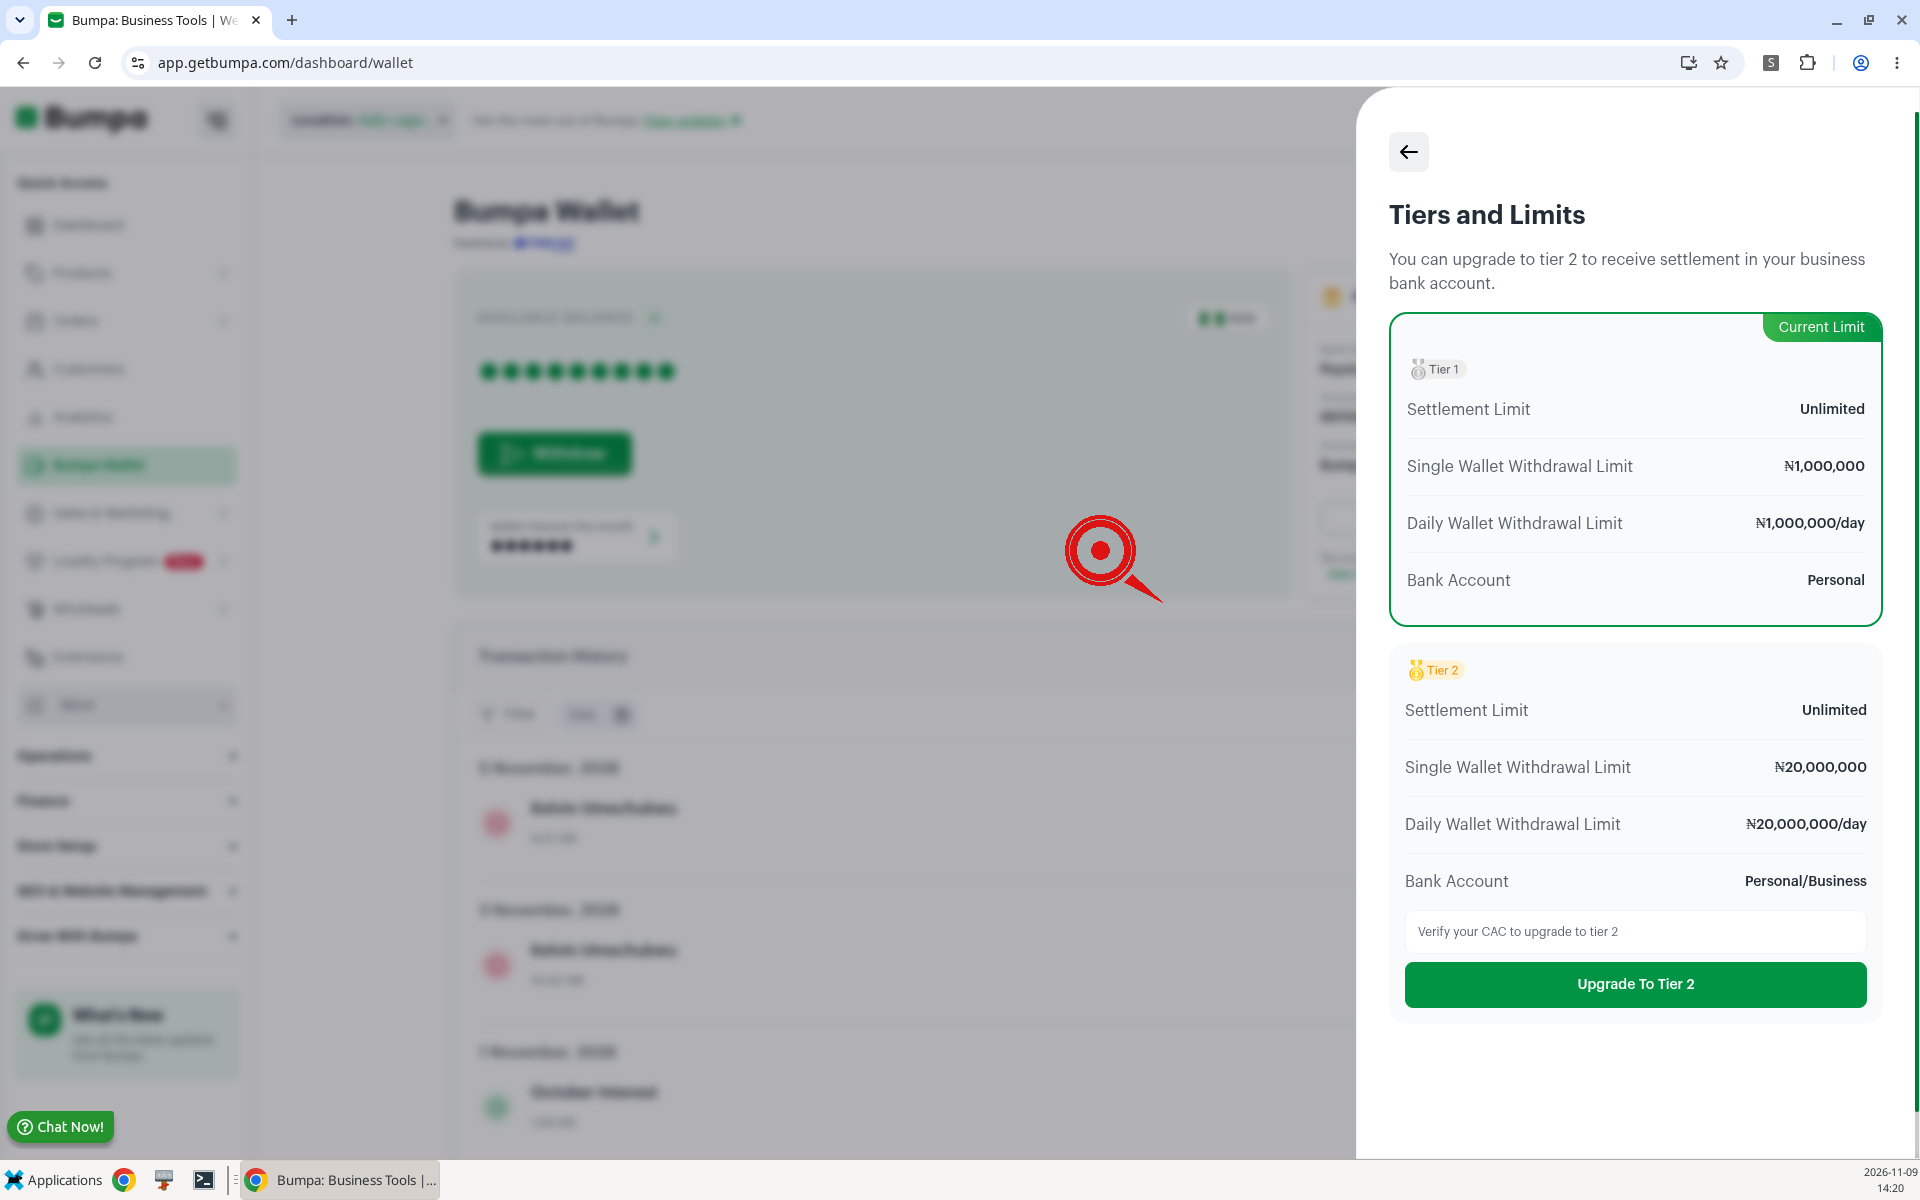
Note: Tier 1 allows personal accounts. Business accounts need tier 2, which needs CAC verification. On Tiers and Limits, you will see "Verify your CAC to upgrade to tier 2." On the add form, you may also see "Add a Business Bank Account (Optional)" with Upgrade to tier 2.
3. Assign a store location
If Merchant Account is turned on in Payment Methods, you can link a bank account to one or more store locations. Customers who pay by Merchant Account on your website see the account for their location. Locations with no account show your default merchant account. Store Location is optional, and you pick from your locations list.
To assign a location, follow these steps:
Click Store Location (Optional) on the Add new bank account form.
Select the location you want, then continue.
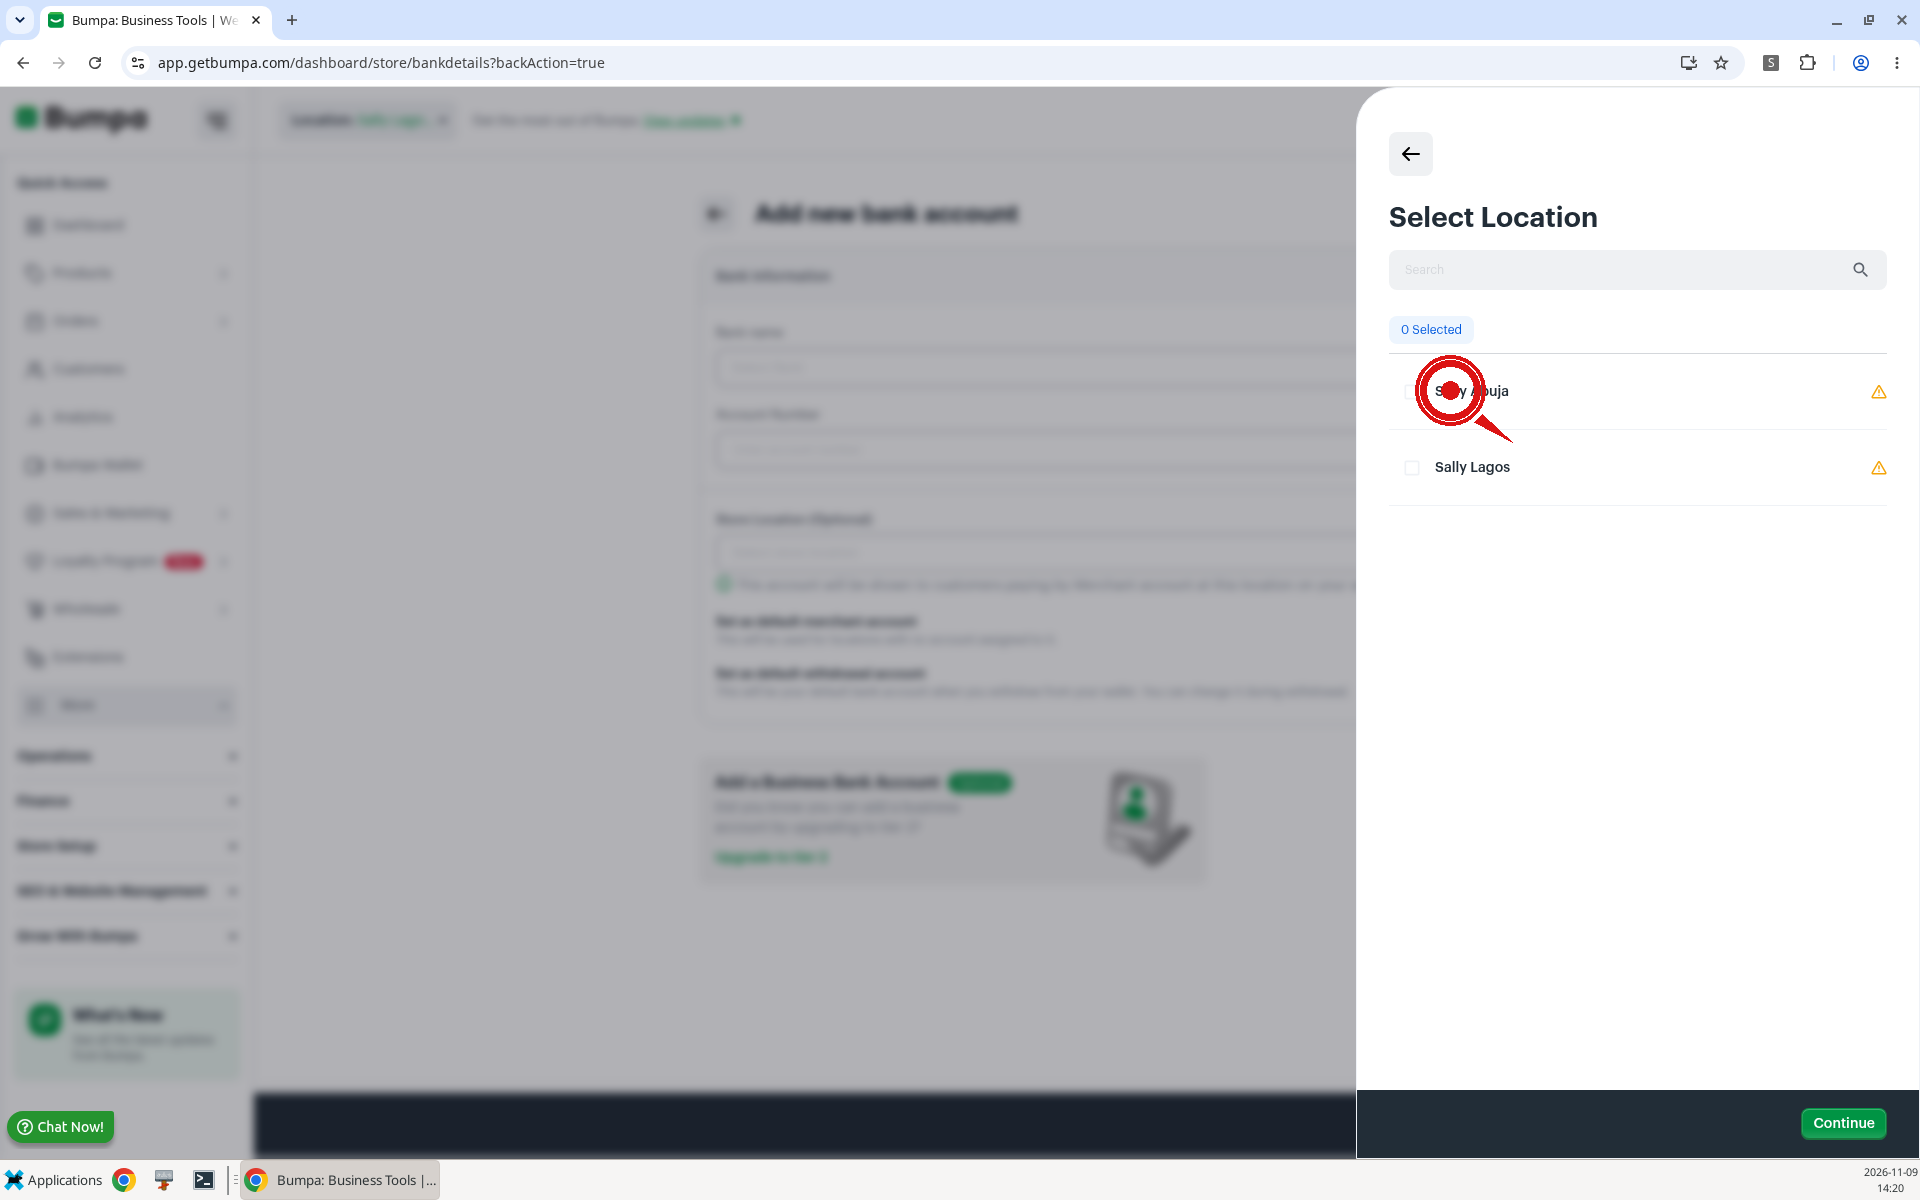
If a location already has an account, you will see: "This location is already tied to an account."
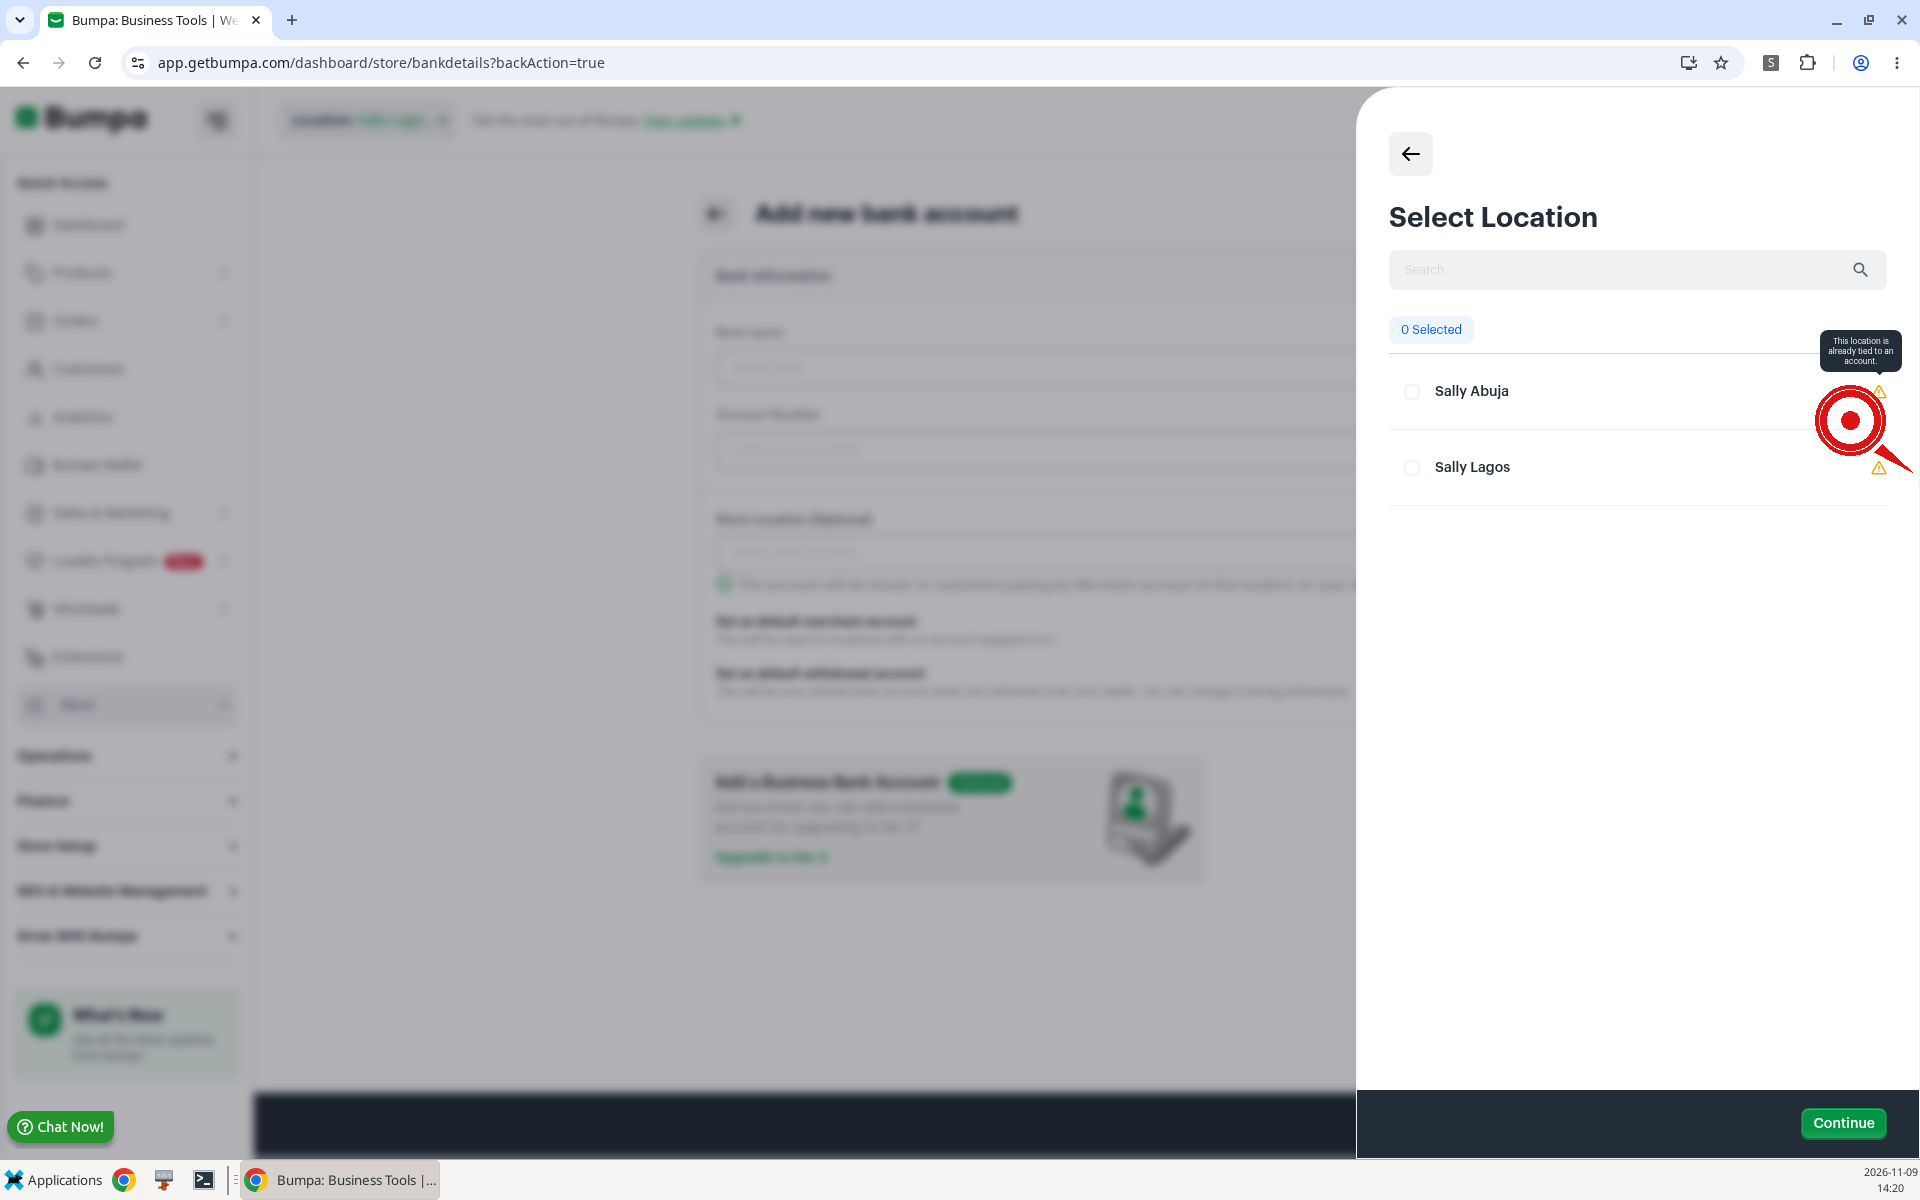
Example: Kemi tries to link Sally Abuja and sees that it is already tied to another account, so she picks Sally Lagos instead.
Note: You only see the Store Location field if Merchant Account is turned on in Payment Methods.4. Edit or delete a bank account
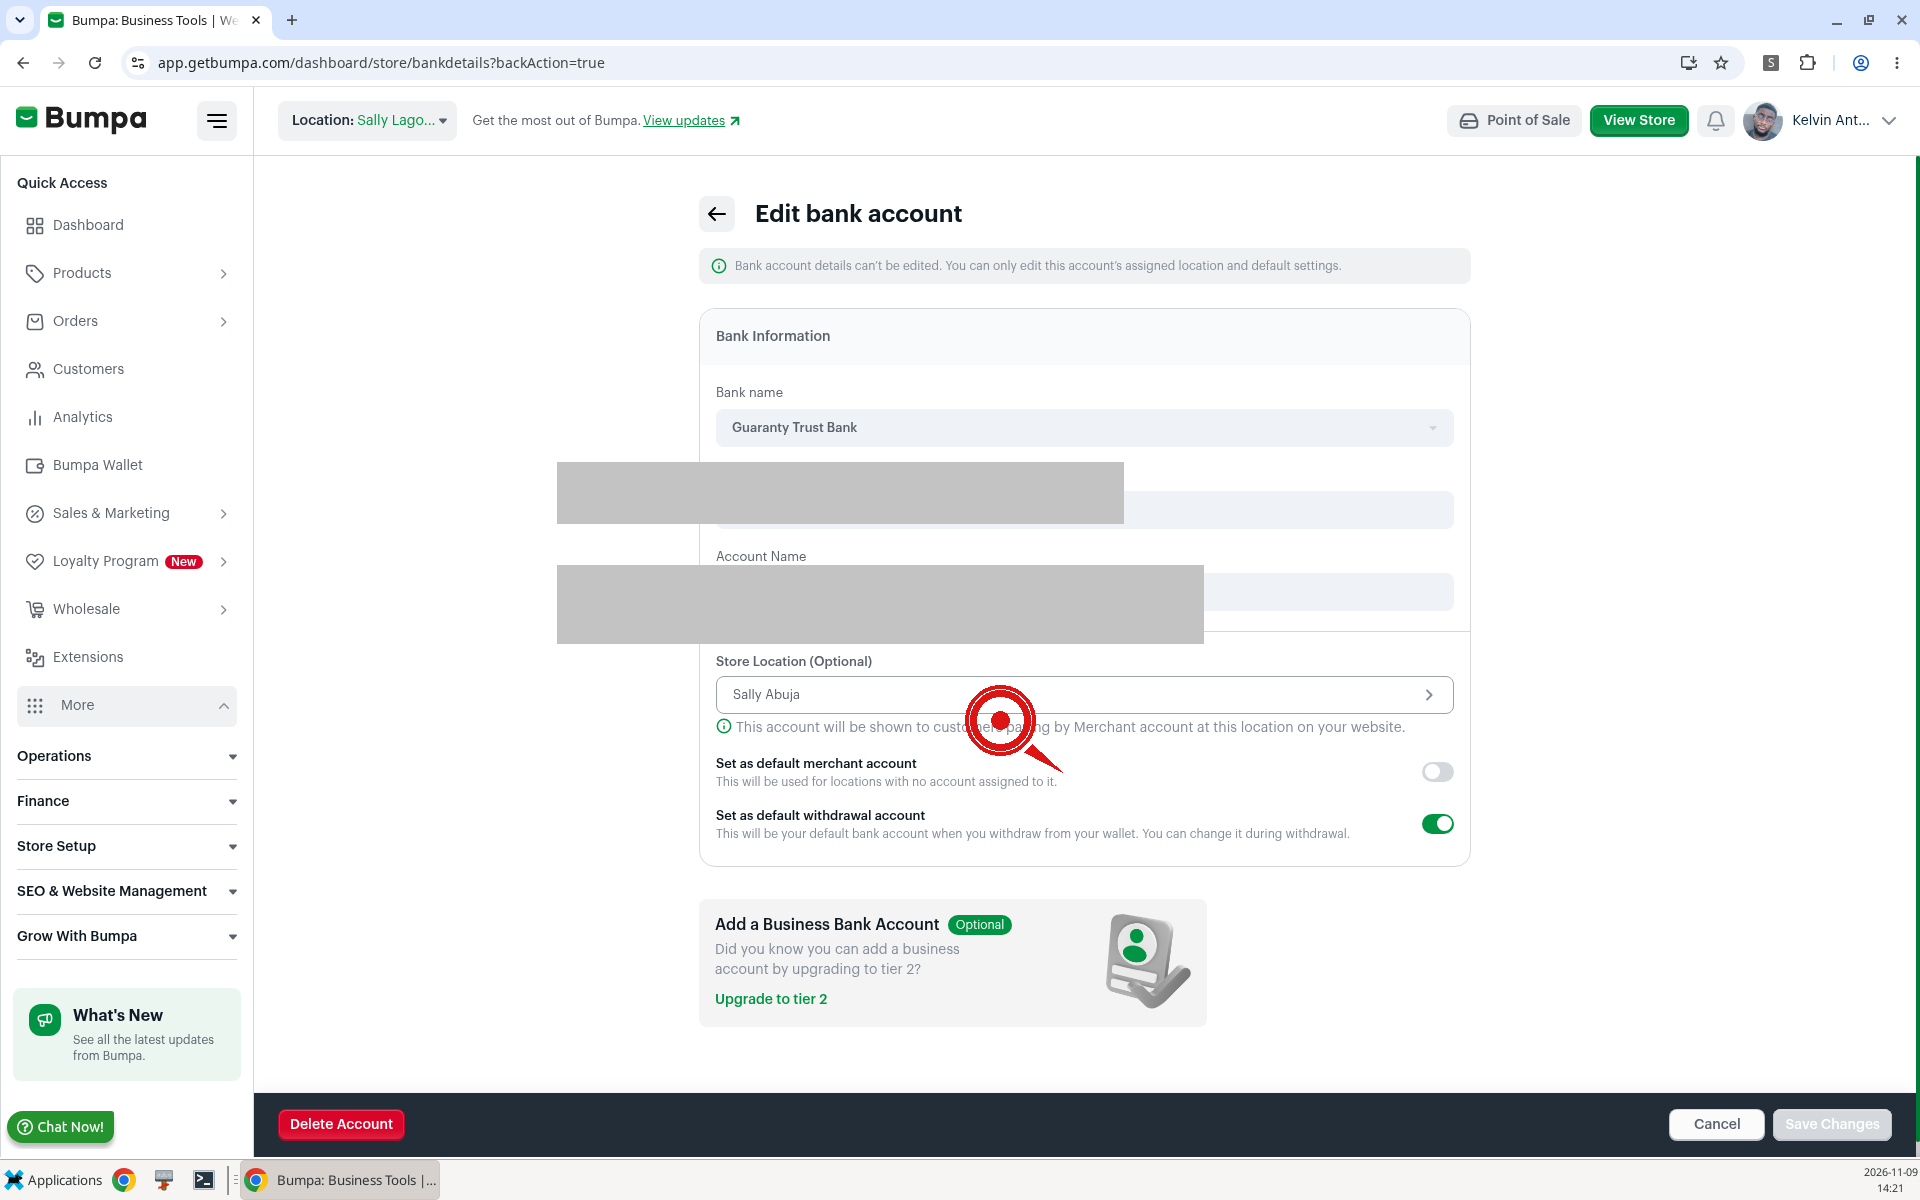
You can change a saved account's locations and default settings. You can't change the bank name or account number. To use a different bank or account number, add a new account and delete the old one.
To edit a saved account, follow these steps:
Click the saved account card you want to change.
Read the note: "Bank account details can't be edited. You can only edit this account's assigned location and default settings."
Update the location or the default toggles, then save your changes.
Badges you may see on a card:
Default for wallet withdrawal: This account is selected by default when you withdraw from your Bumpa Wallet. You can choose another saved account before withdrawing."
Default for merchant account on website: This account is used by default for merchant account payments on your website. Any location without an assigned bank account will show this account to customers when they pay on your website."
Example: Bola opens her Lagos account card and turns off Set as default merchant account so a different account shows on the website.
You can delete a bank account you no longer use. If the account is assigned to store locations, Bumpa tells you which locations will use your default account instead.
Note: You can't delete your default account. Set another account as your default first, then delete the old one.
Example: Chidi is moving from his old Access Bank account to a new one. He adds the new account, sets it as default, and then deletes the old account.
5. Withdraw to a selected account
When you withdraw from your Bumpa Wallet, you see all your saved bank accounts. Your default withdrawal account is already selected. You can pick any saved account, whatever location it is assigned to.
Your choice only applies to that one withdrawal. It doesn't change your default account. This also works when you withdraw from the page Bumpa shows when your subscription has expired.
Example: Amaka's default account is with GTBank. For one withdrawal, she picks her Zenith Bank account instead. Her next withdrawal still starts with GTBank selected.
Note: If an account doesn't match your KYC details or isn't verified yet, Bumpa asks you to choose another account.
Related Articles:
Was this article helpful?
That’s Great!
Thank you for your feedback
Sorry! We couldn't be helpful
Thank you for your feedback
Feedback sent
We appreciate your effort and will try to fix the article